![]()
Overview
The Problem: UH students who paint, draw, sculpt, photograph, and so on do not have a public place to showcase their art to other individuals. Although there is the Manoa Creative Production Discord server, it is not a convenient place for people to look at a specific person’s art, nor a place for sculptures, photographs, ceramics, etc.
The Solution: The UH Student Art Gallery allows users to post images of their art for anyone to view. Users will be able to add comments under artworks and star posts. Users will also be able to follow various users, search for users, or discover any user who has posted artwork on the platform.
Table of contents
- Overview
- User Guide
- Developer Guide
- Developer History
- User Reviews
- Deployment
- Project Management Links
- Team Profiles
- Materials Links
User Guide
Landing
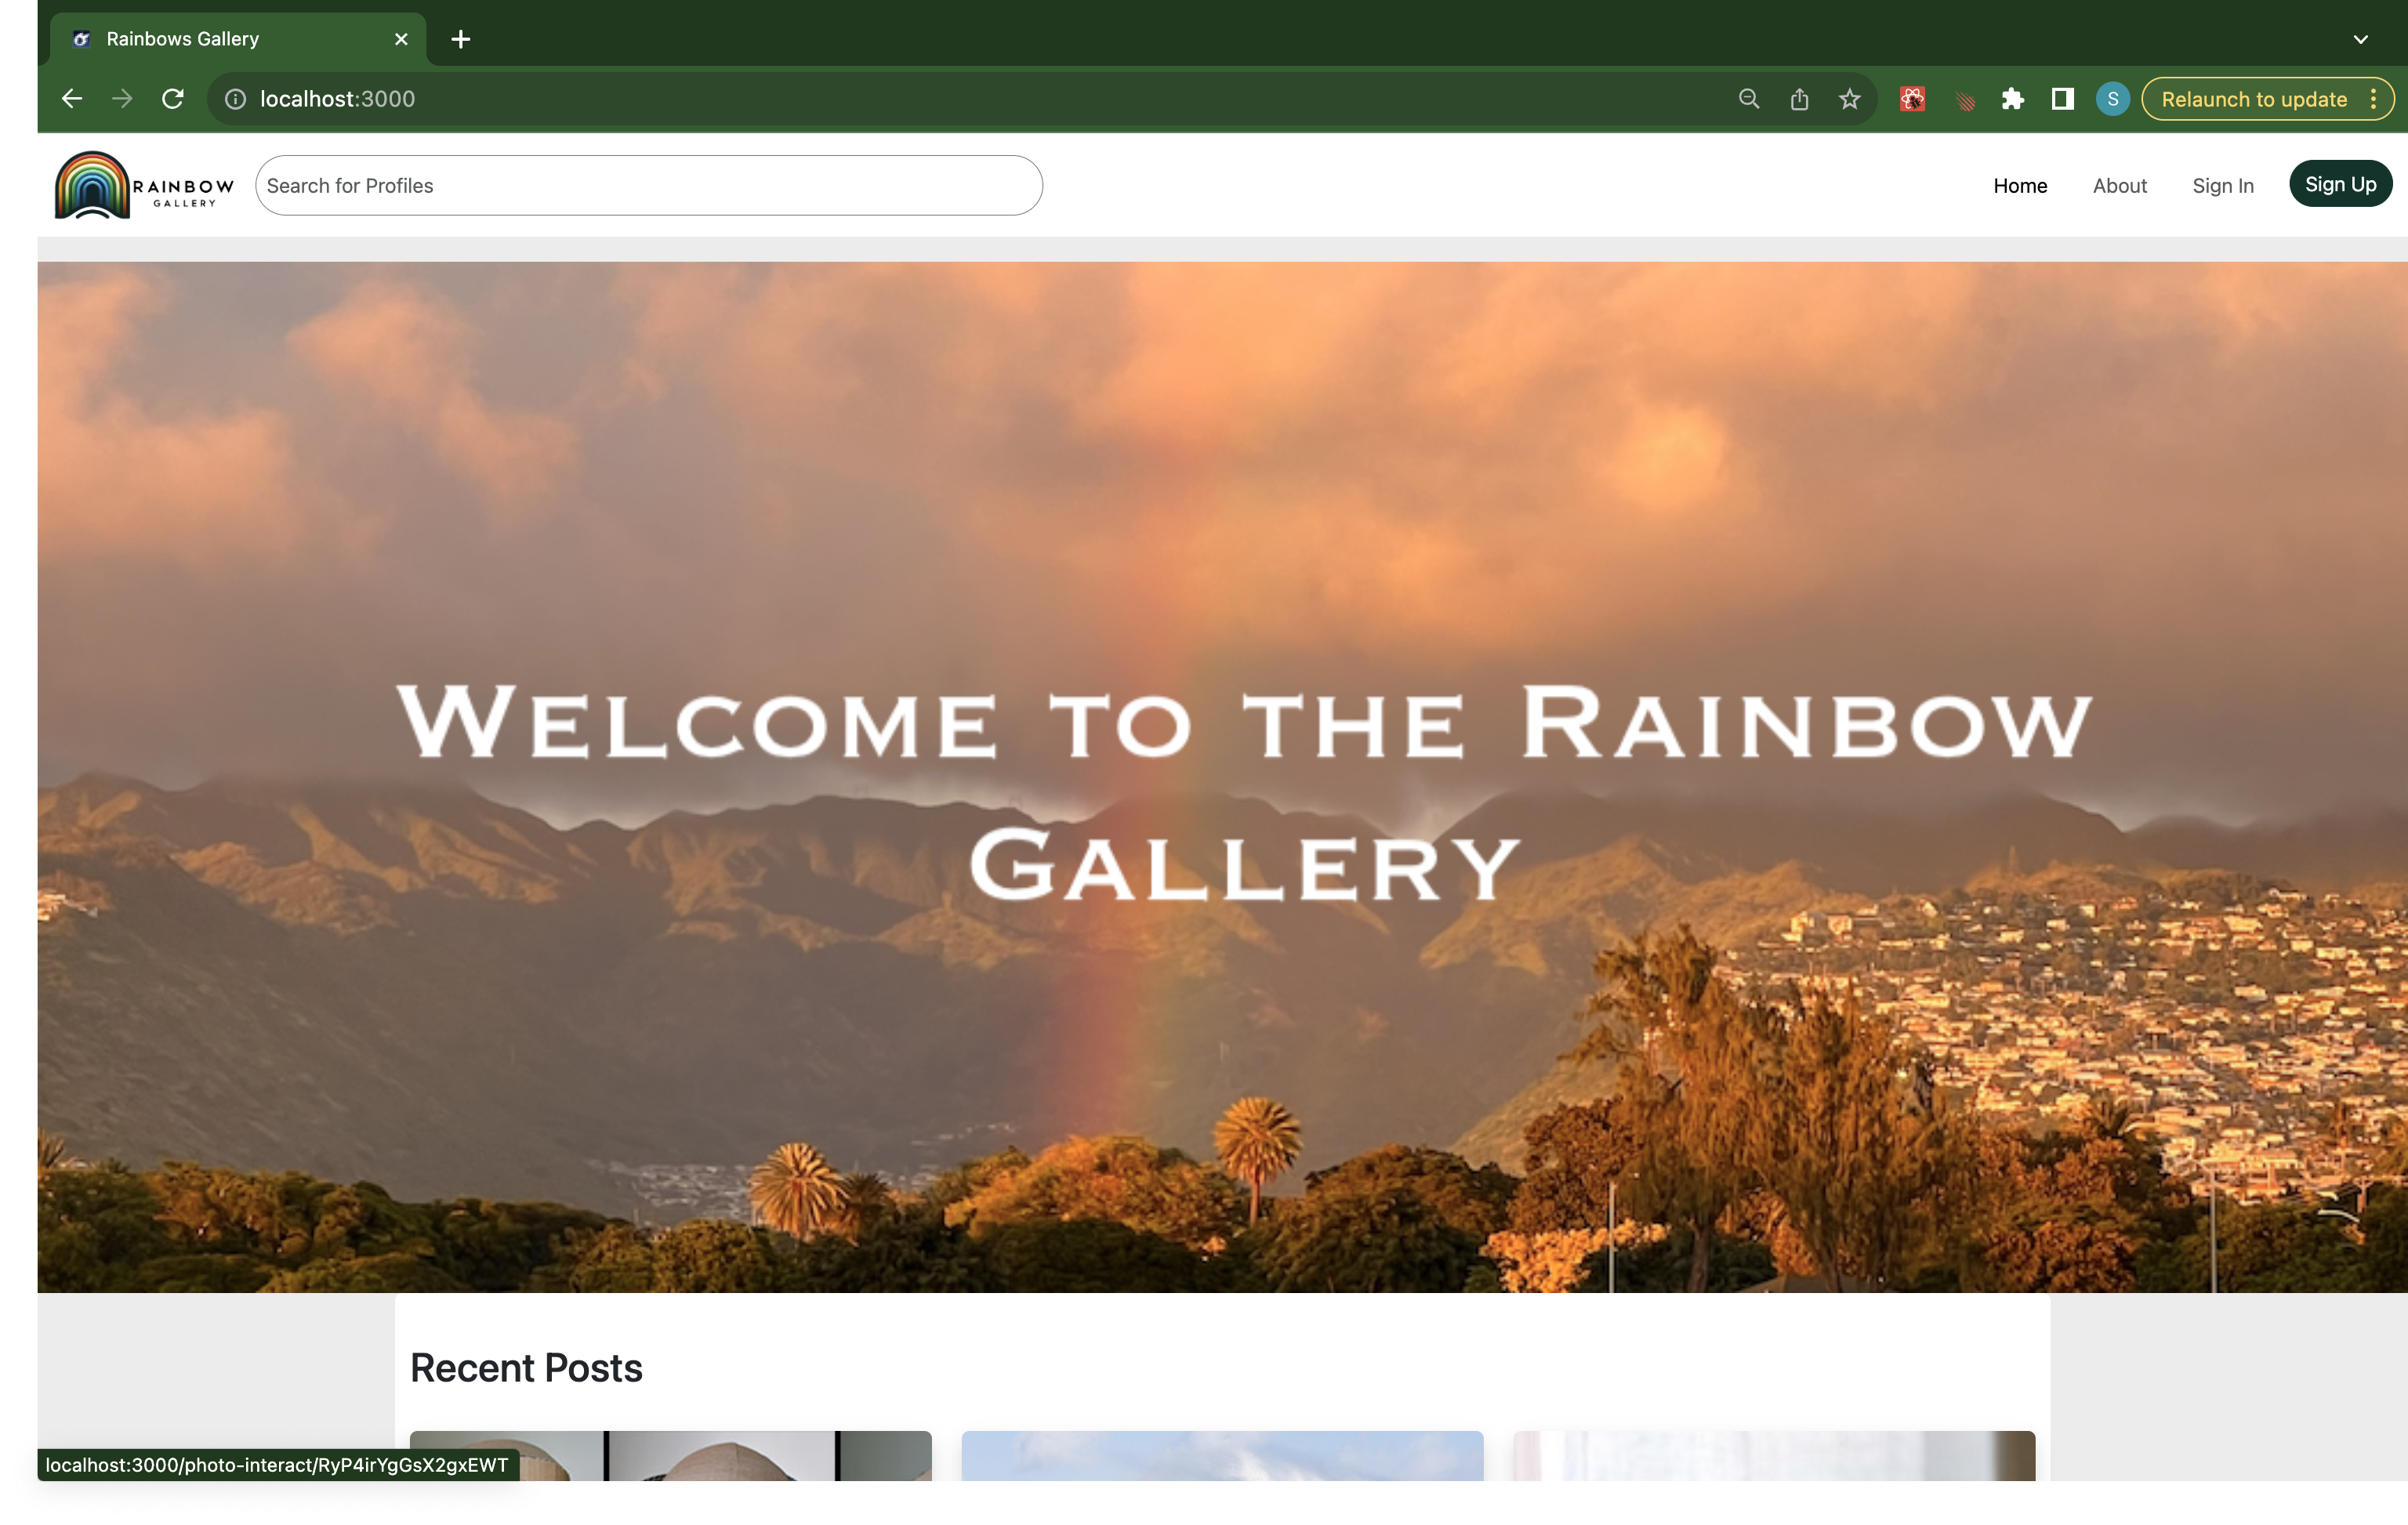
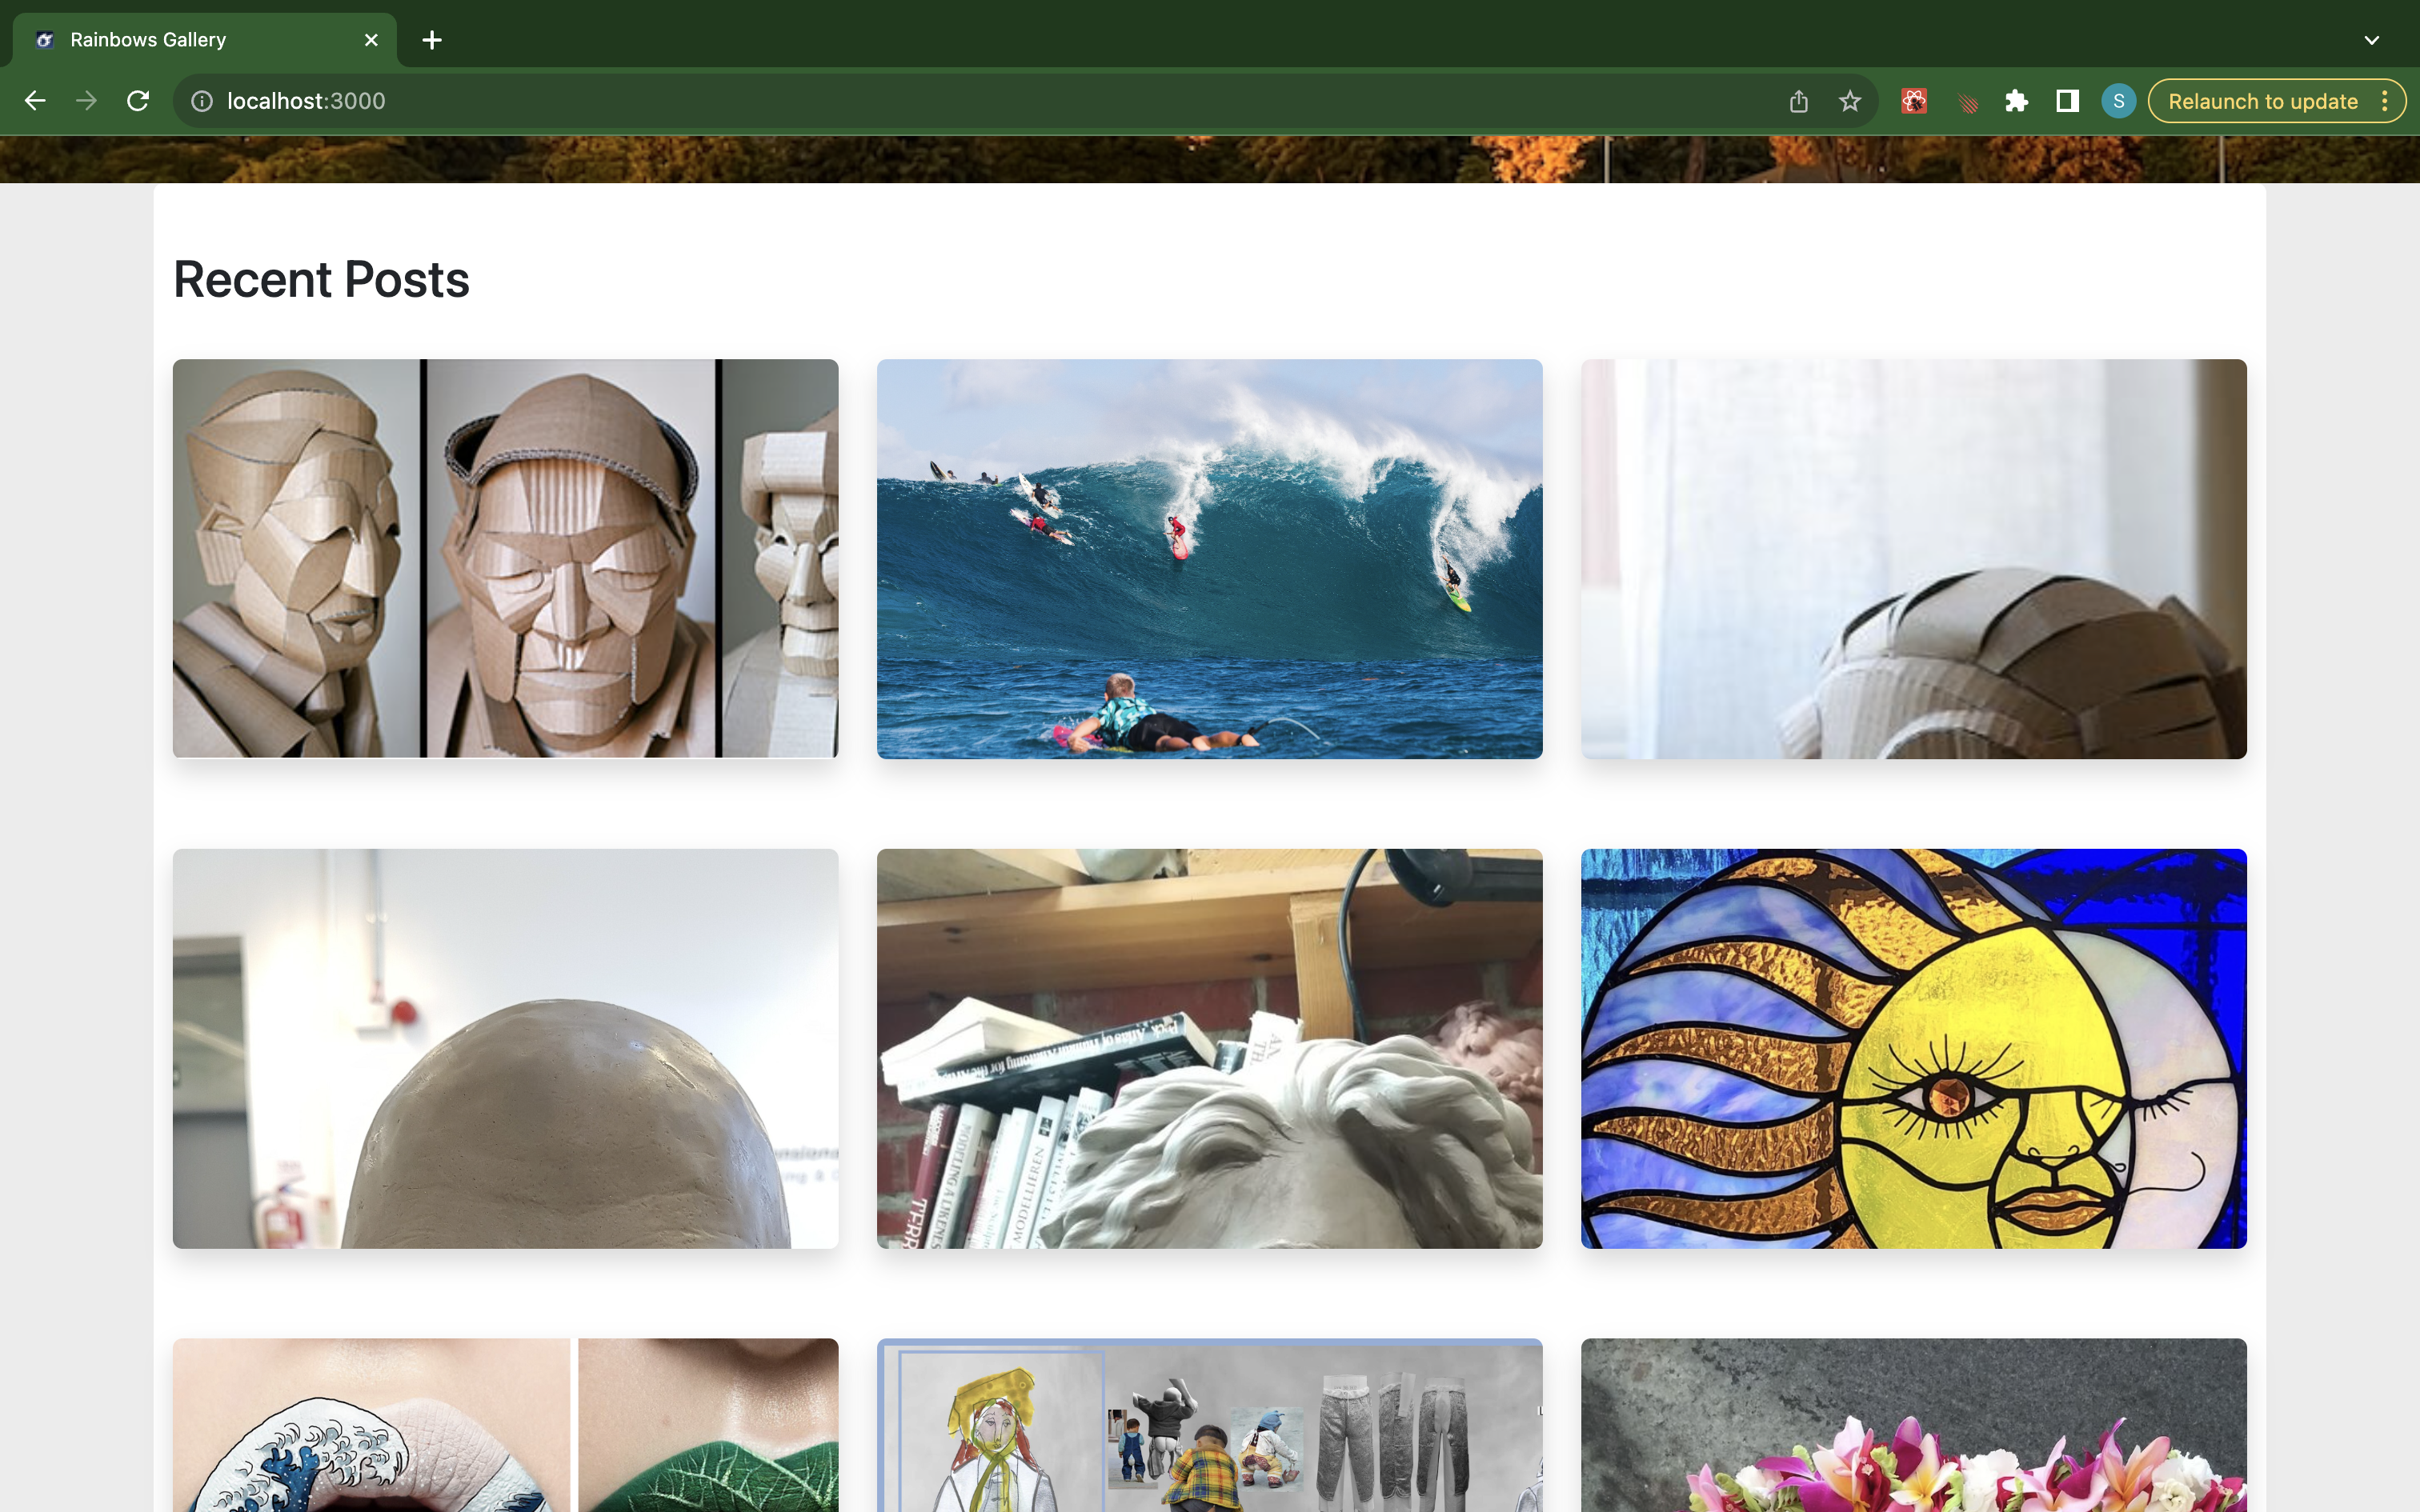
These images show the landing page of our application. Each of these photos can be clicked to view in greater detail. Until you log in, however, you will not be able to comment on or star posts.
Sign Up
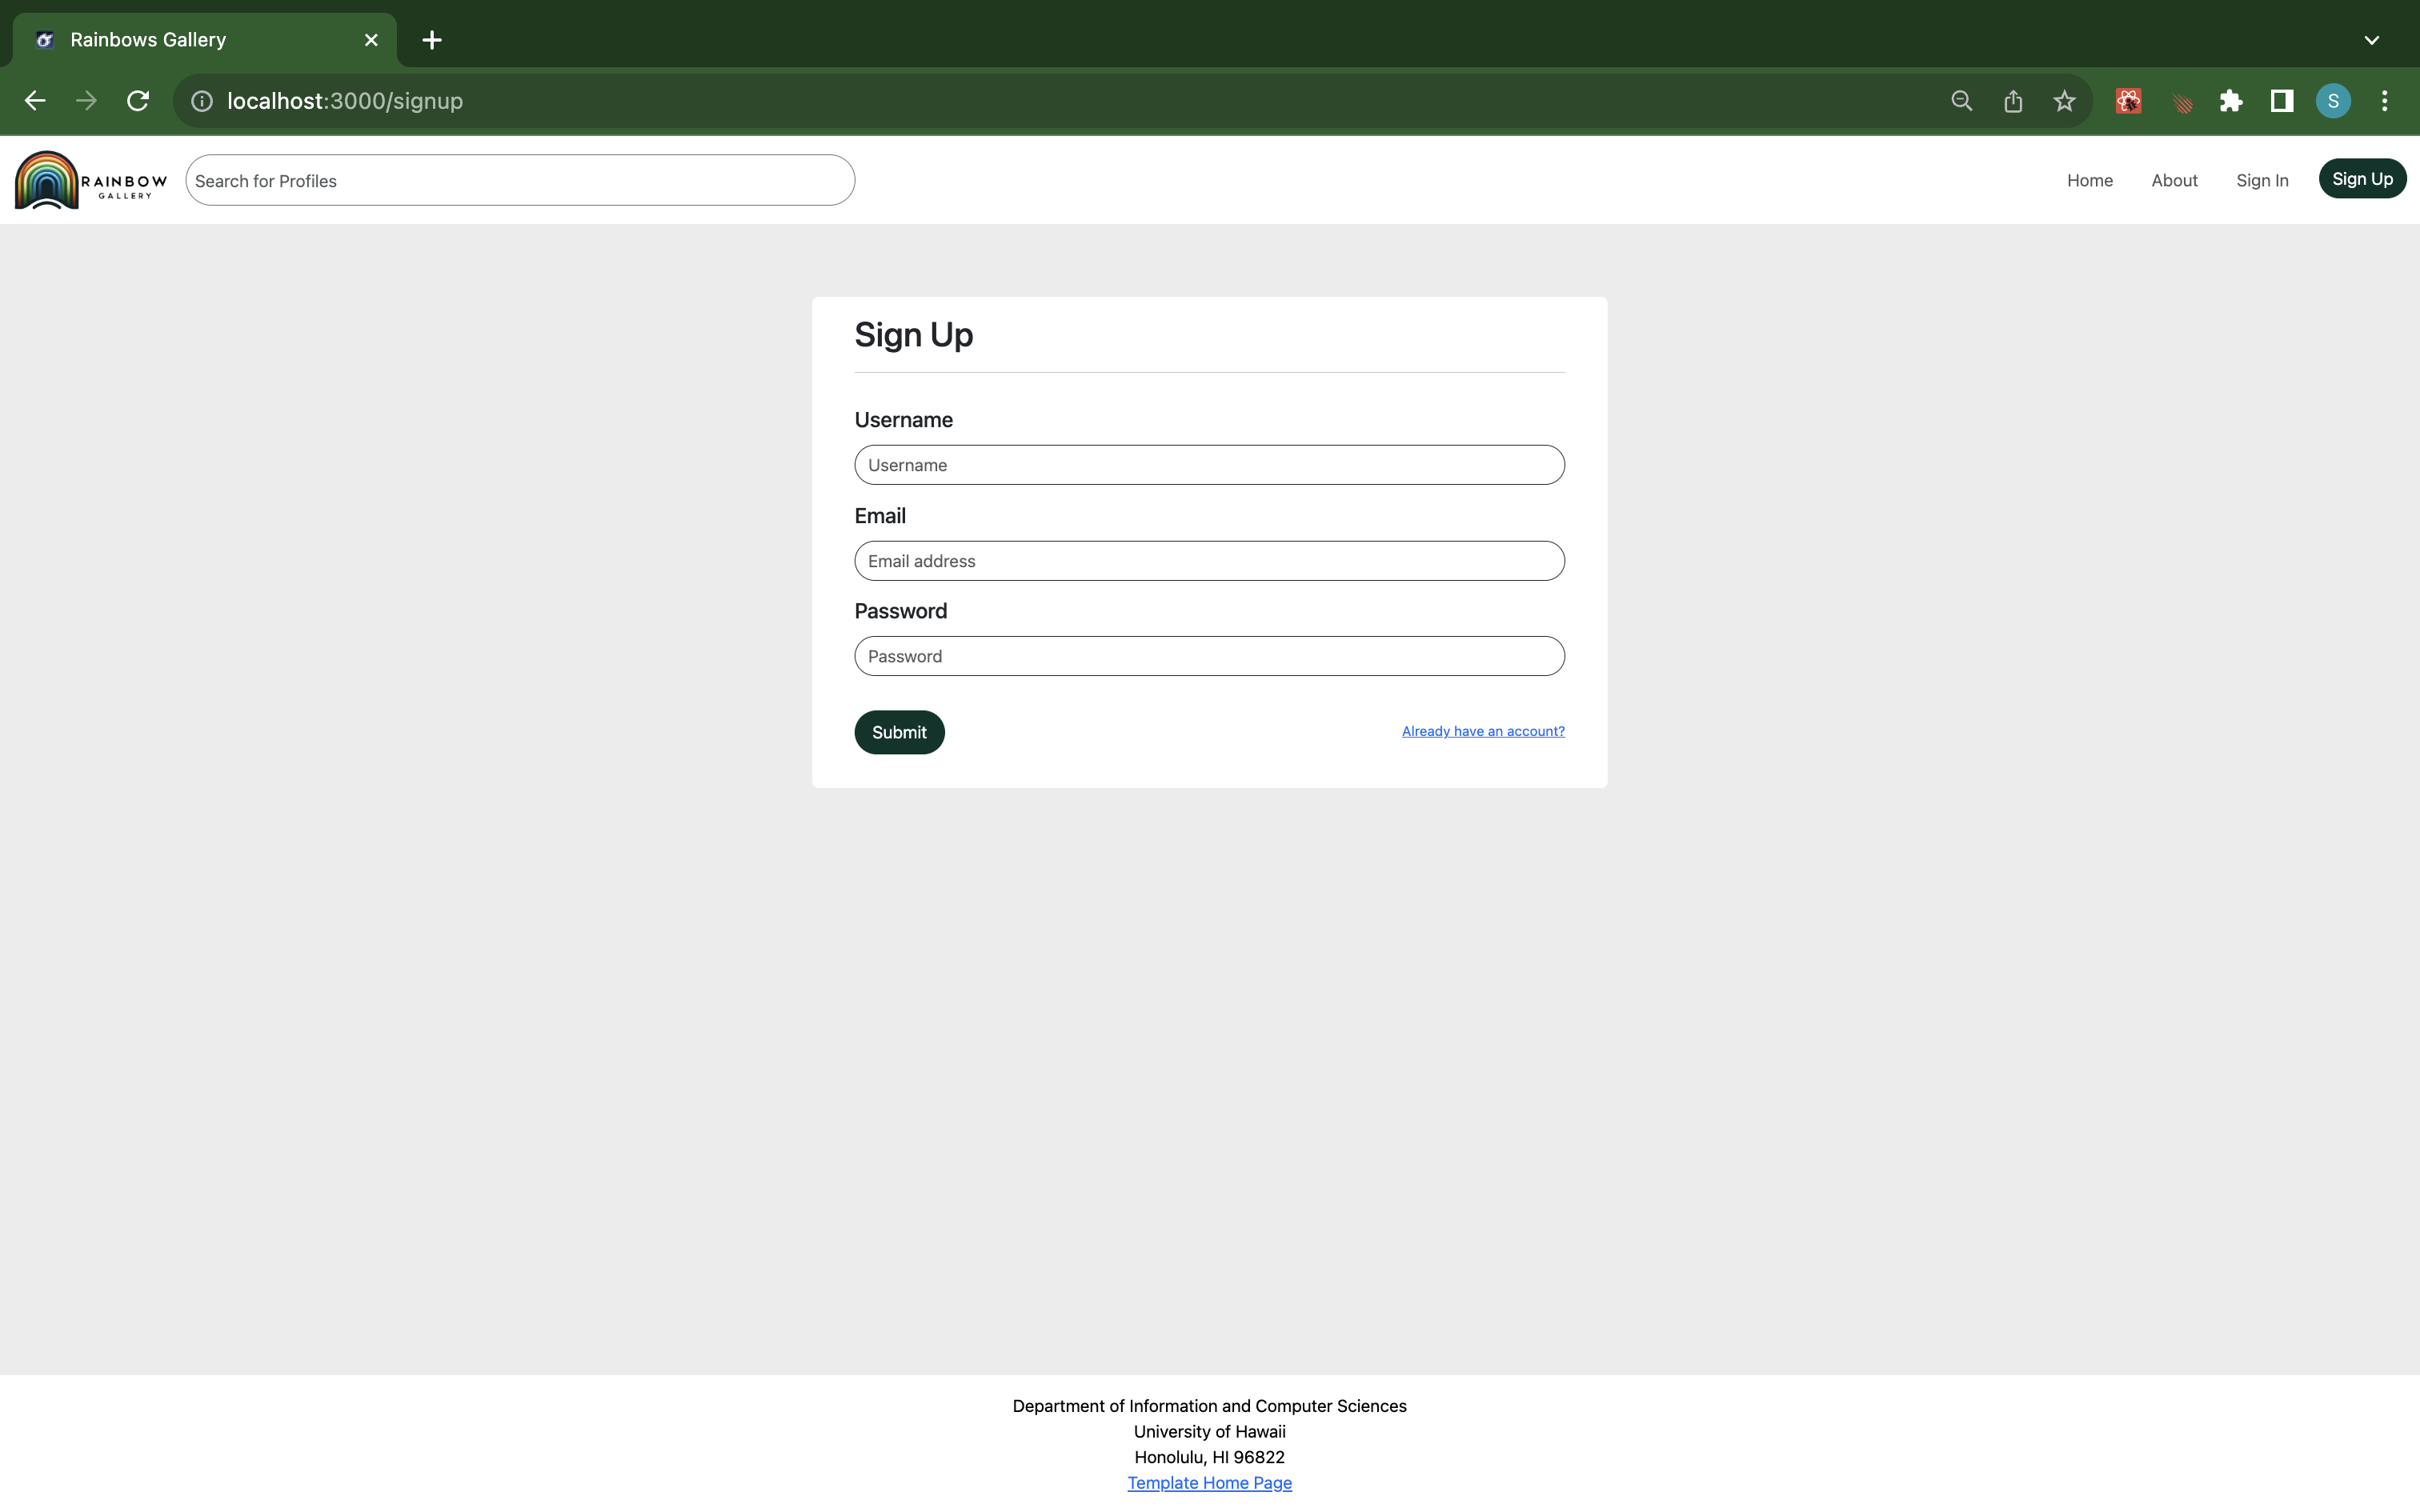
This is the sign up page. When starting up, the site asks for entry of a username, email, and password. The “Already have an account?” link is functional and takes you directly to the sign in page.
Sign In
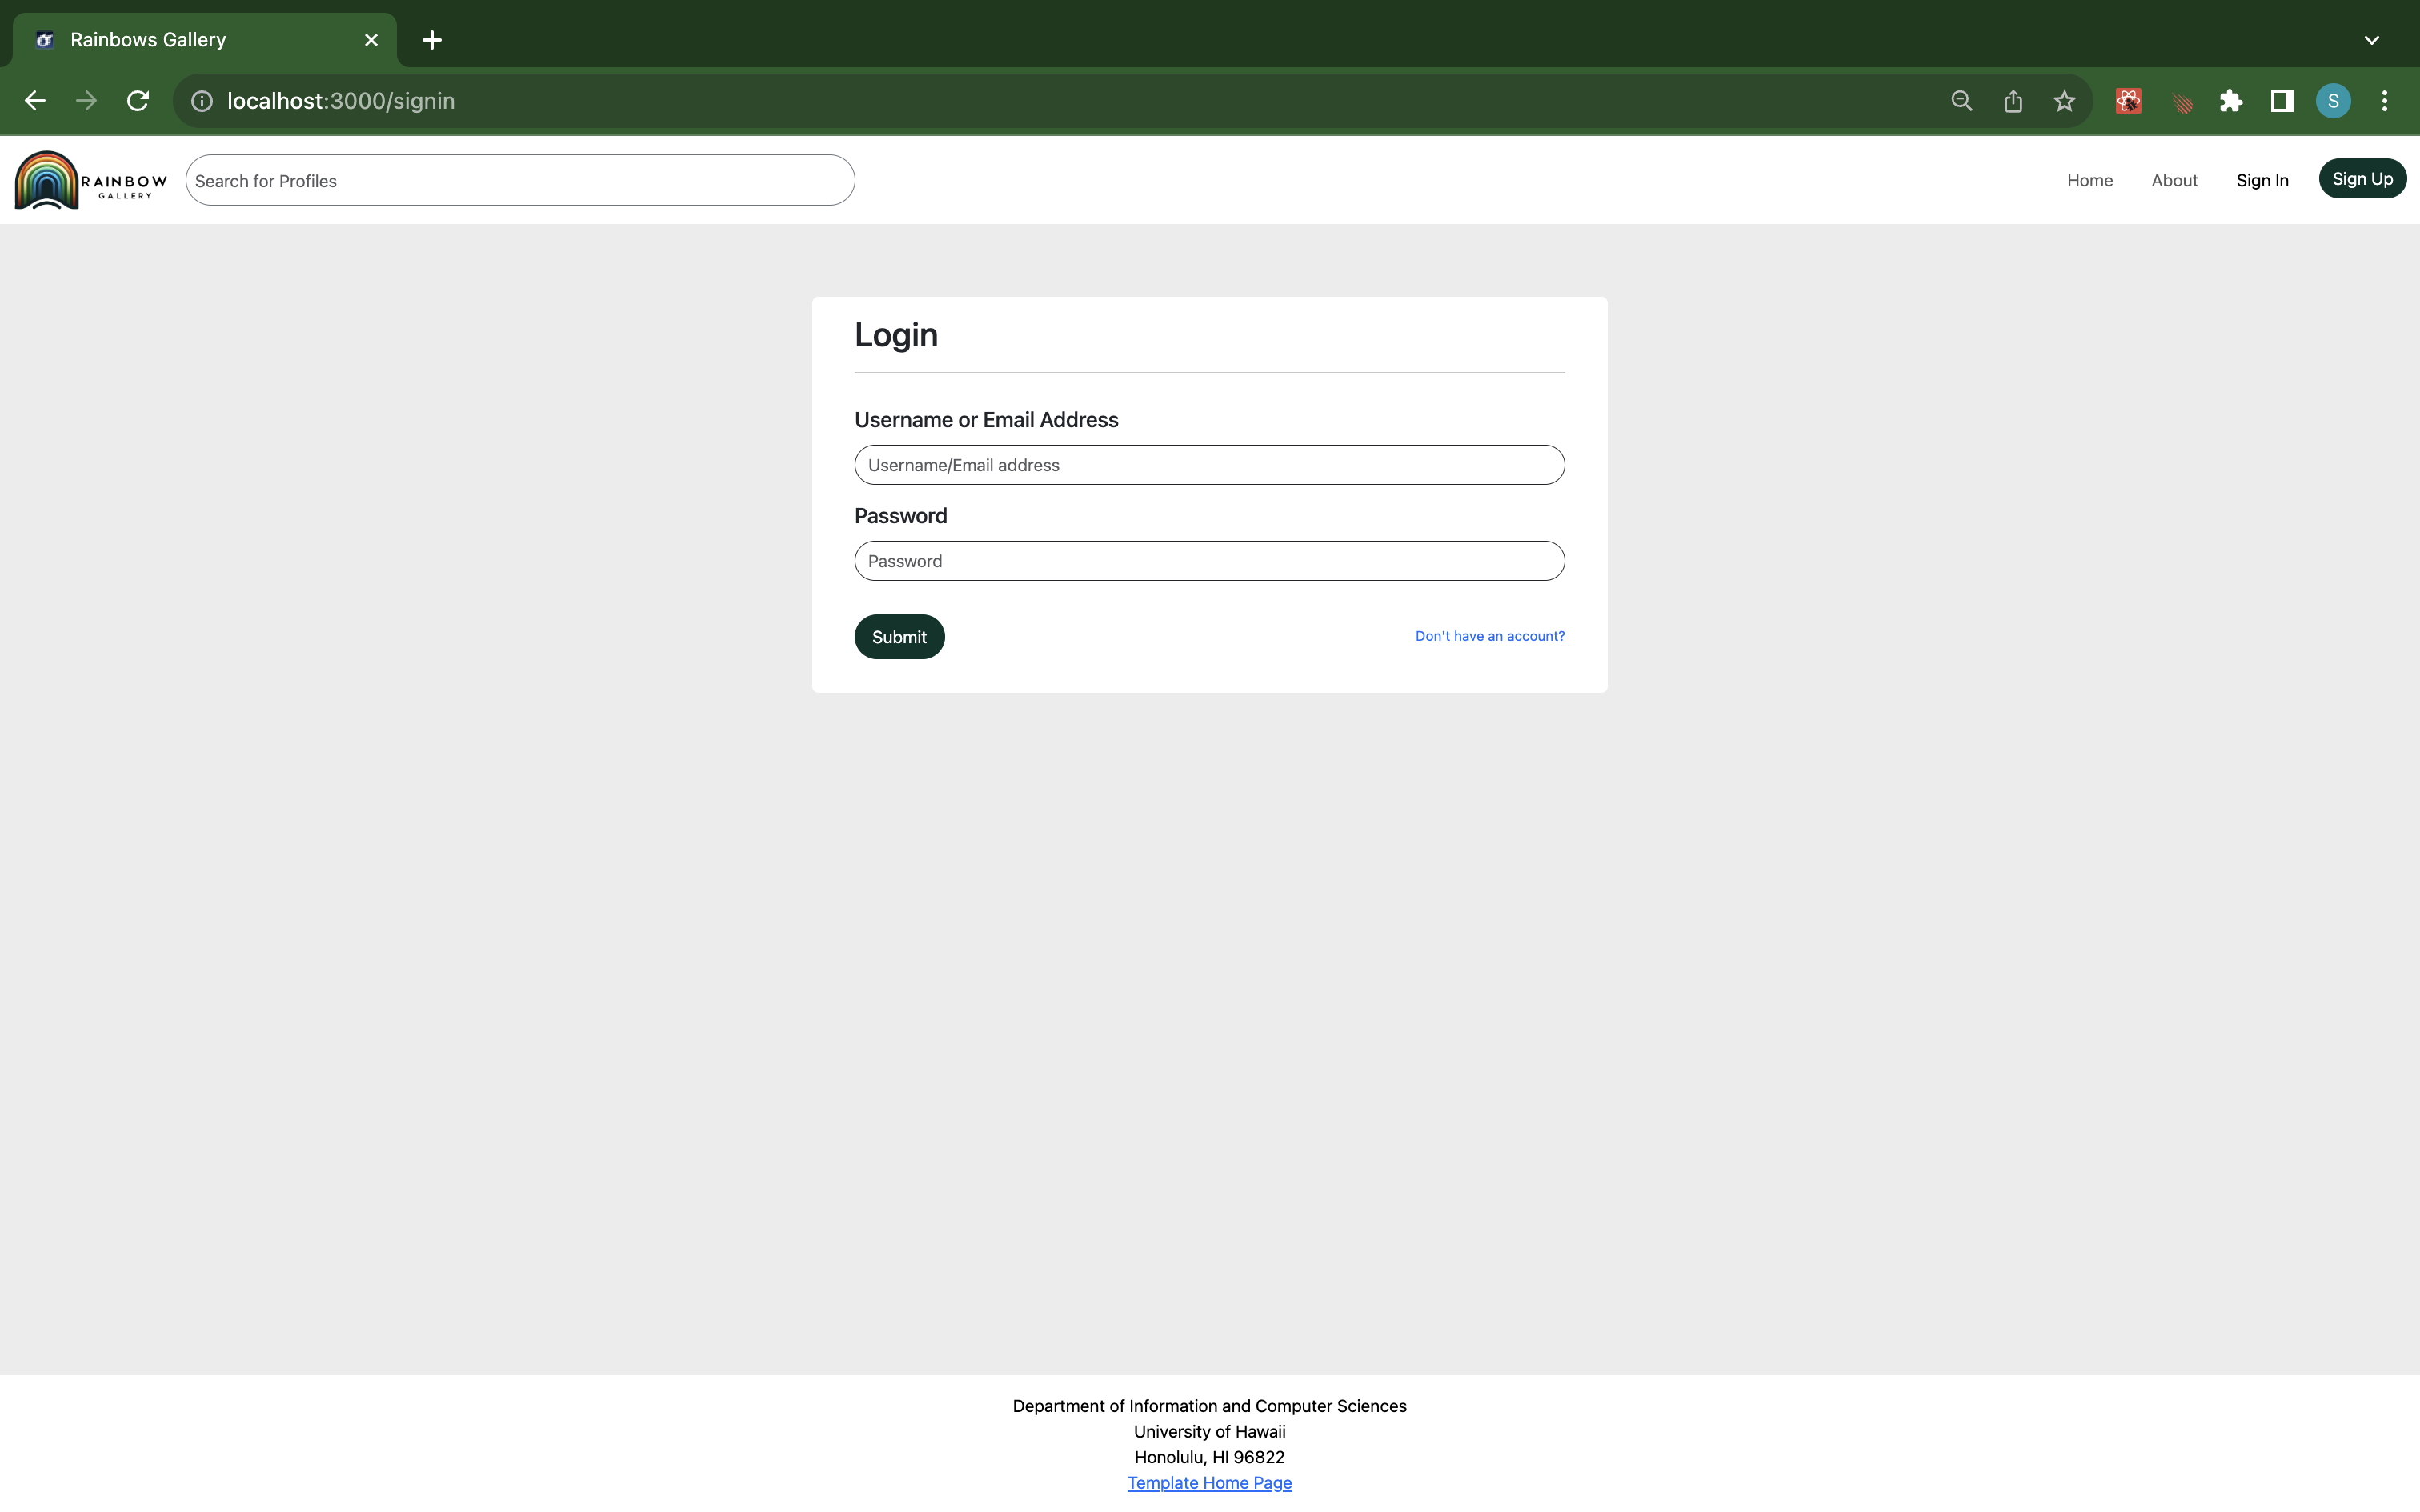
This is the sign in page. It requests a username or email from the user, as well as their password.
About
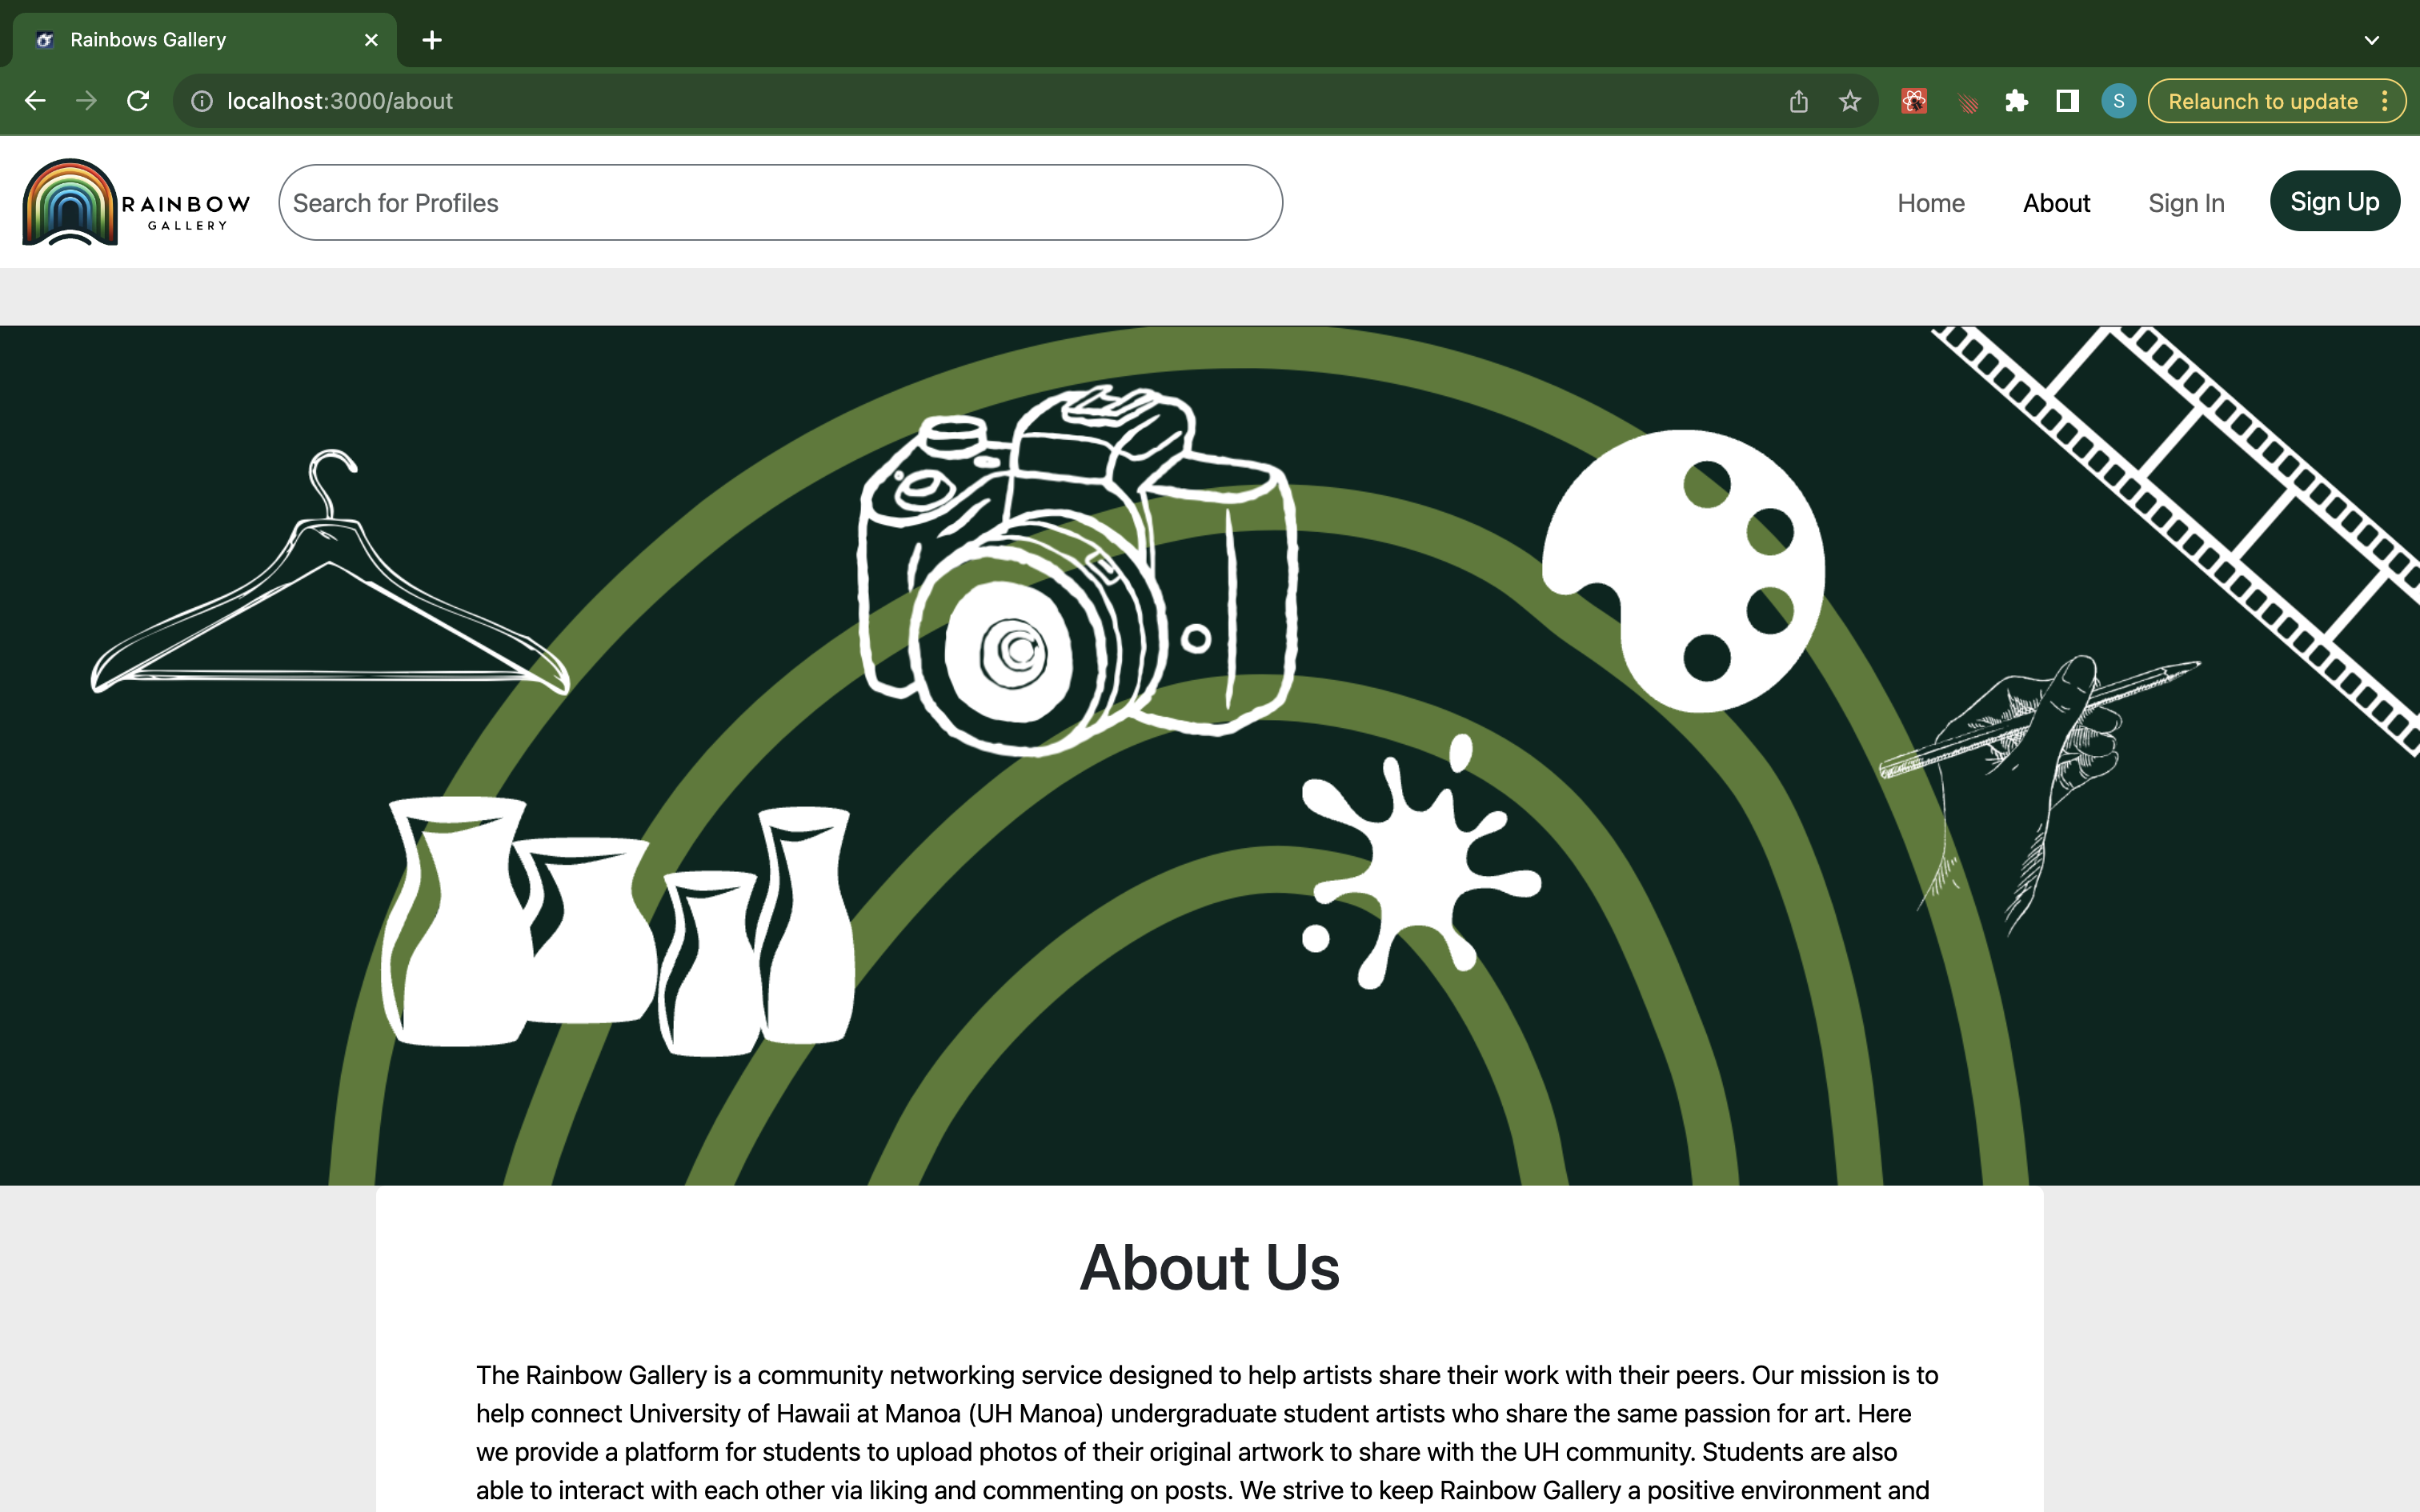
Immediately upon signing up for the first time, you will be taken to an about page that helps explain how to use the app.
Profile
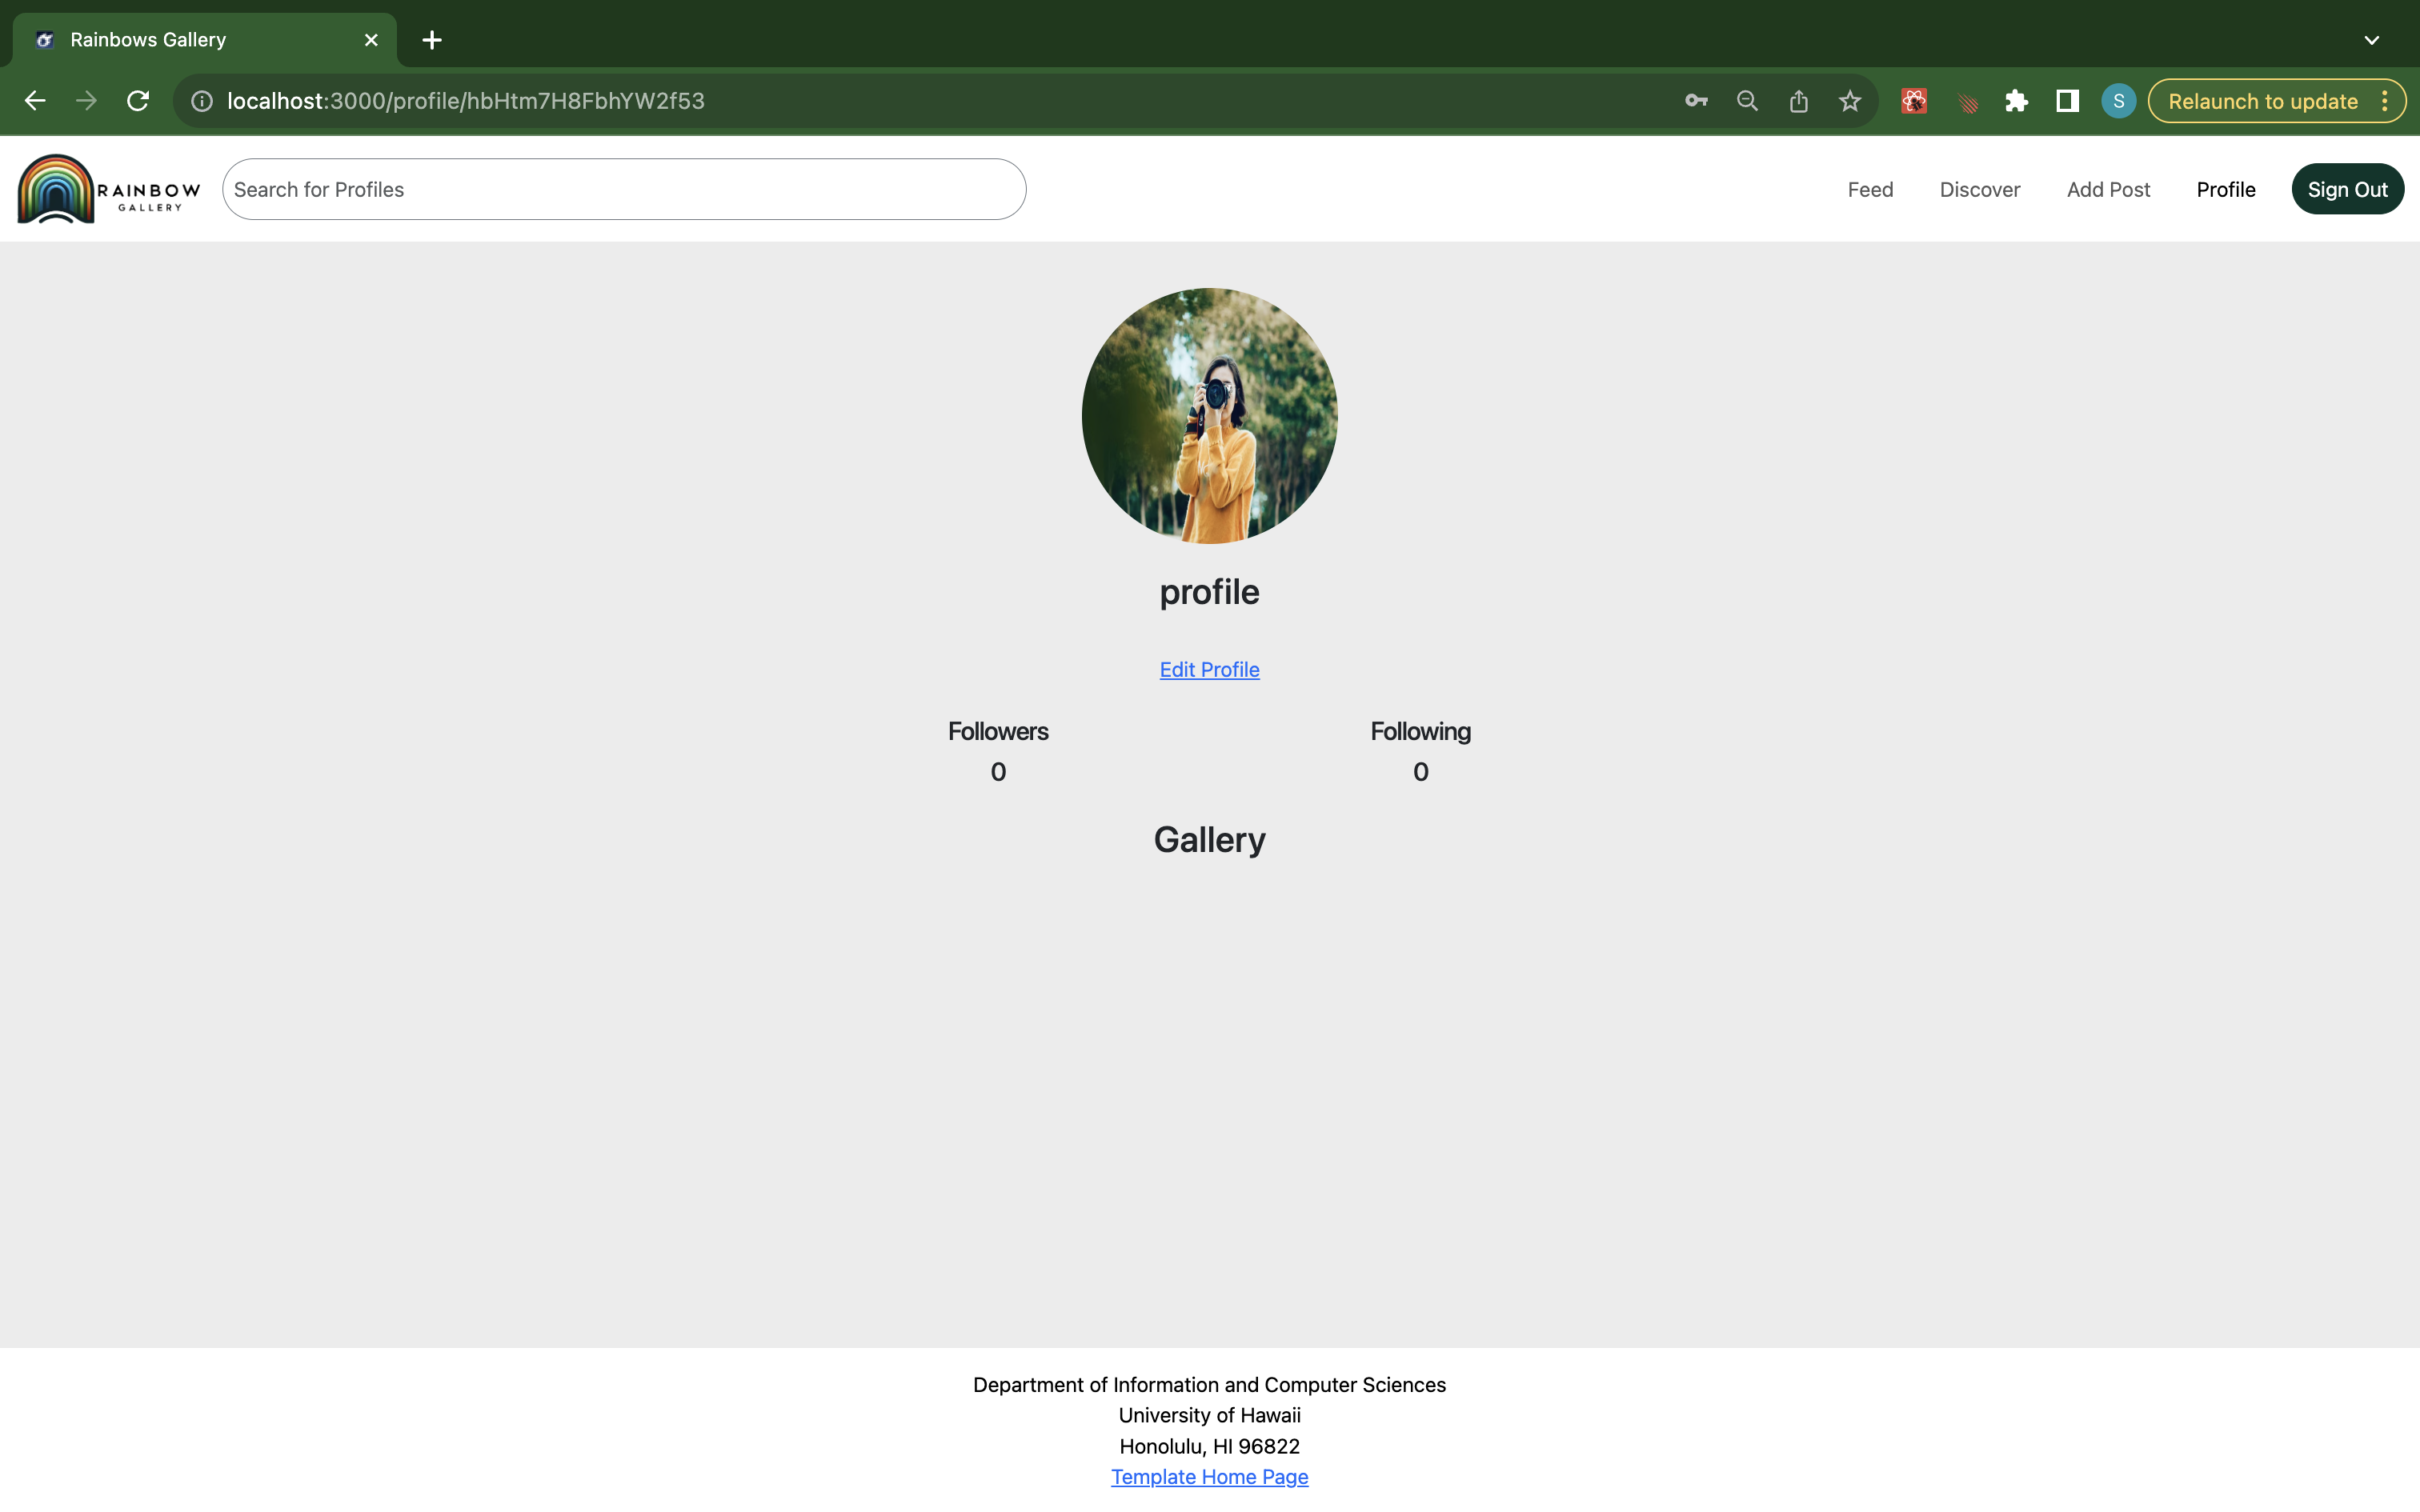
If just signing up for the first time, this is what your page will look like prior to adding any posts. If you would like to add posts to your profile, you can go into the “Add Post” tab in the Navbar.
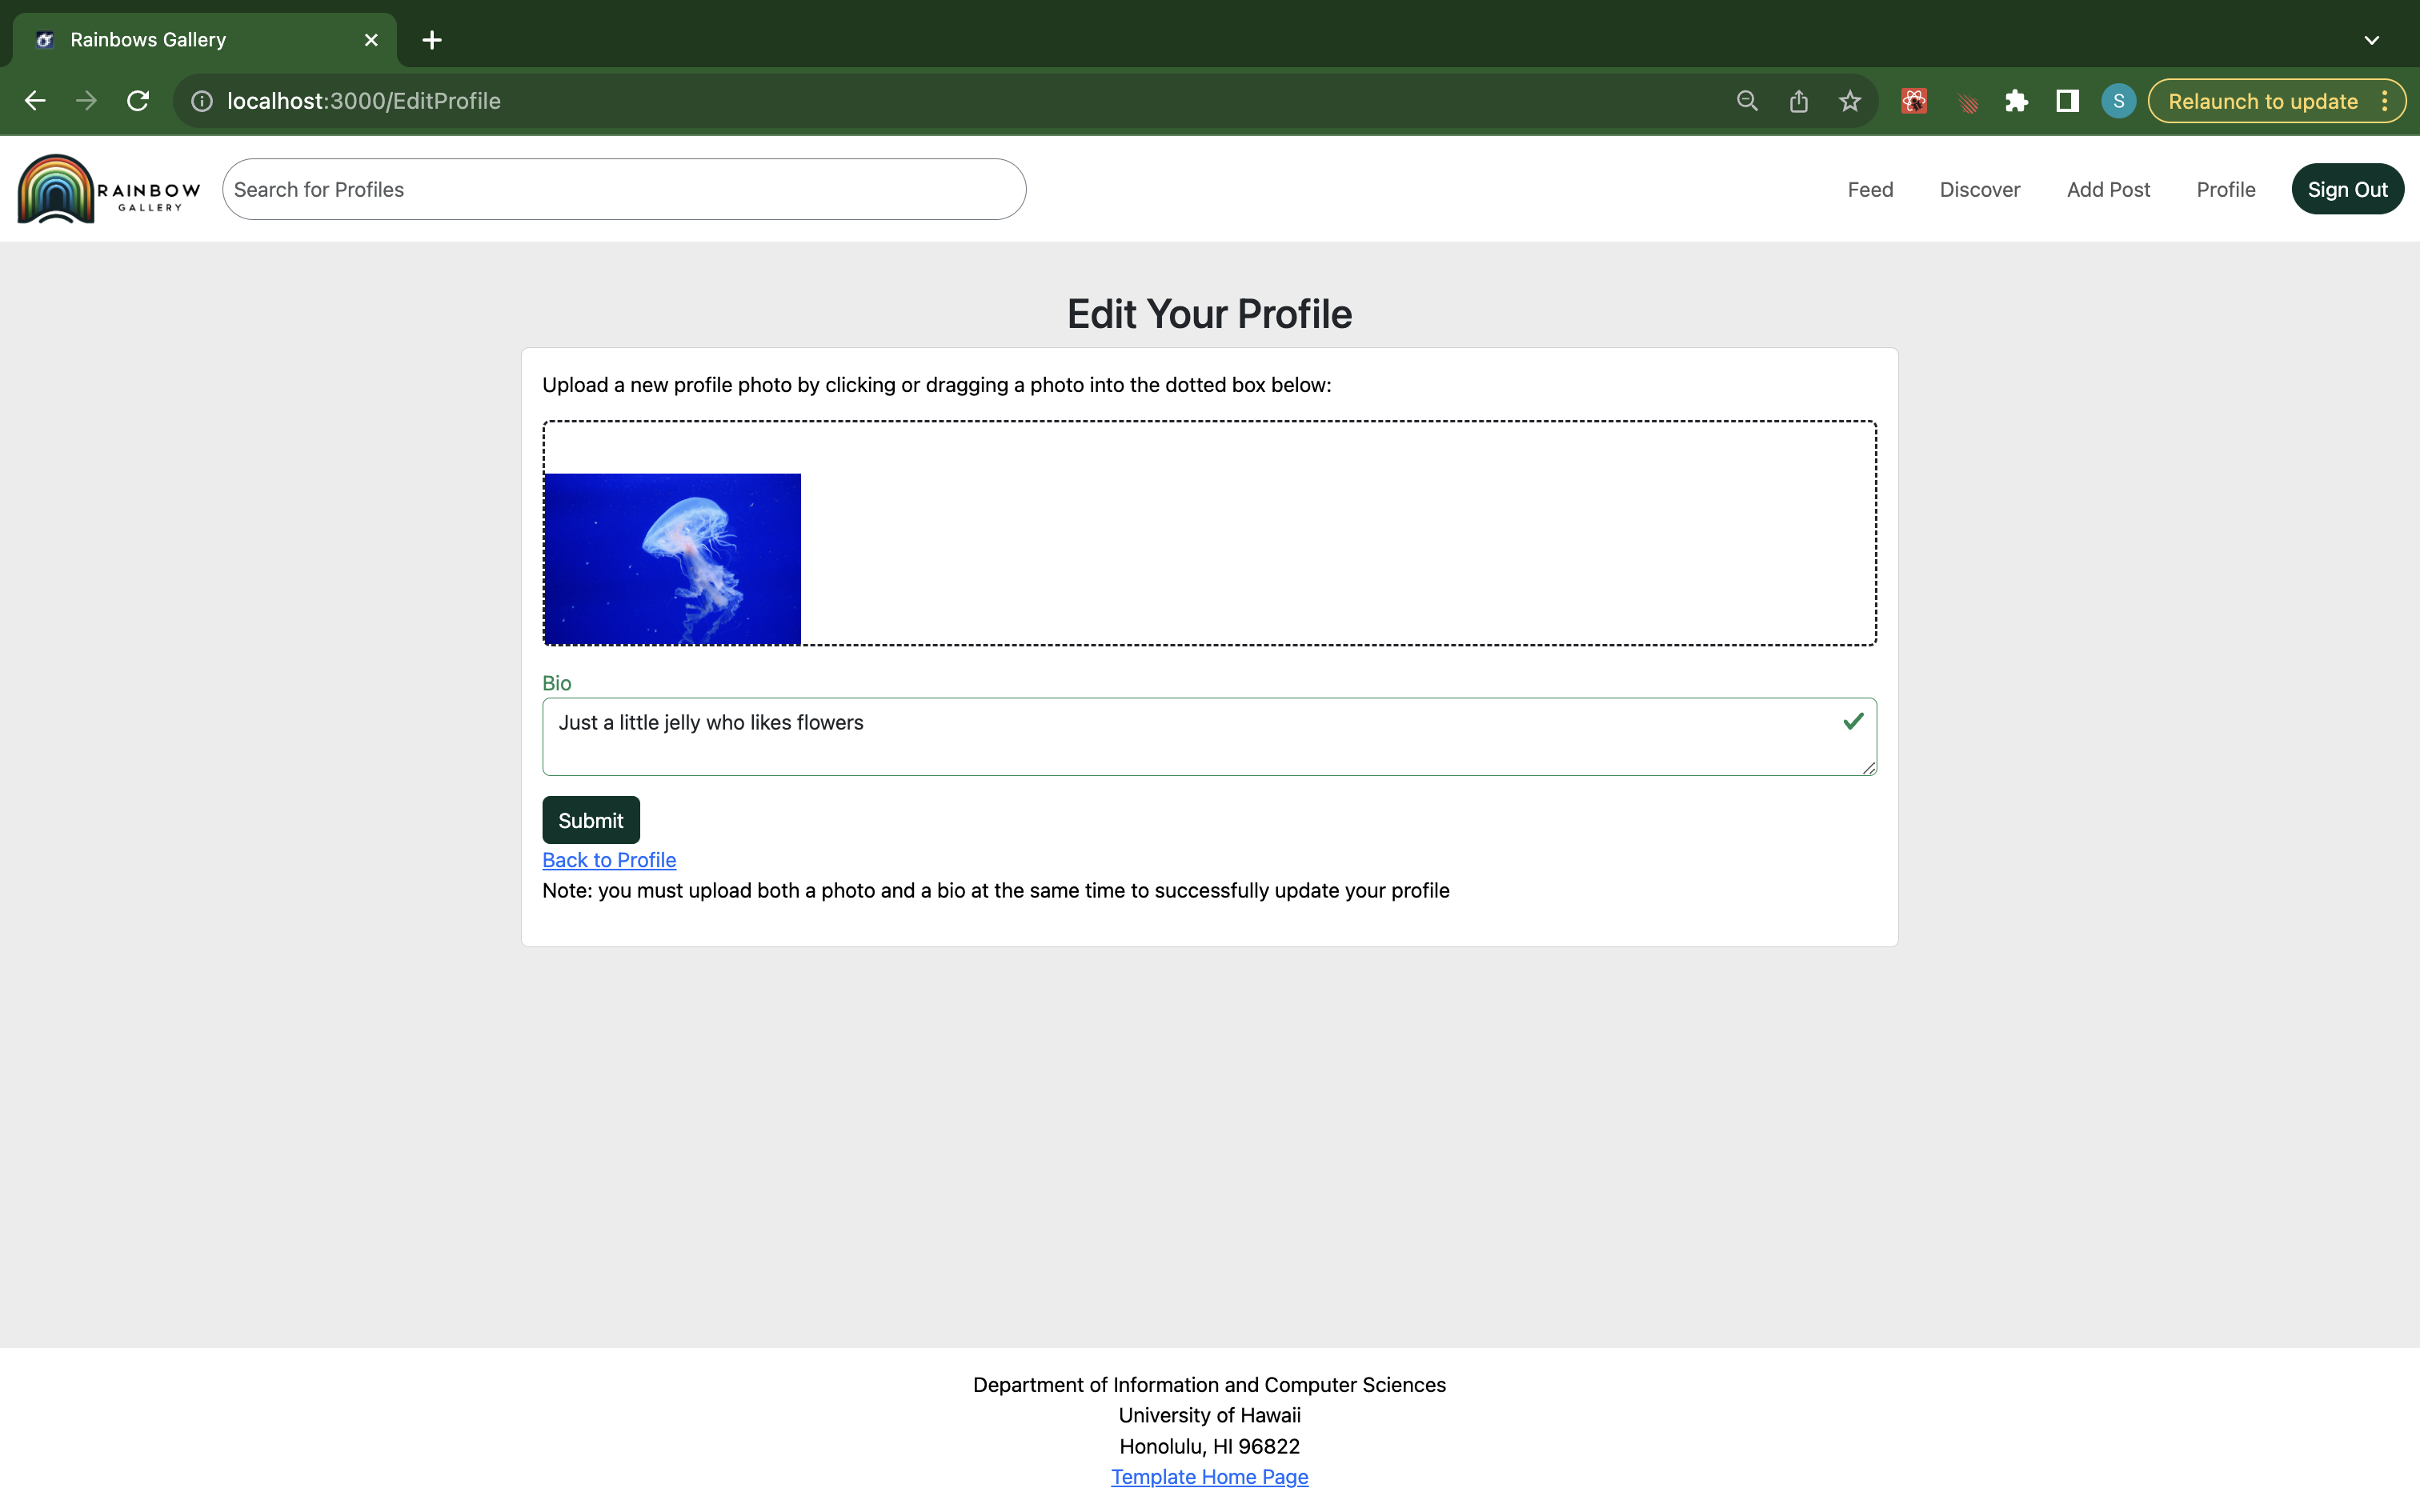
To edit your profile, click the edit profile link. Add a photo and a bio and click submit!
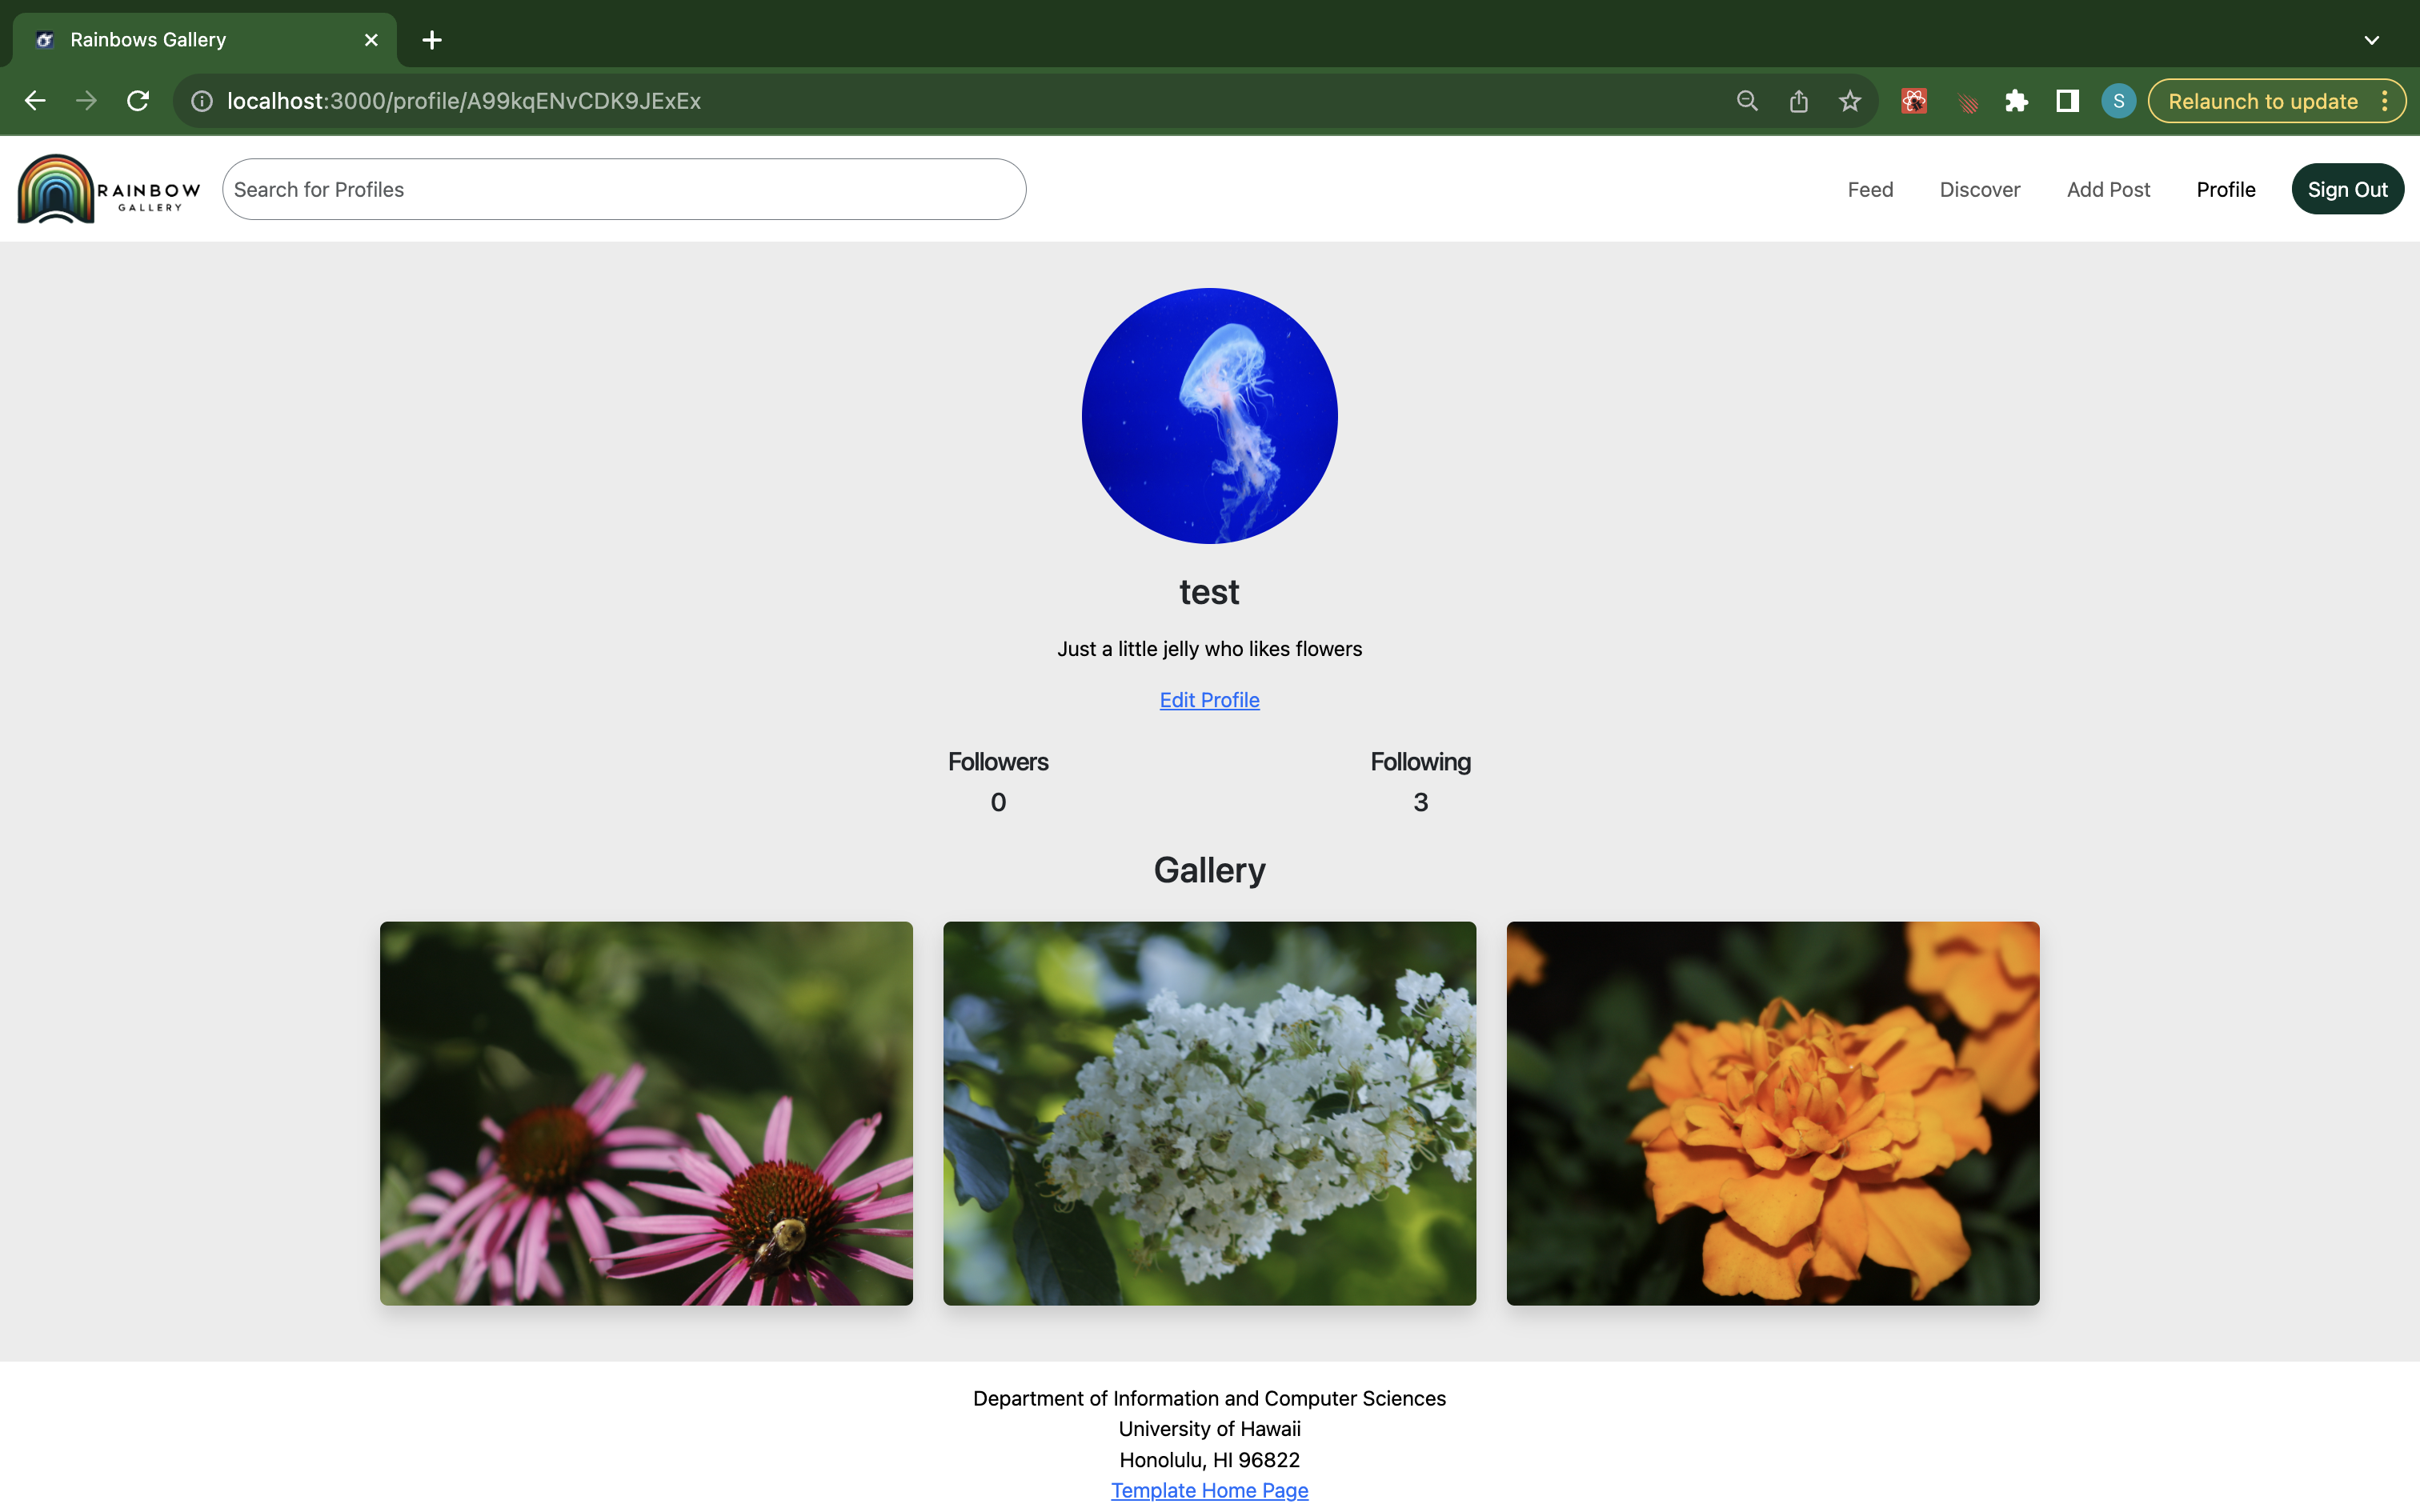
Once you have added posts to your profile, this is what it will look like!
Followers/Following
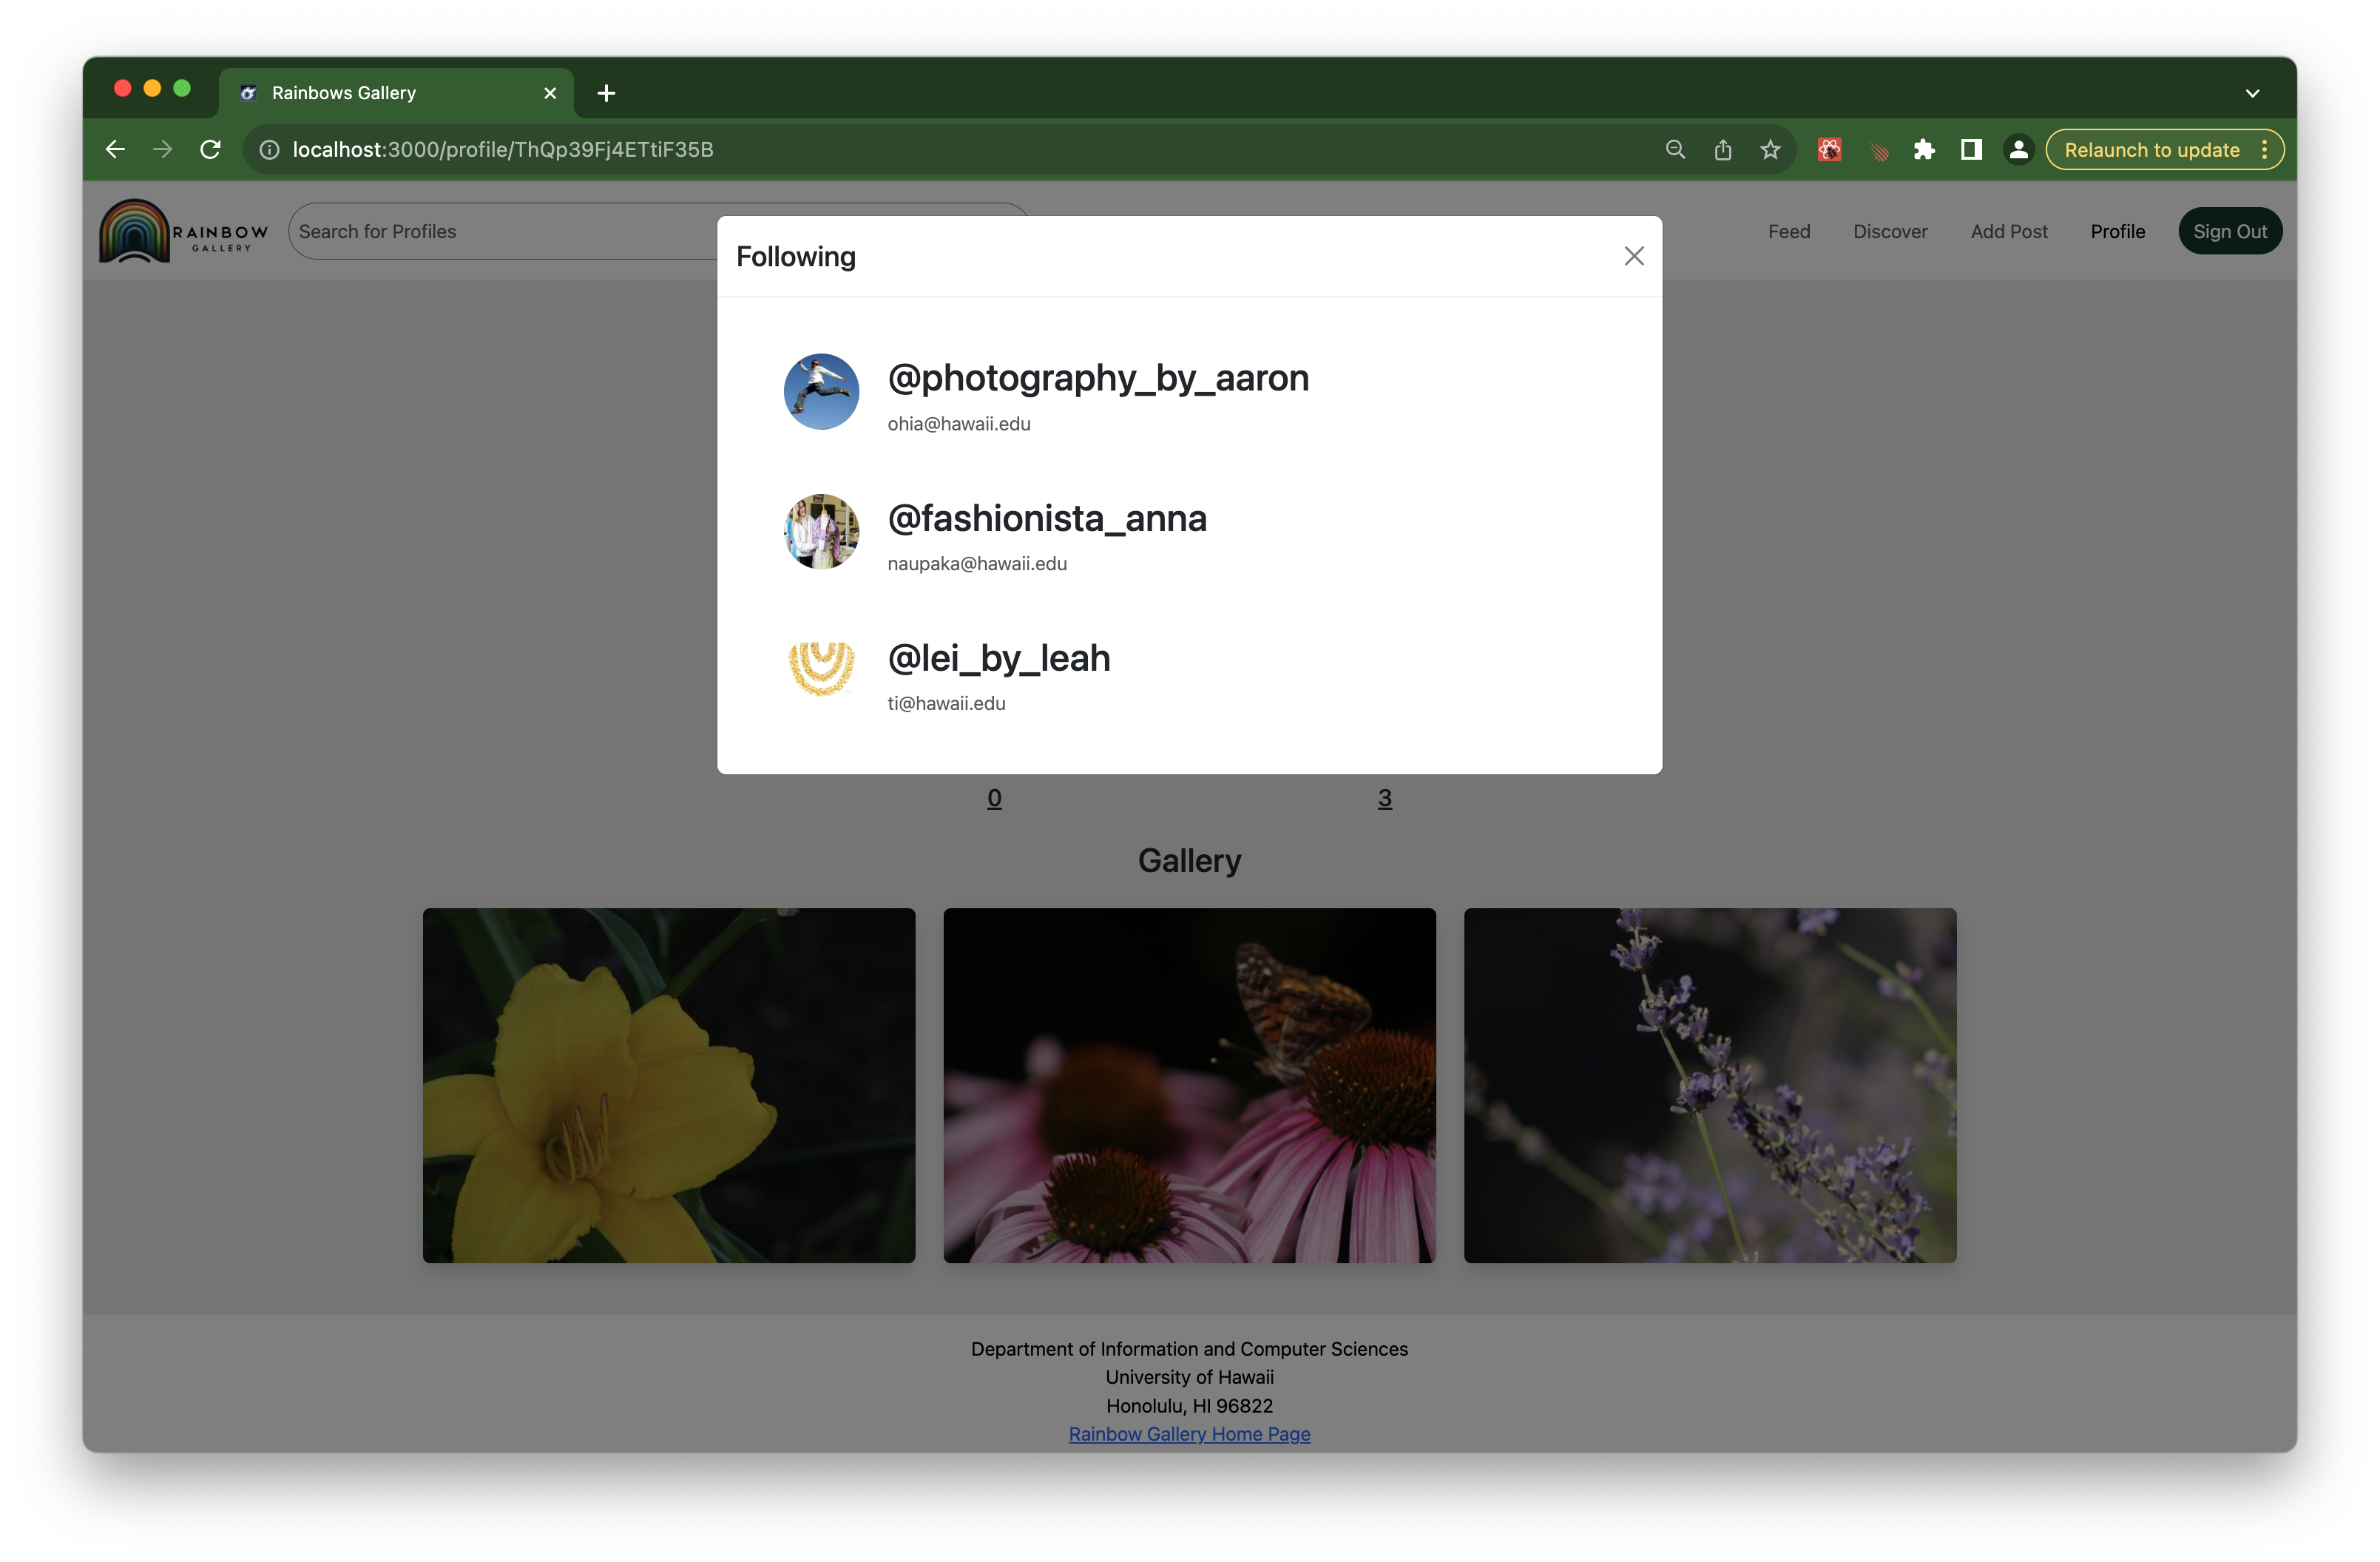
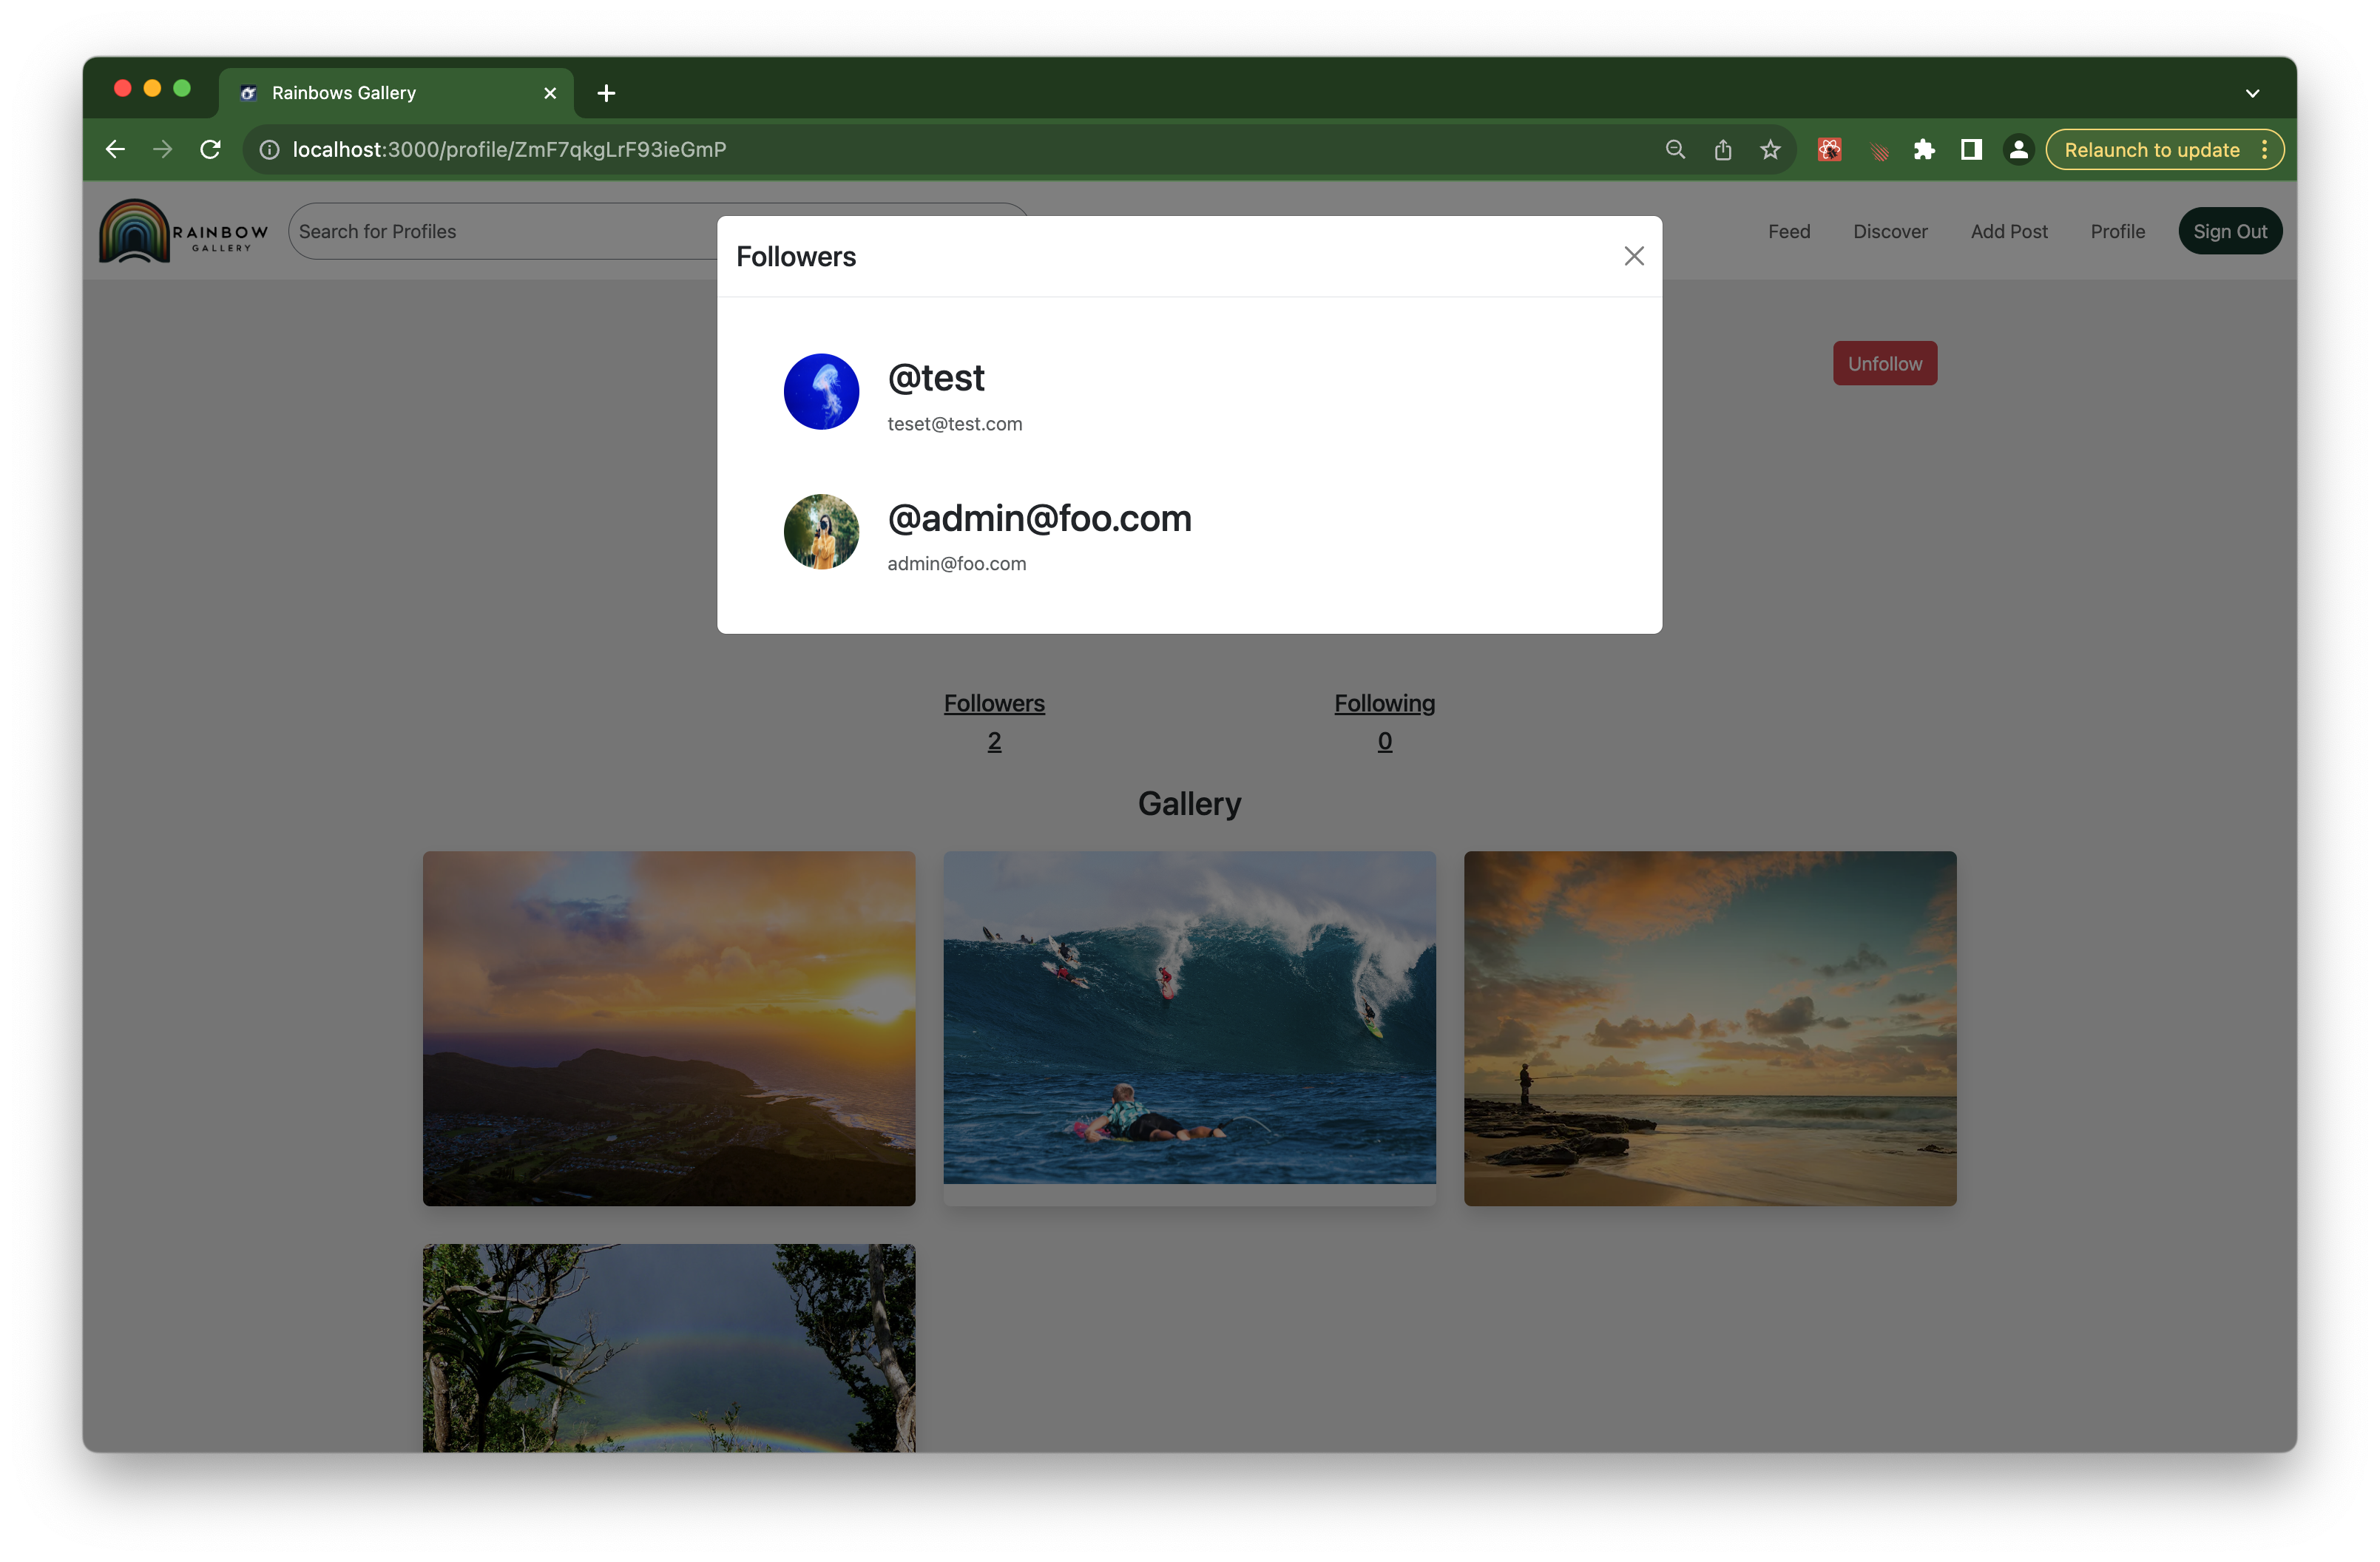
Our app lets you see who your followers are and who you are following, by simply clicking on the “followers” or “following” text on any profile page. You do not need to be friended with someone to see who they are following or who is following them, and you can click on any of the profiles you see on the overlay to be taken to that user’s profile.
Add Post
![]()
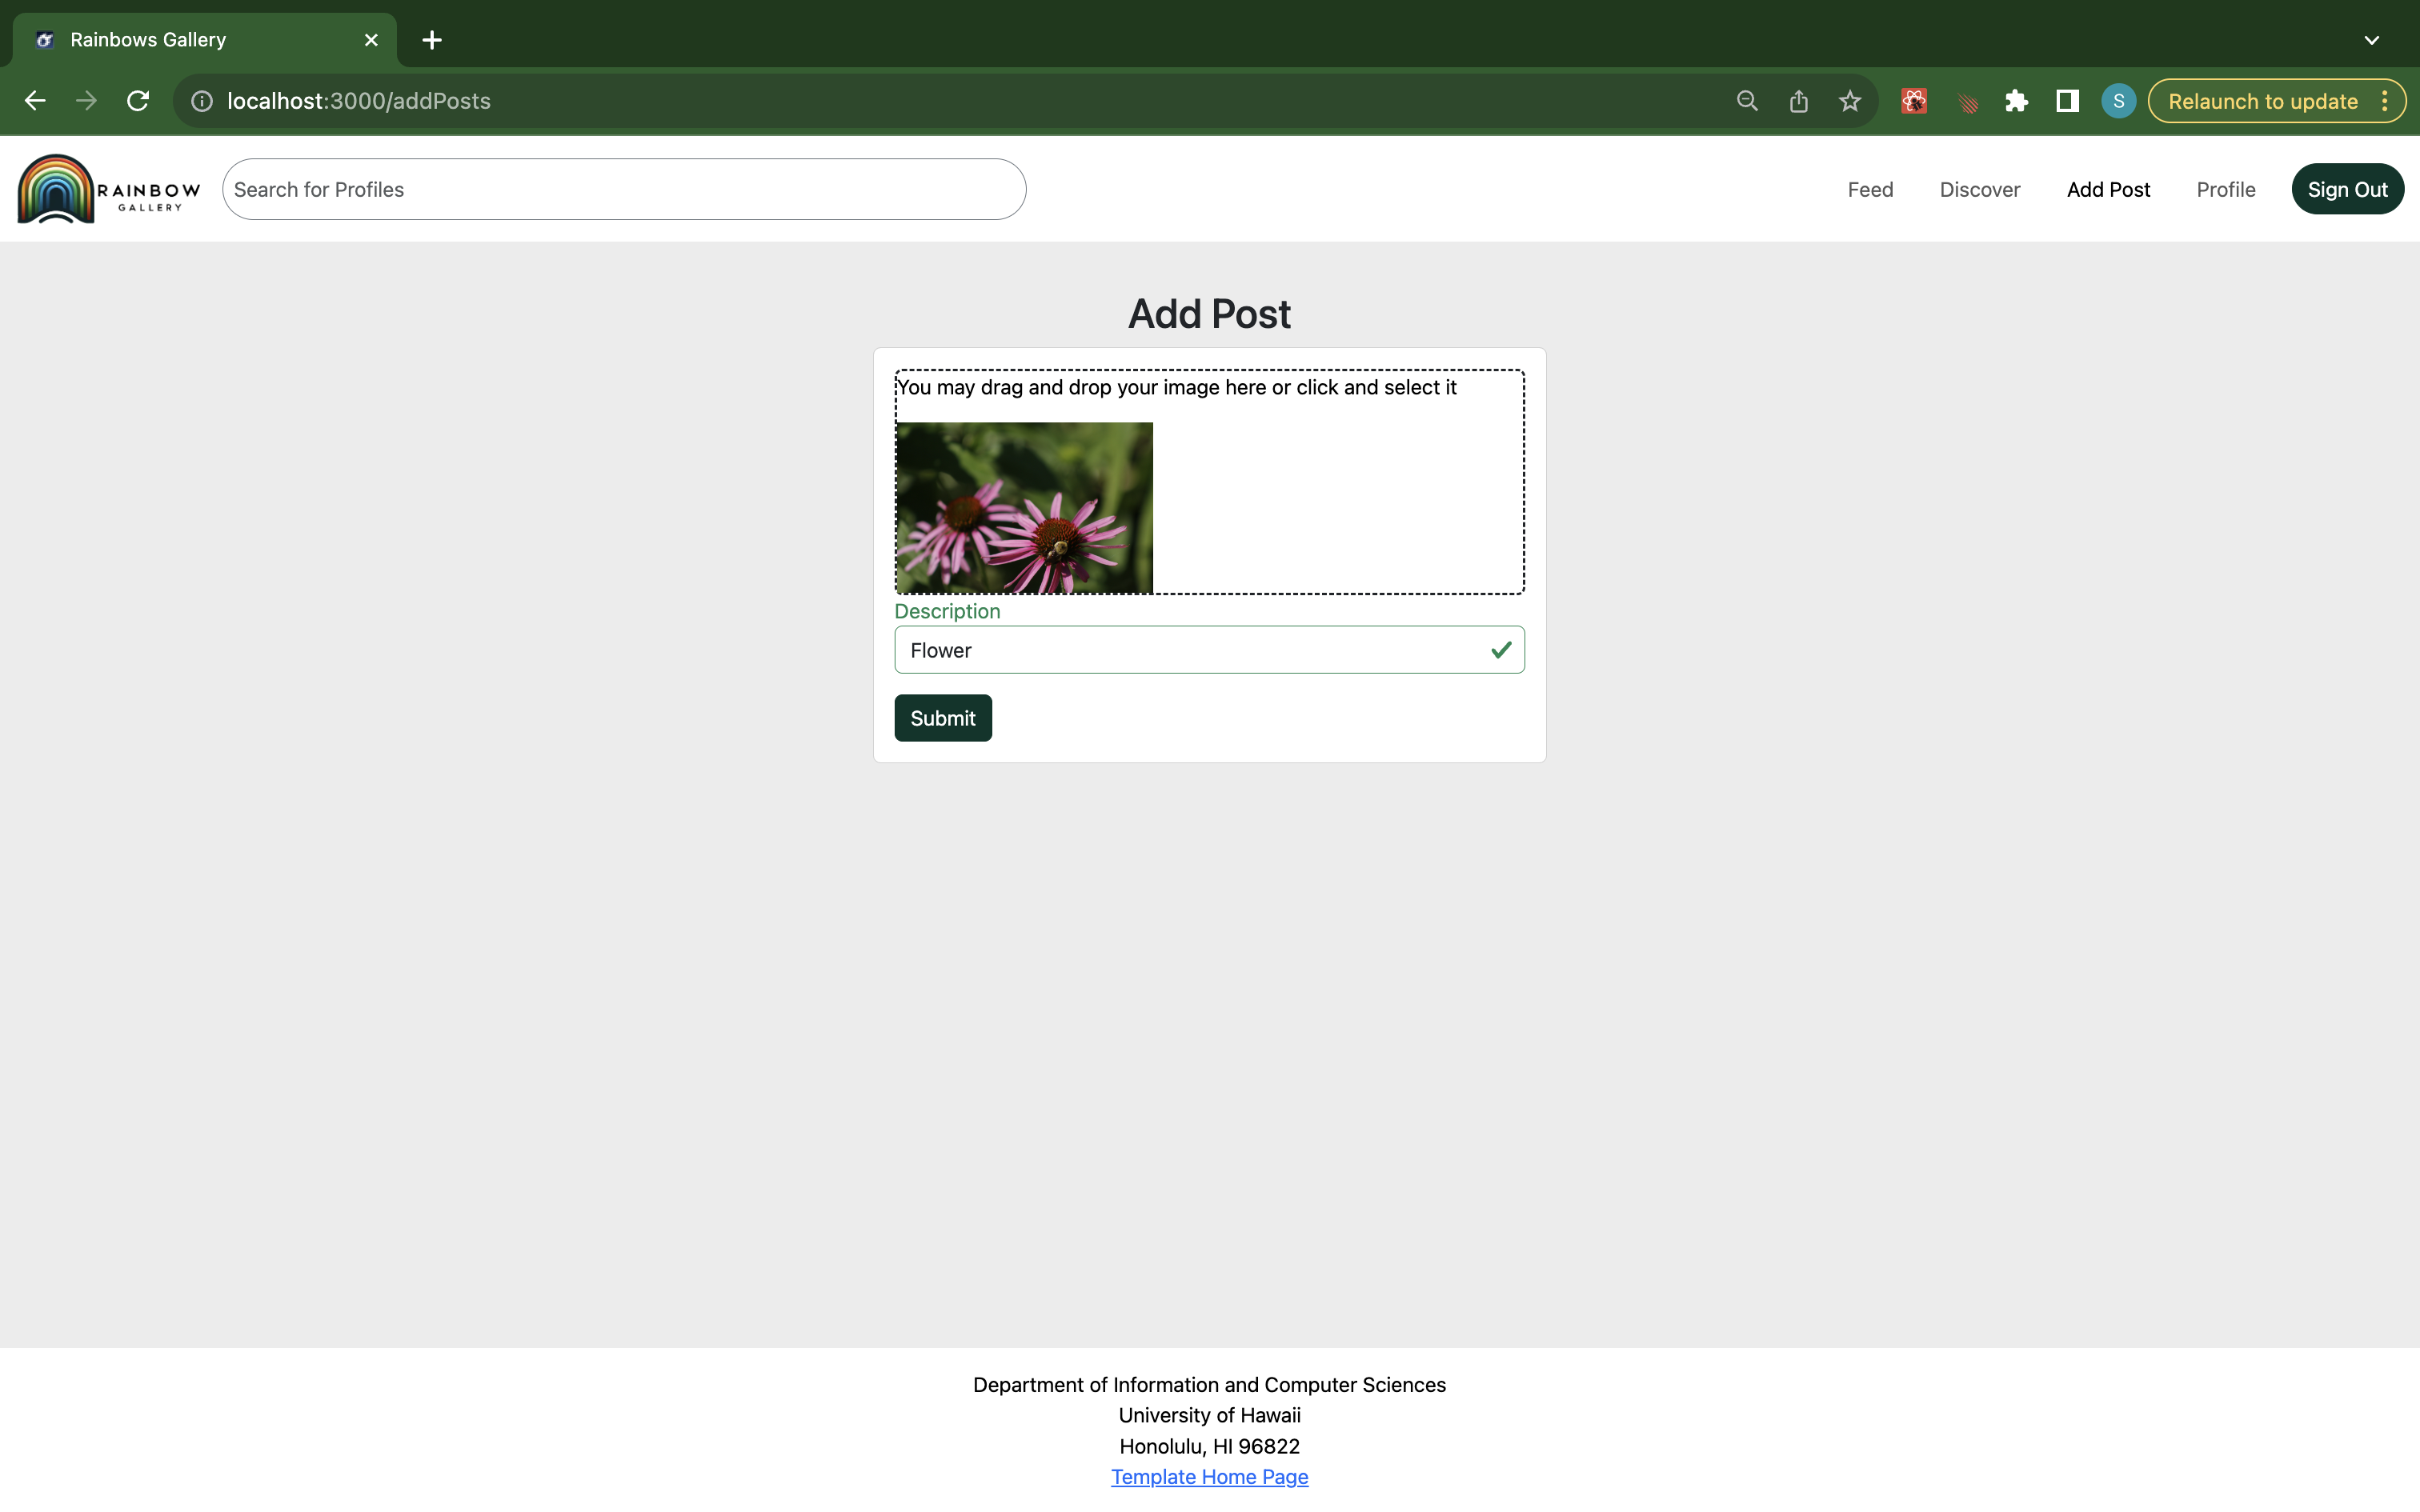
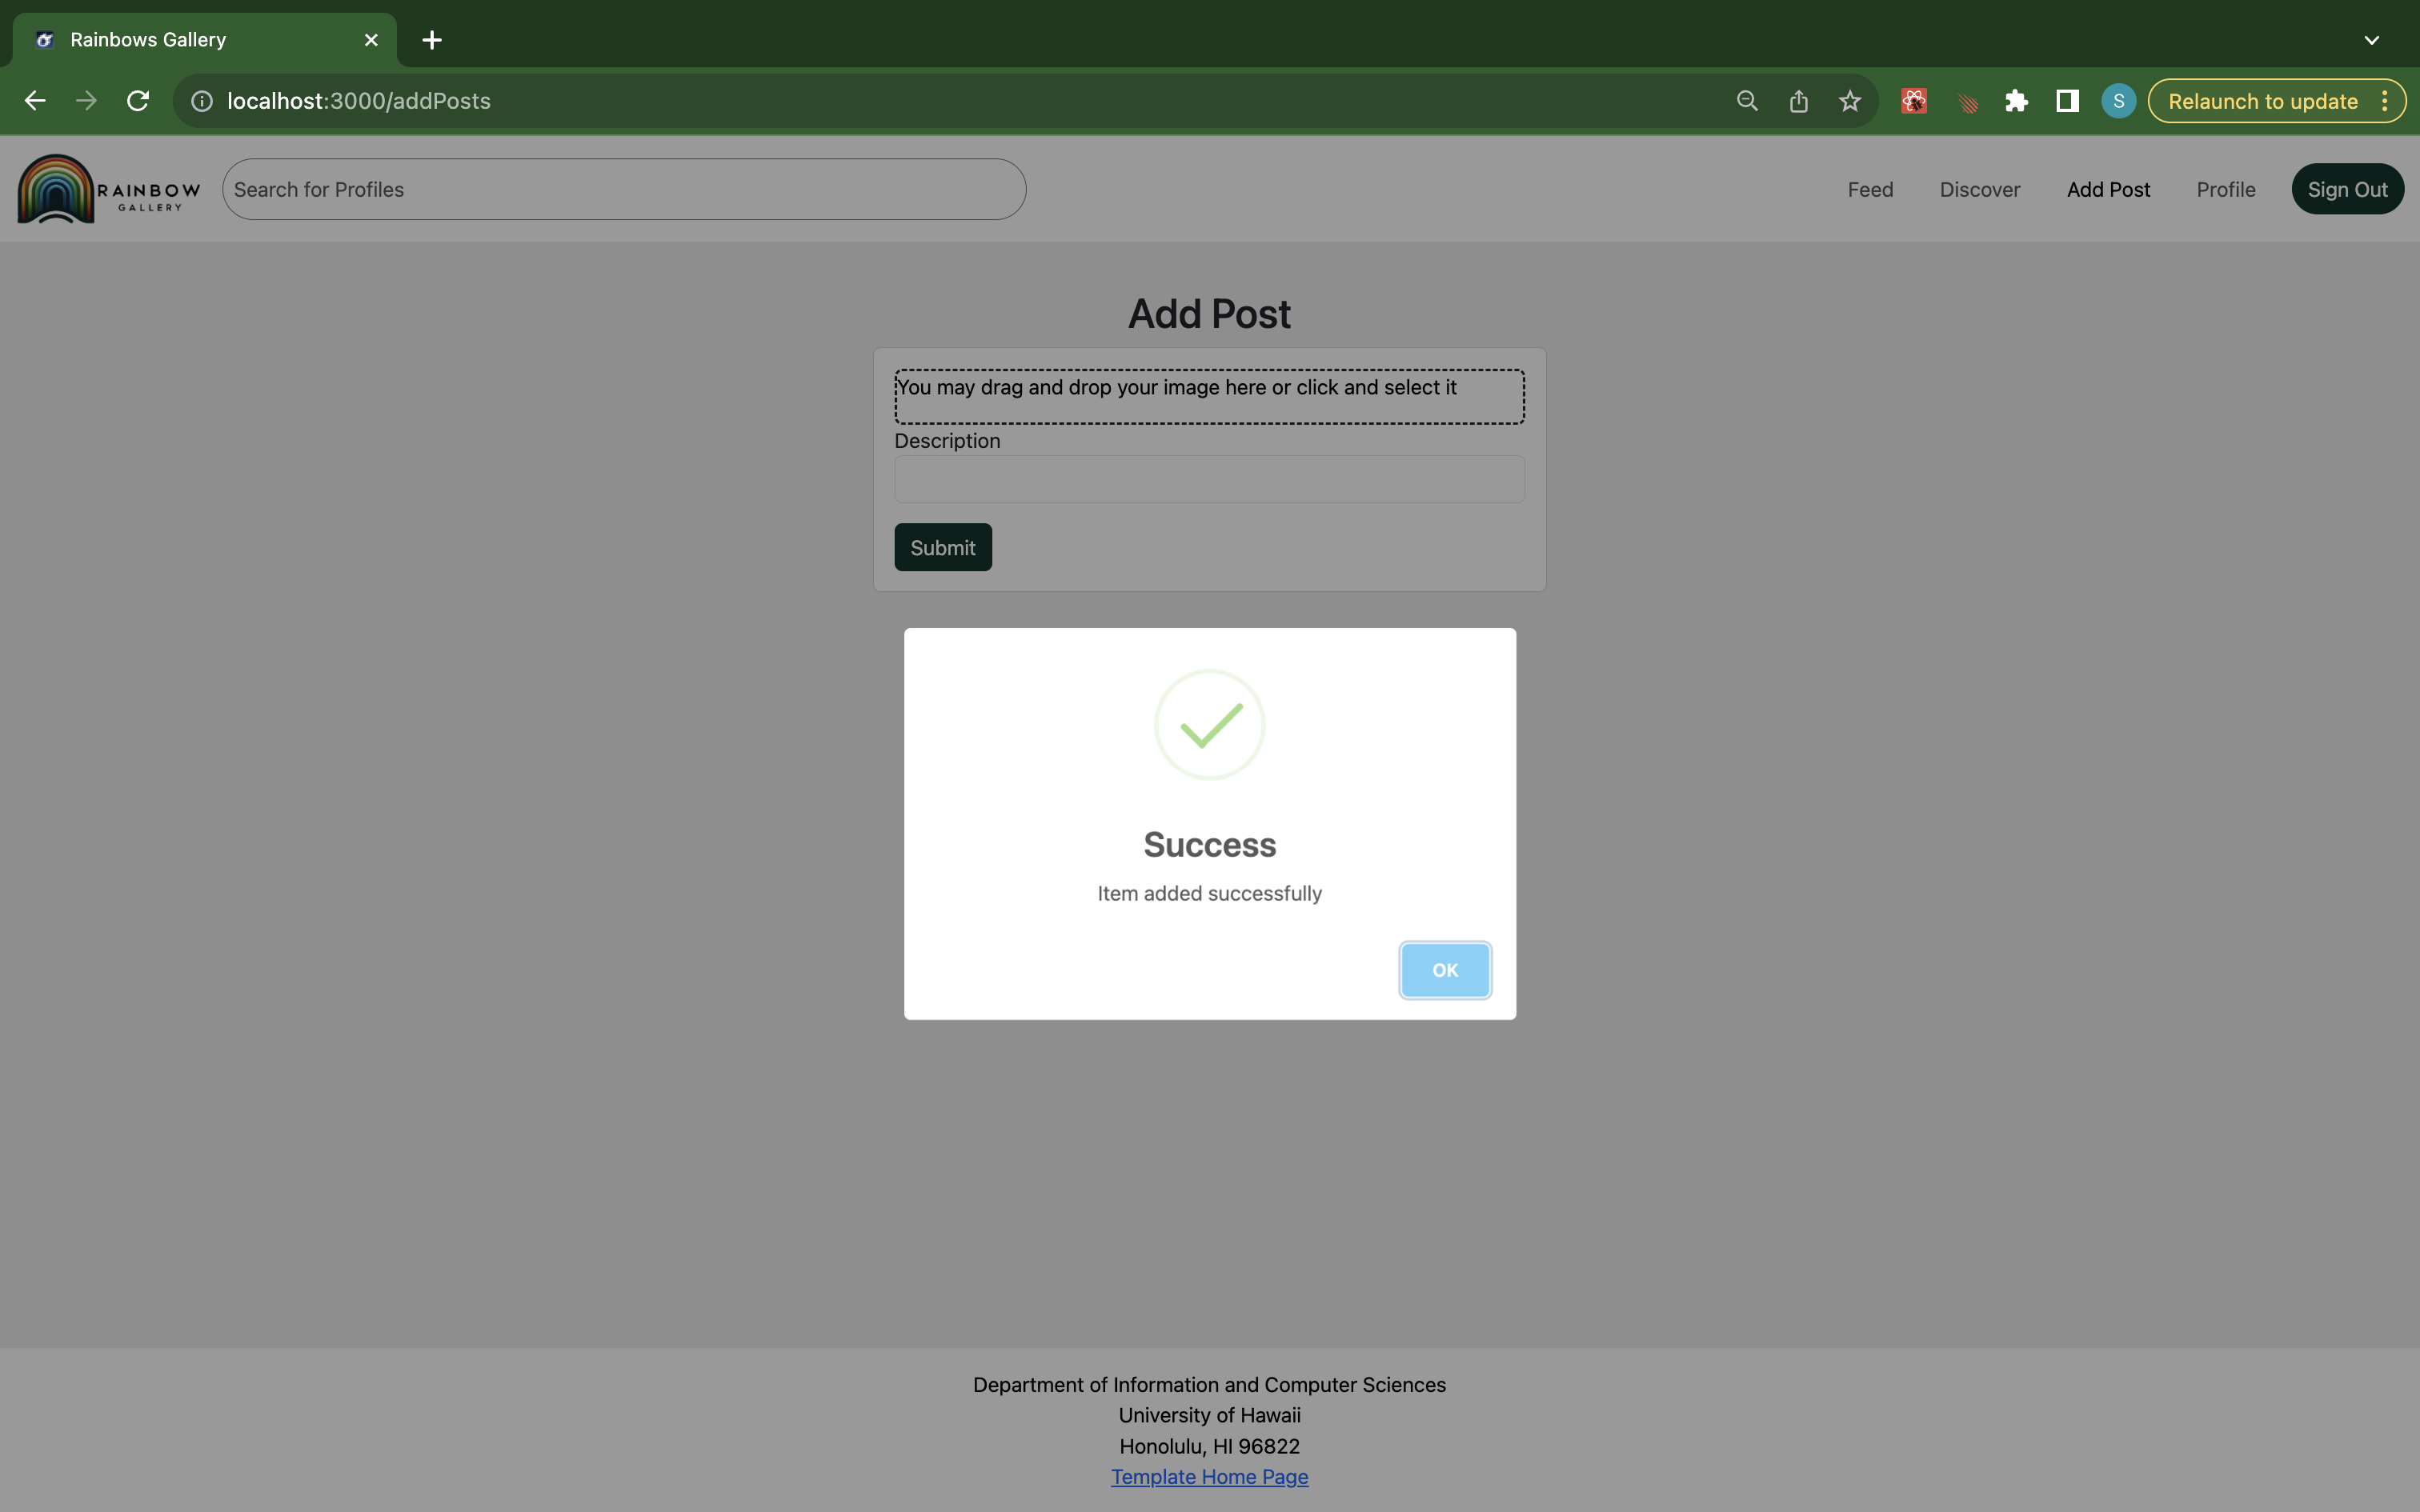
To add a post, click on the top box to look for a file, or drag a file into the box. Fill in the description beneath the photo, then click submit. In a few seconds, you will receive an indicator that the post was successfully submitted.
Edit Post
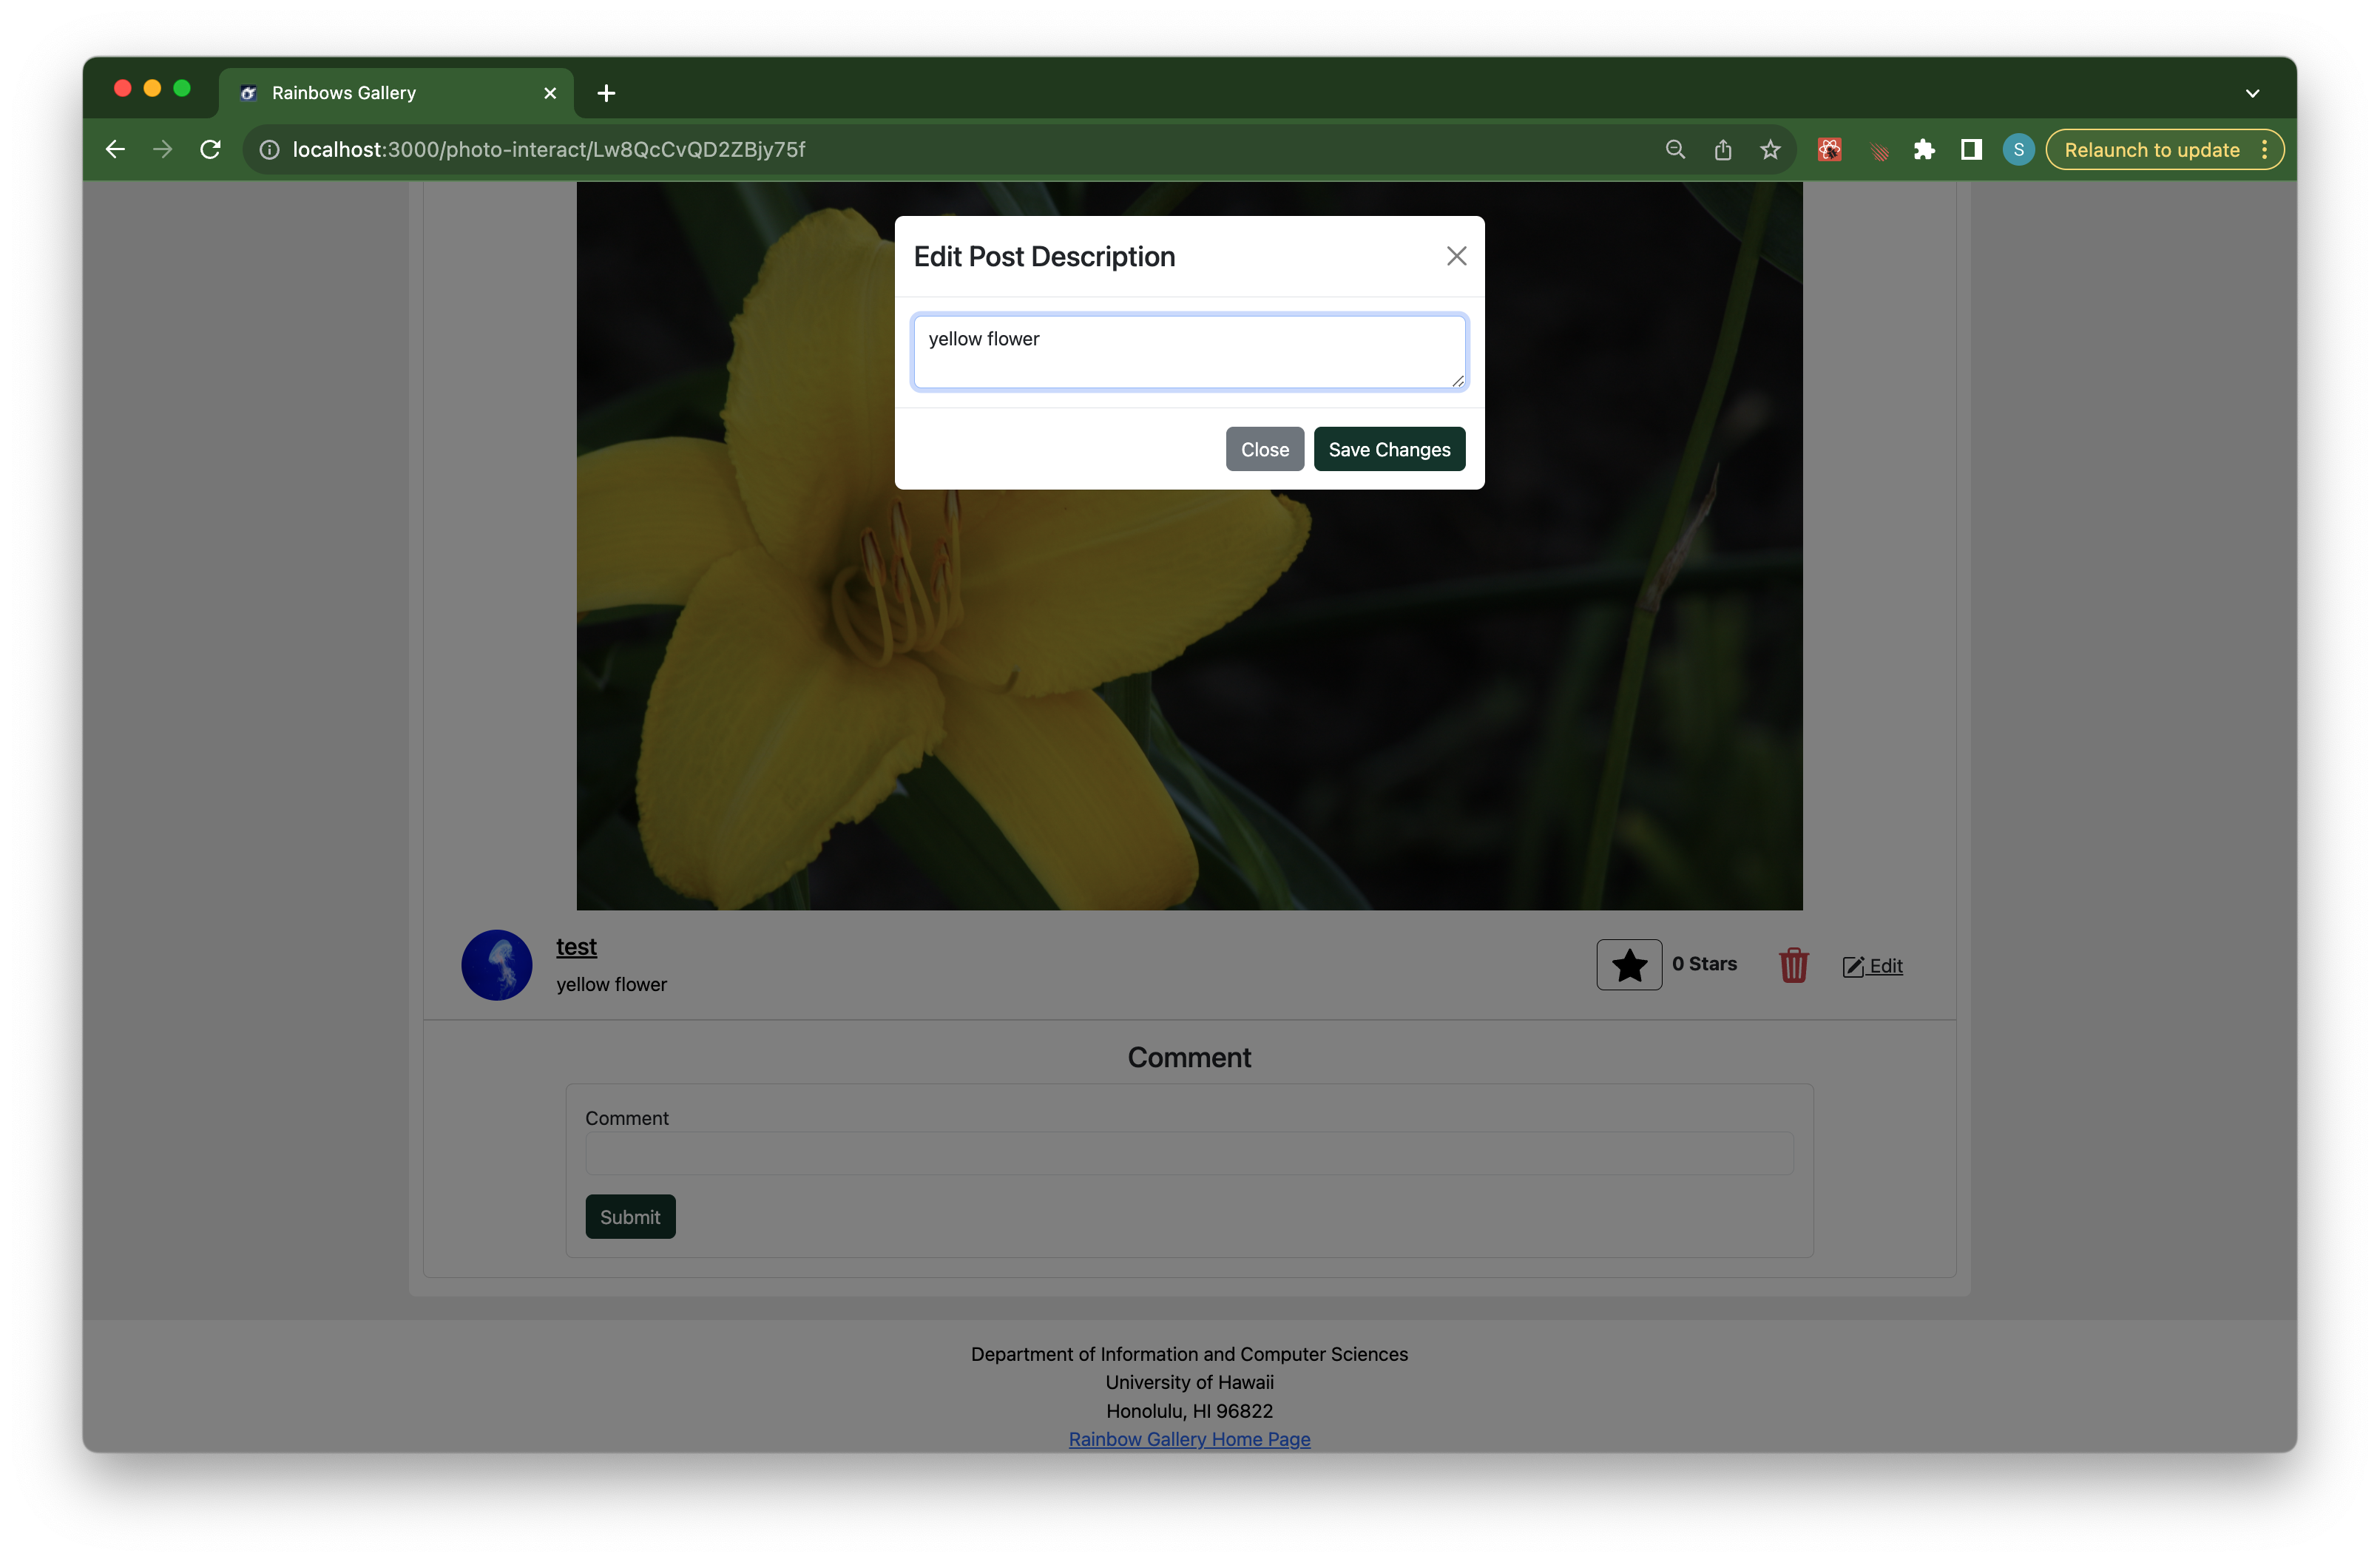
To edit a post, you can click on any of your photos and click on ‘edit’. Once you click edit, you will be able to change the post description. You are not able to change the photo, so if you would like to change the photo and description, simply delete your old post (using the trash icon) and create a new one!
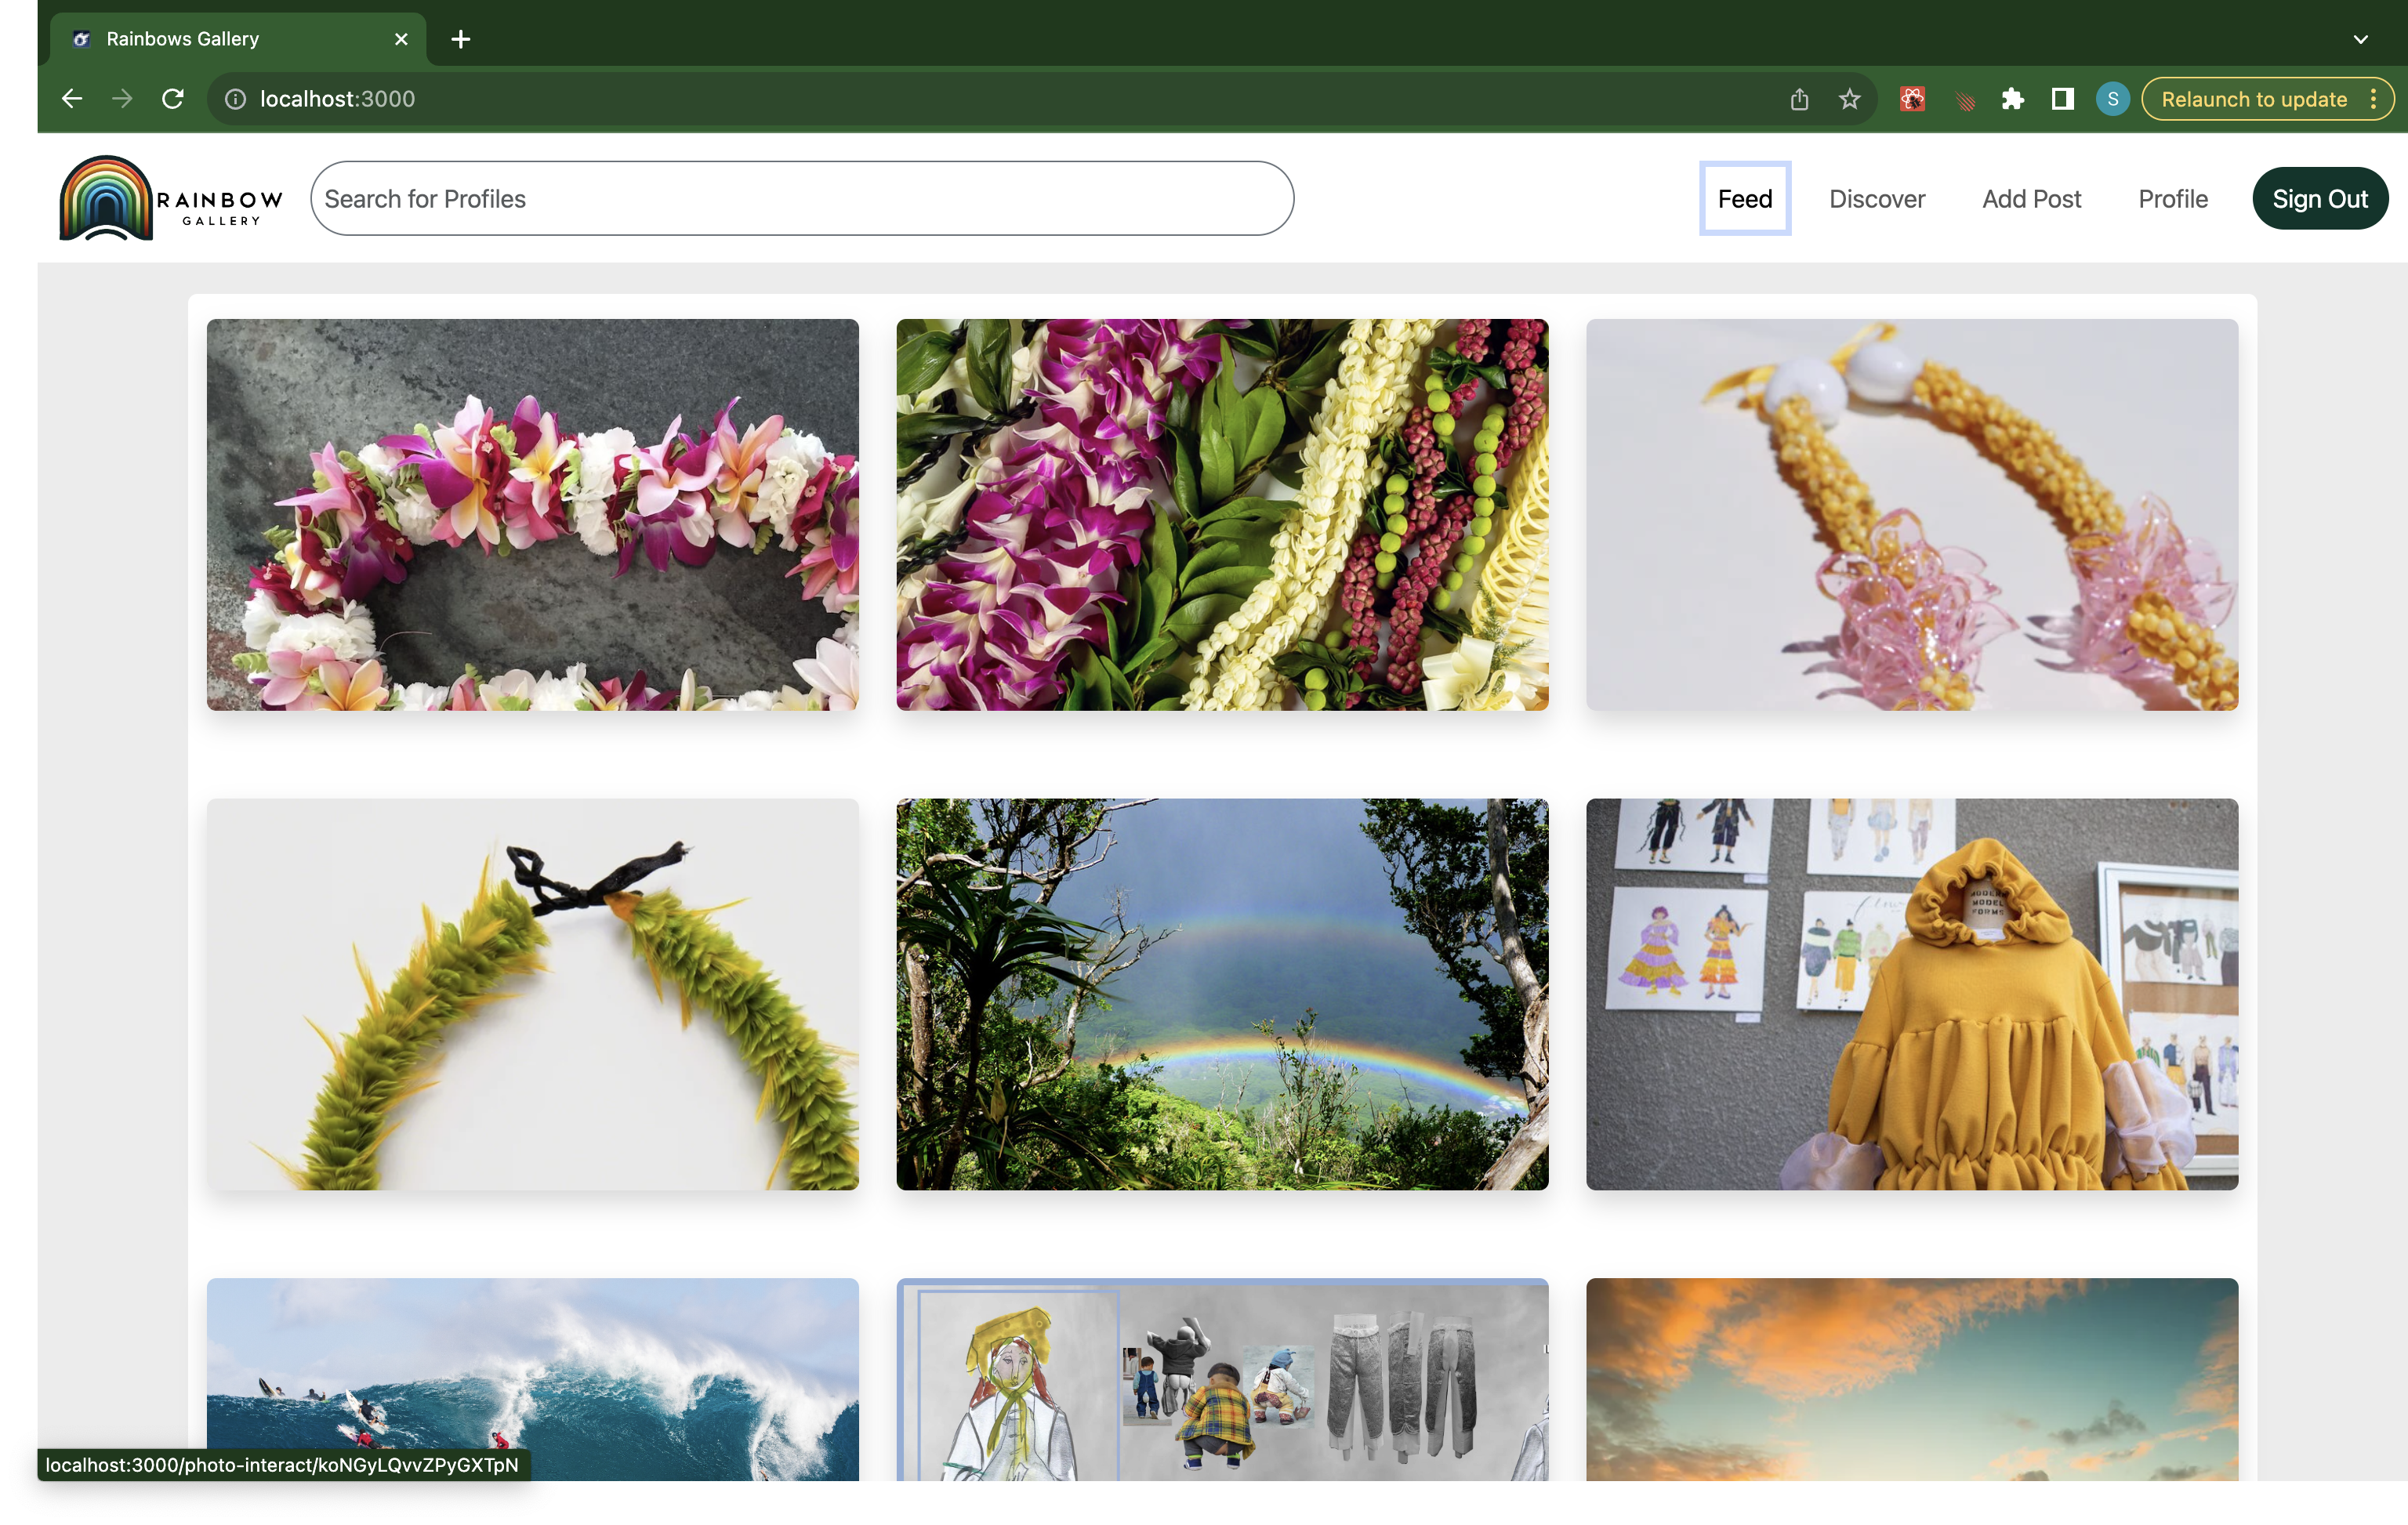
Feed
![]()
Originally, if you are not following anyone, this is what your feed will look like. In order to start following accounts, search for other accounts in the search bar or checkout the Discover tab.
Search
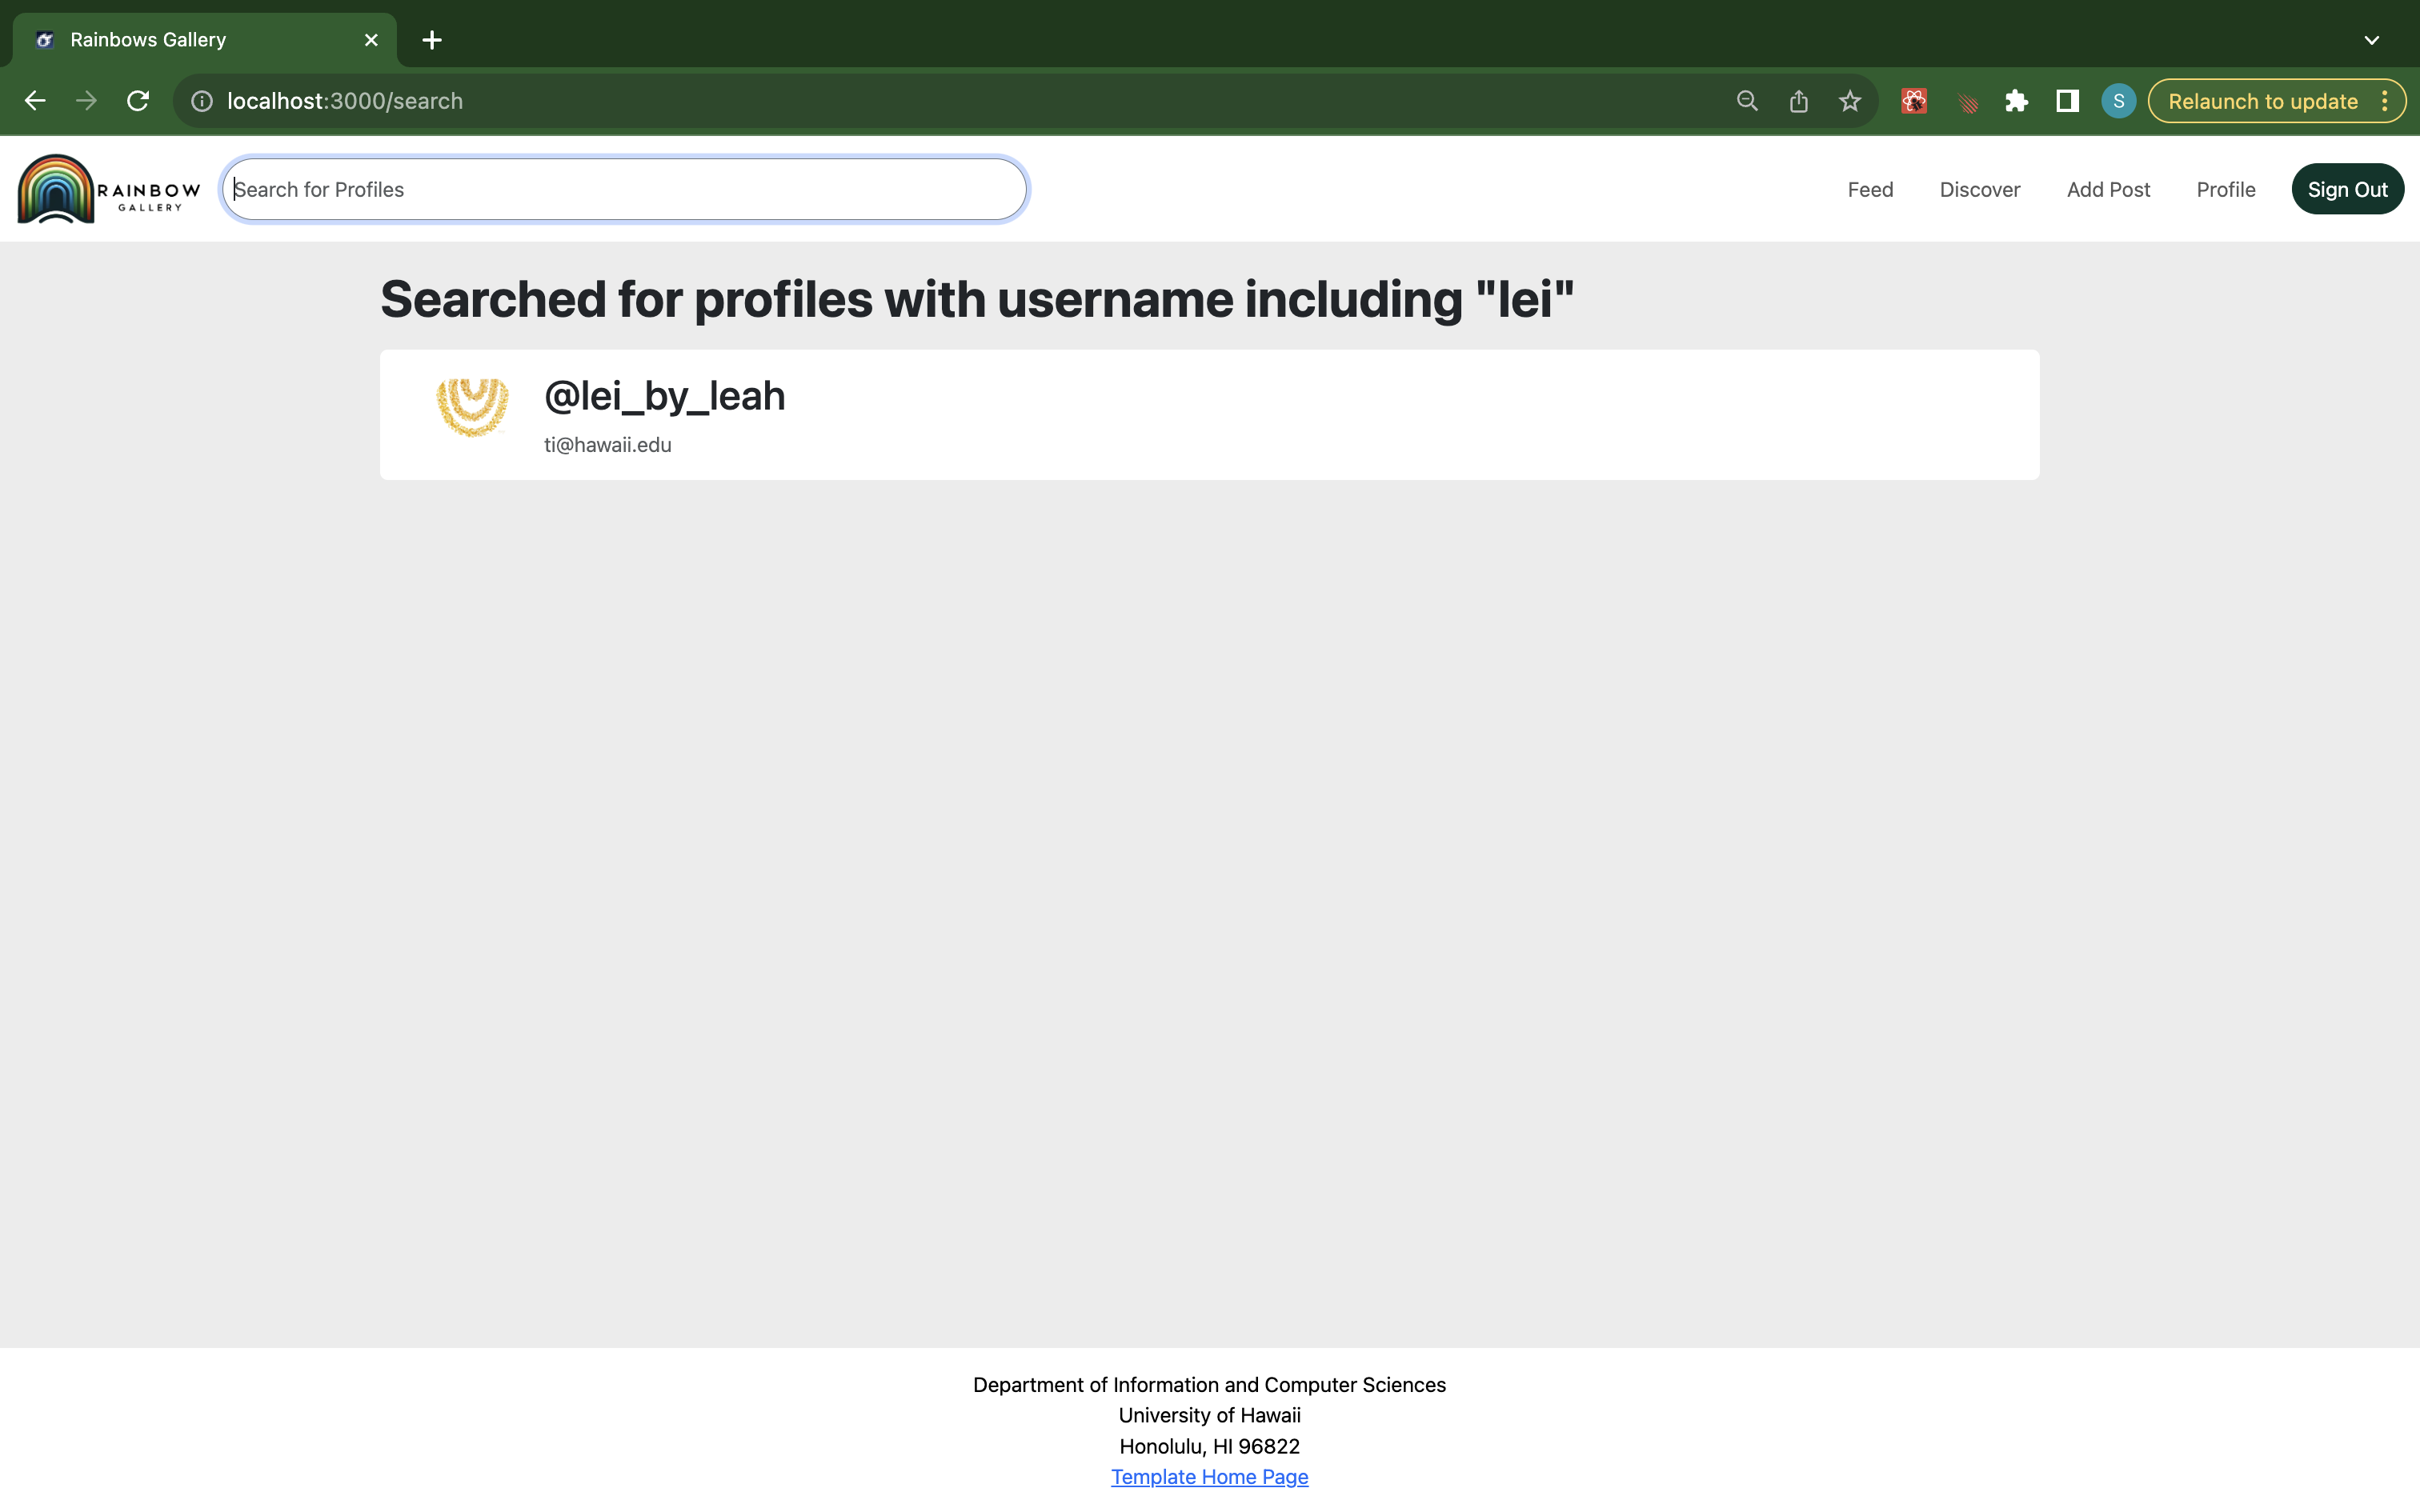
To search for accounts, simply enter any string into the Navbar then click enter. A page with all profiles with a match to the string you entered will appear. Click on the account shown to be taken to that user’s profile page.
Discover
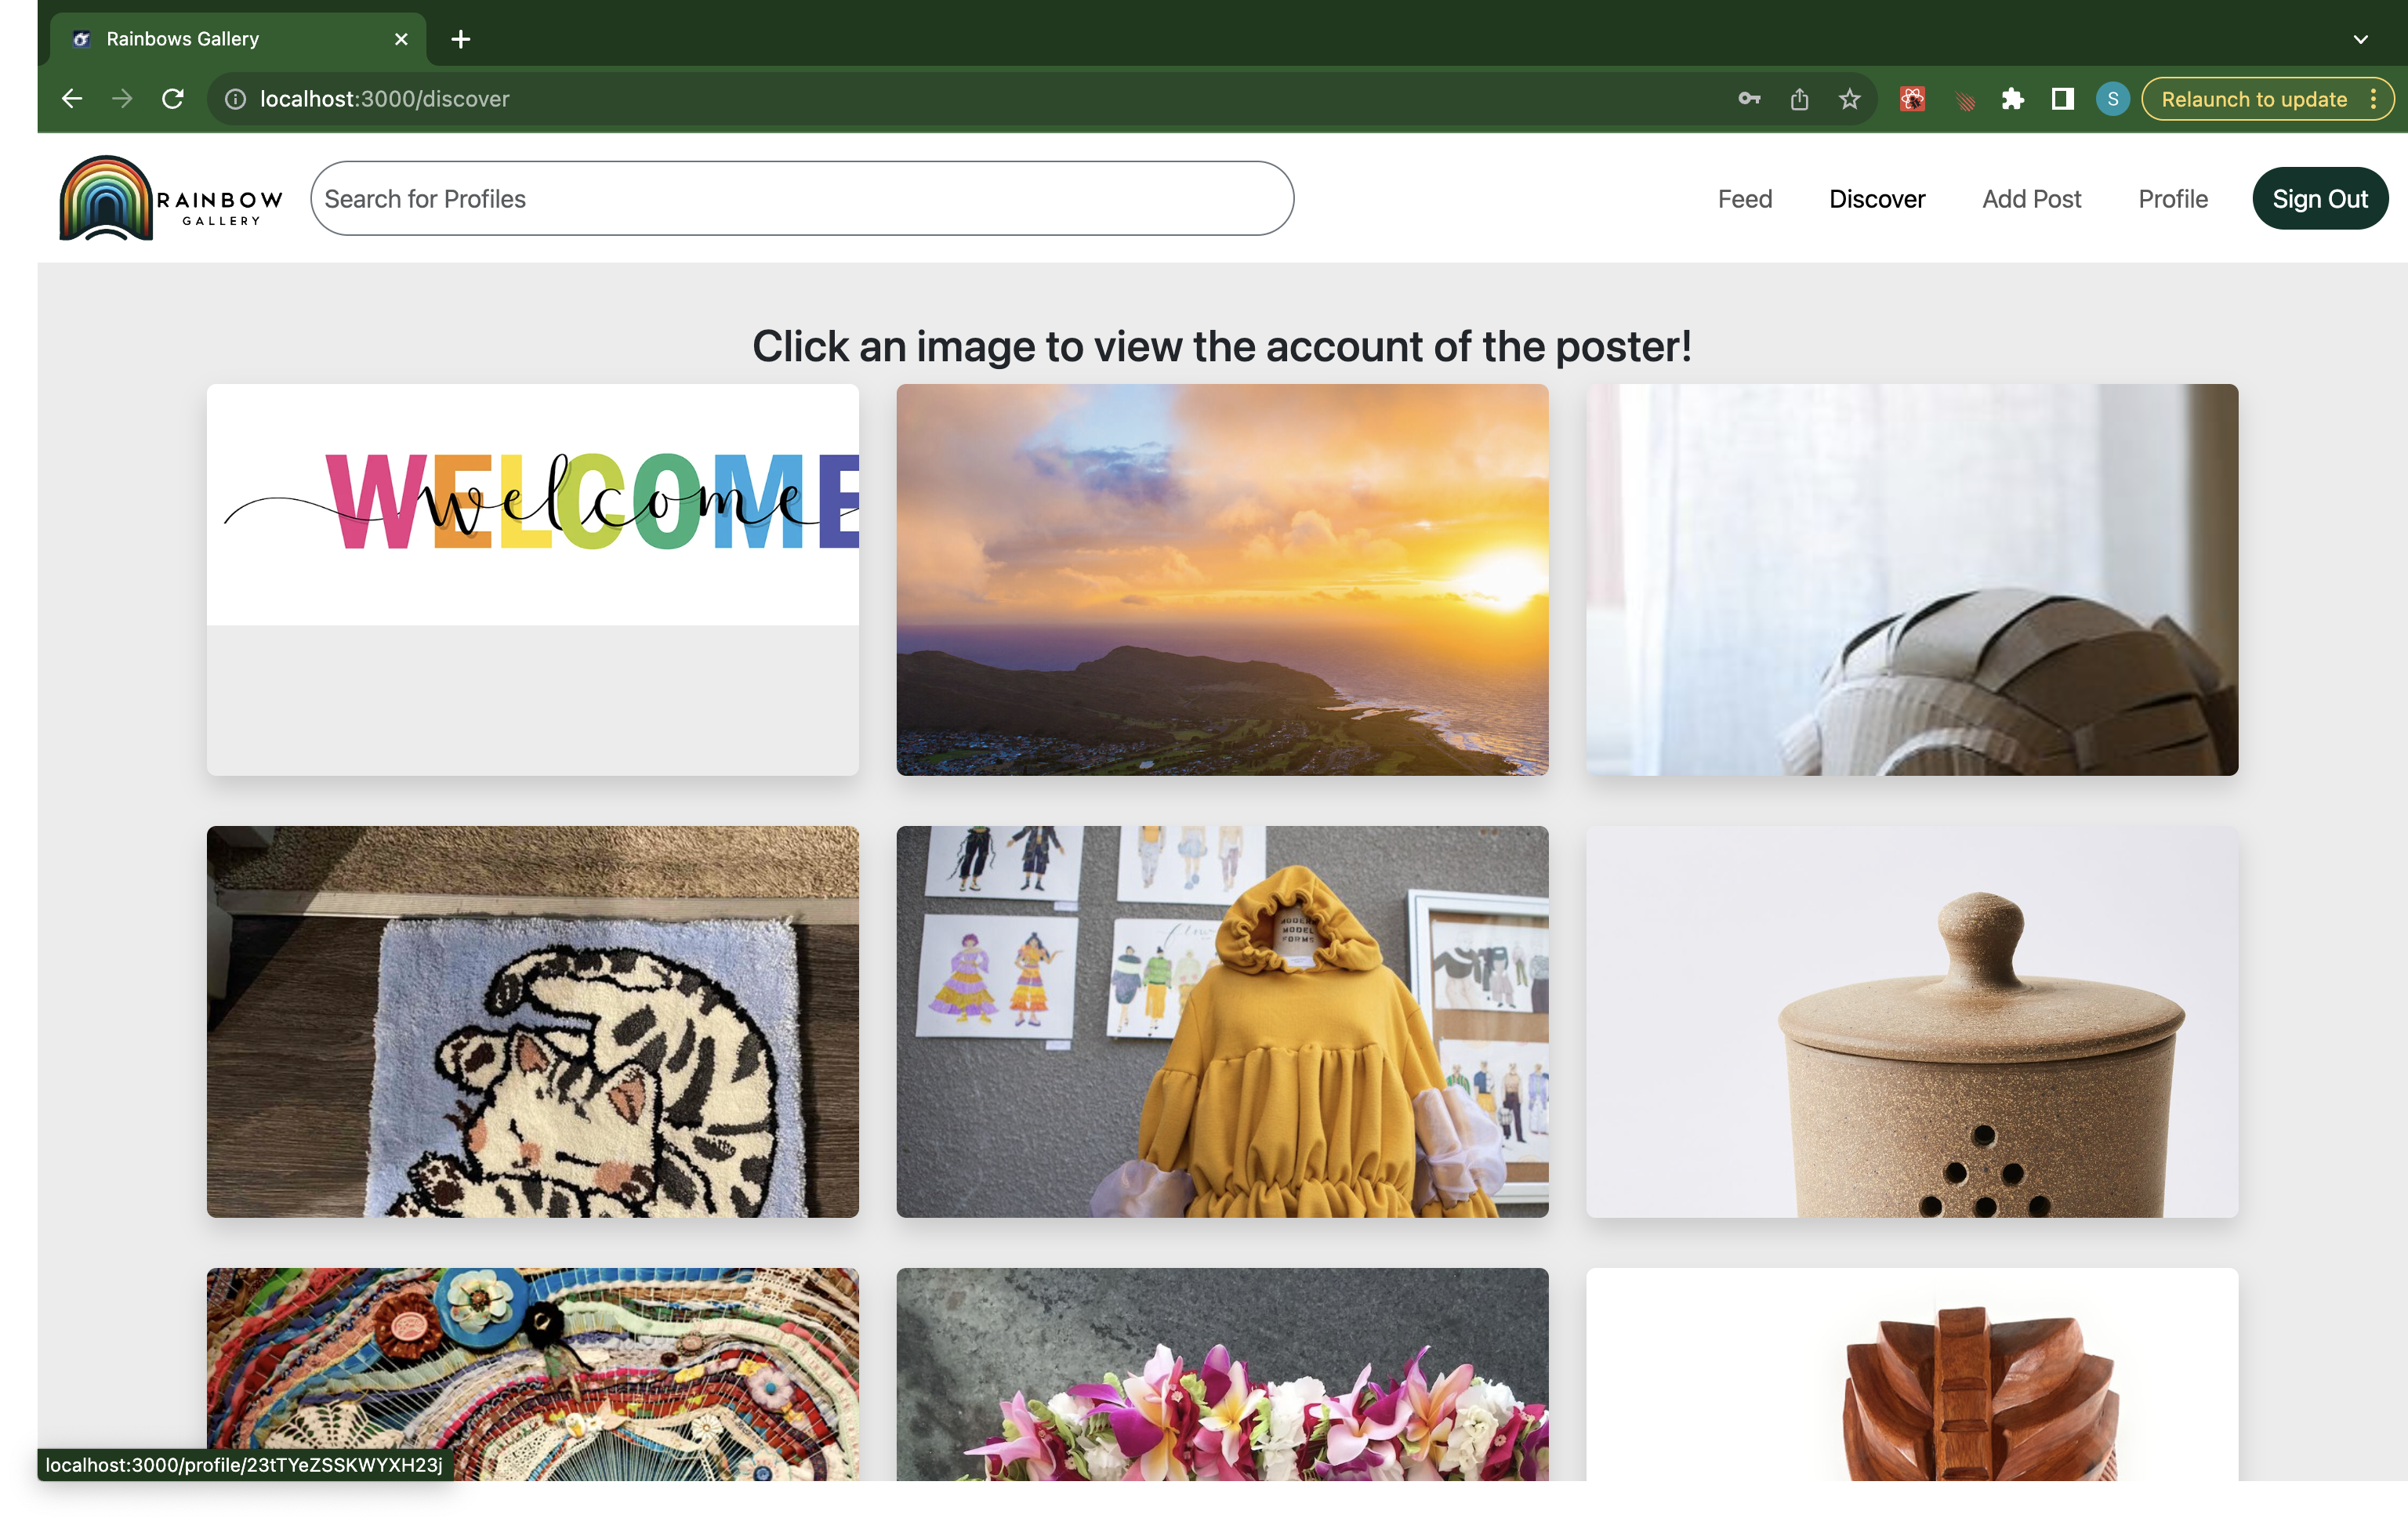
This is the discover page. Every account that has atleast one post will have their first post displayed in the Discover tab. If you like an image, simply click on it to be taken to the poster’s account!
Someone Else’s Profile

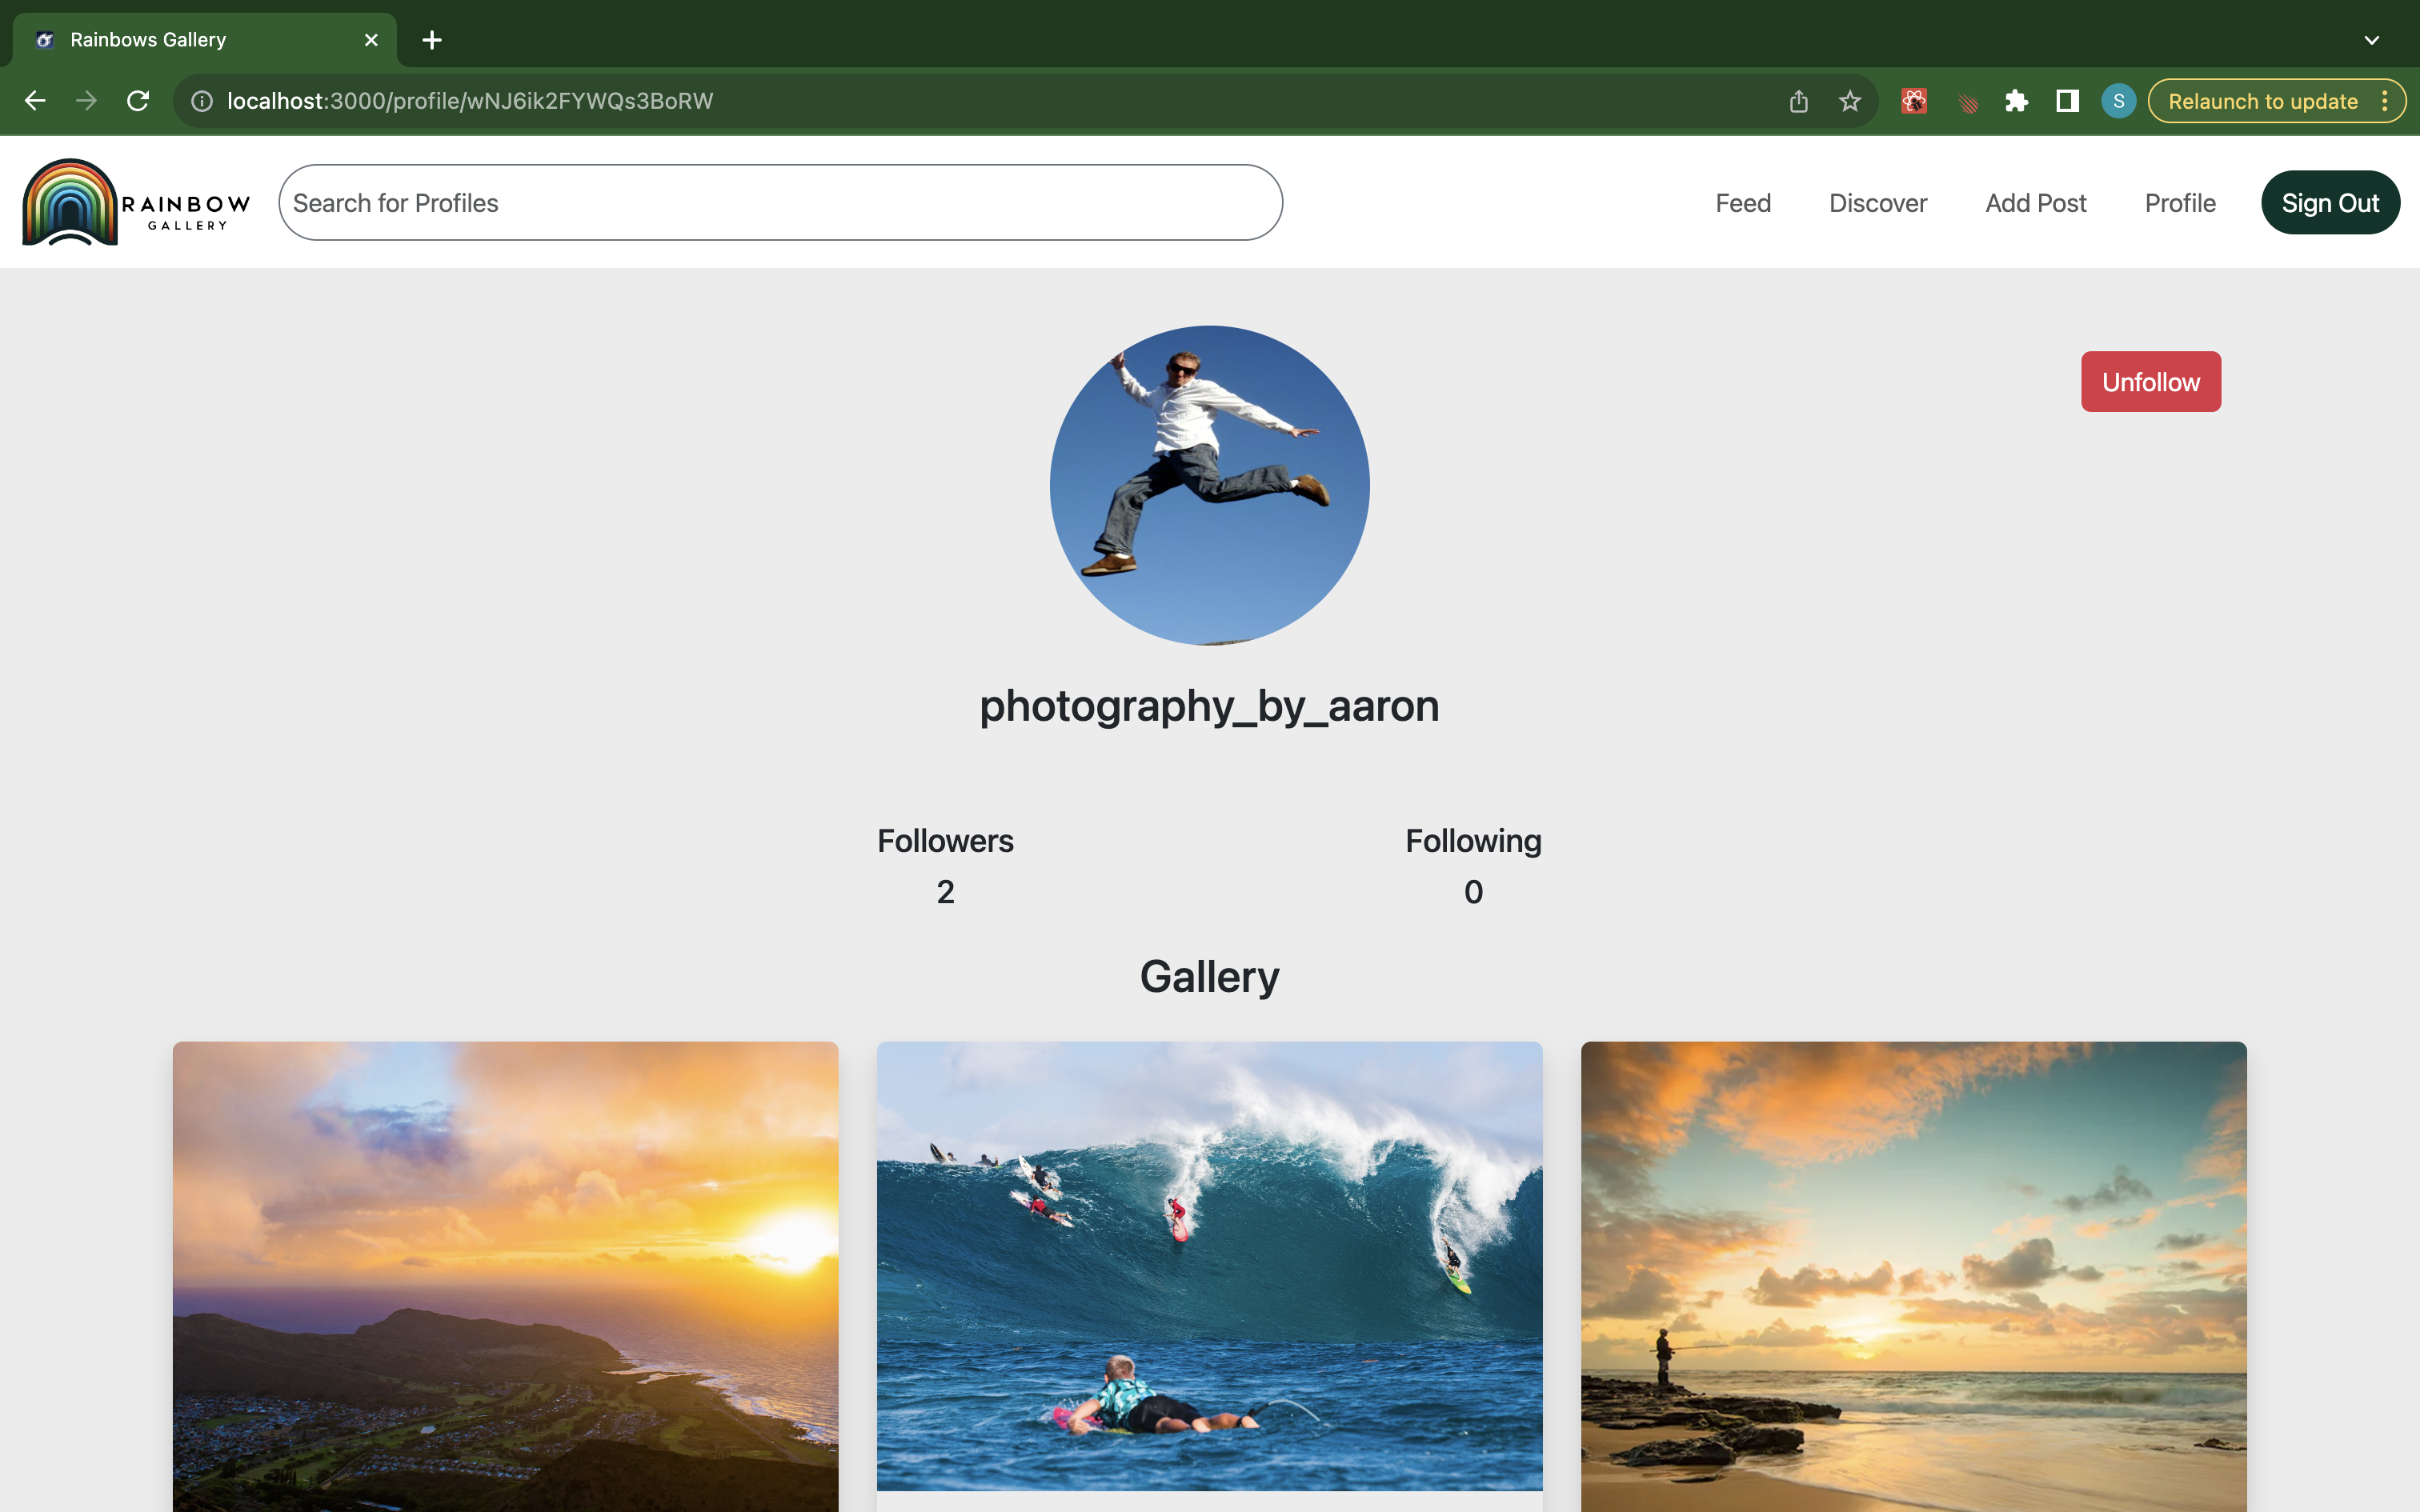
When you view someone else’s account, you will have the option to follow them. To follow that account, simply click follow. Once you are following the account, their posts will populate in your feed.
Populated Feed
After you follow someone, their posts will populate in your feed.
Commenting
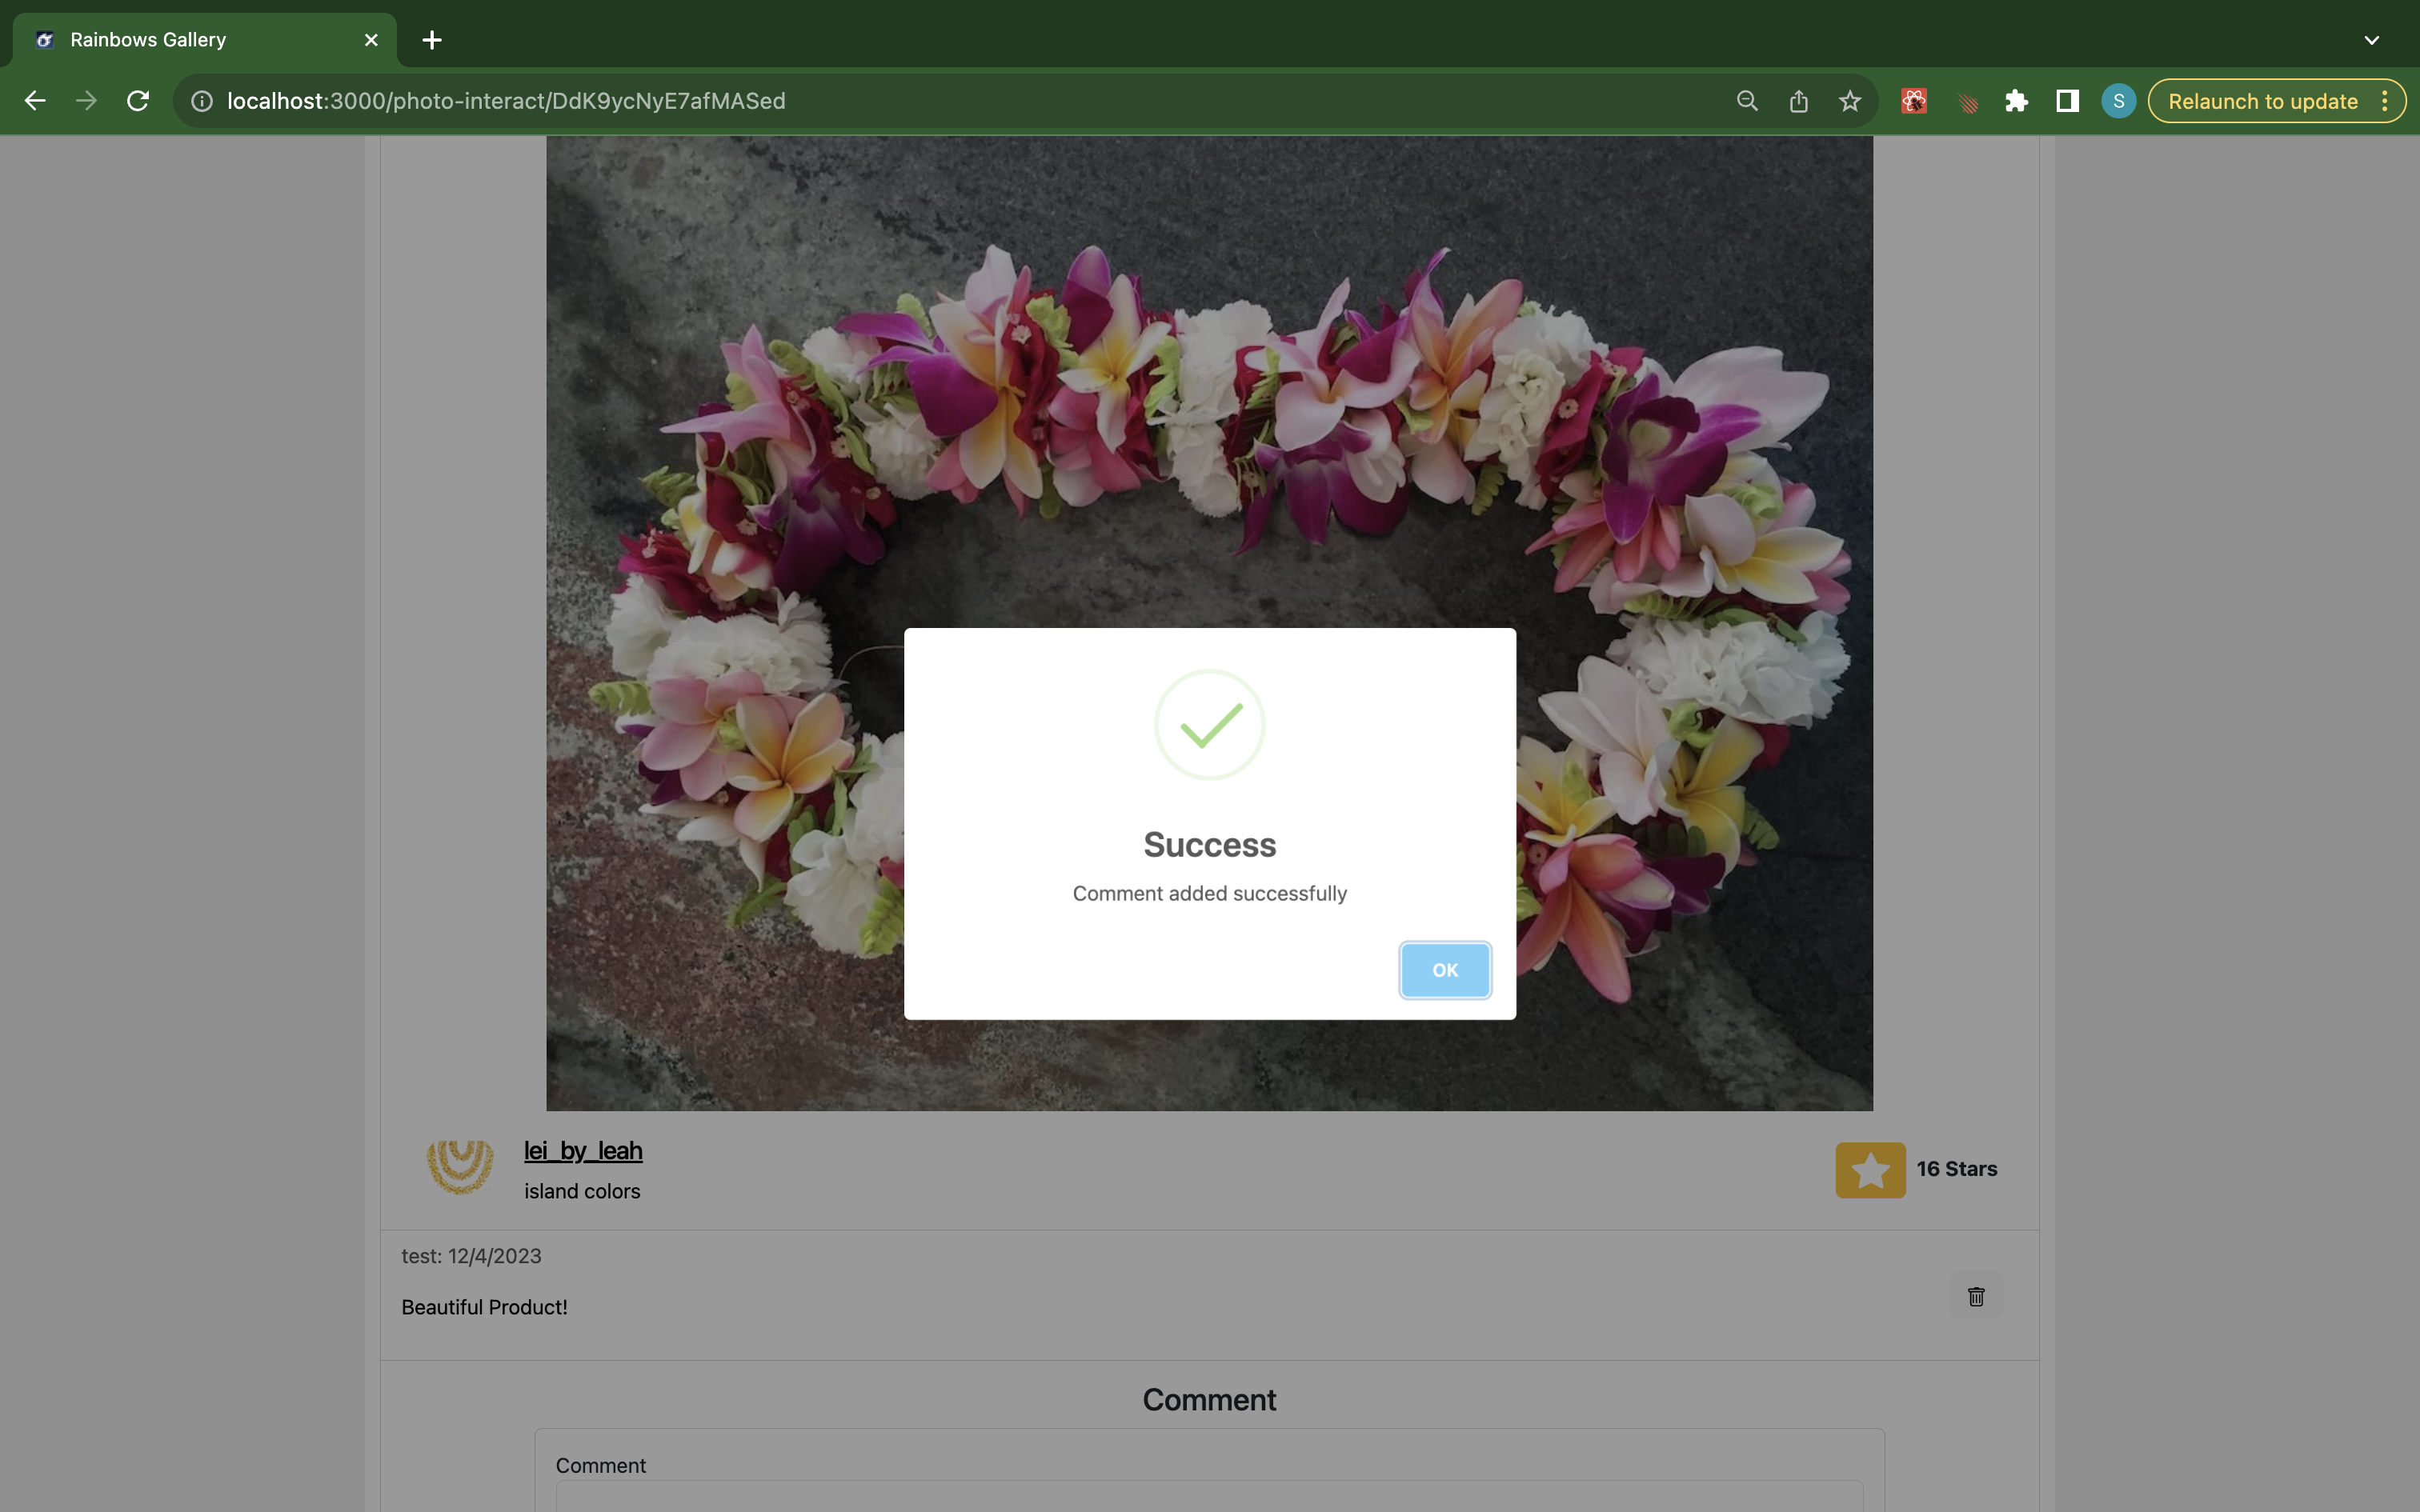
To comment on a post, click on any photo. You can enter in your comment and will receive a success notification (shown above) upon entry. You have the ability to delete any comment you create. Owners of a post may delete any comment on their post, and admin has the ability to remove any comment regardless of the post it is on.
Starring
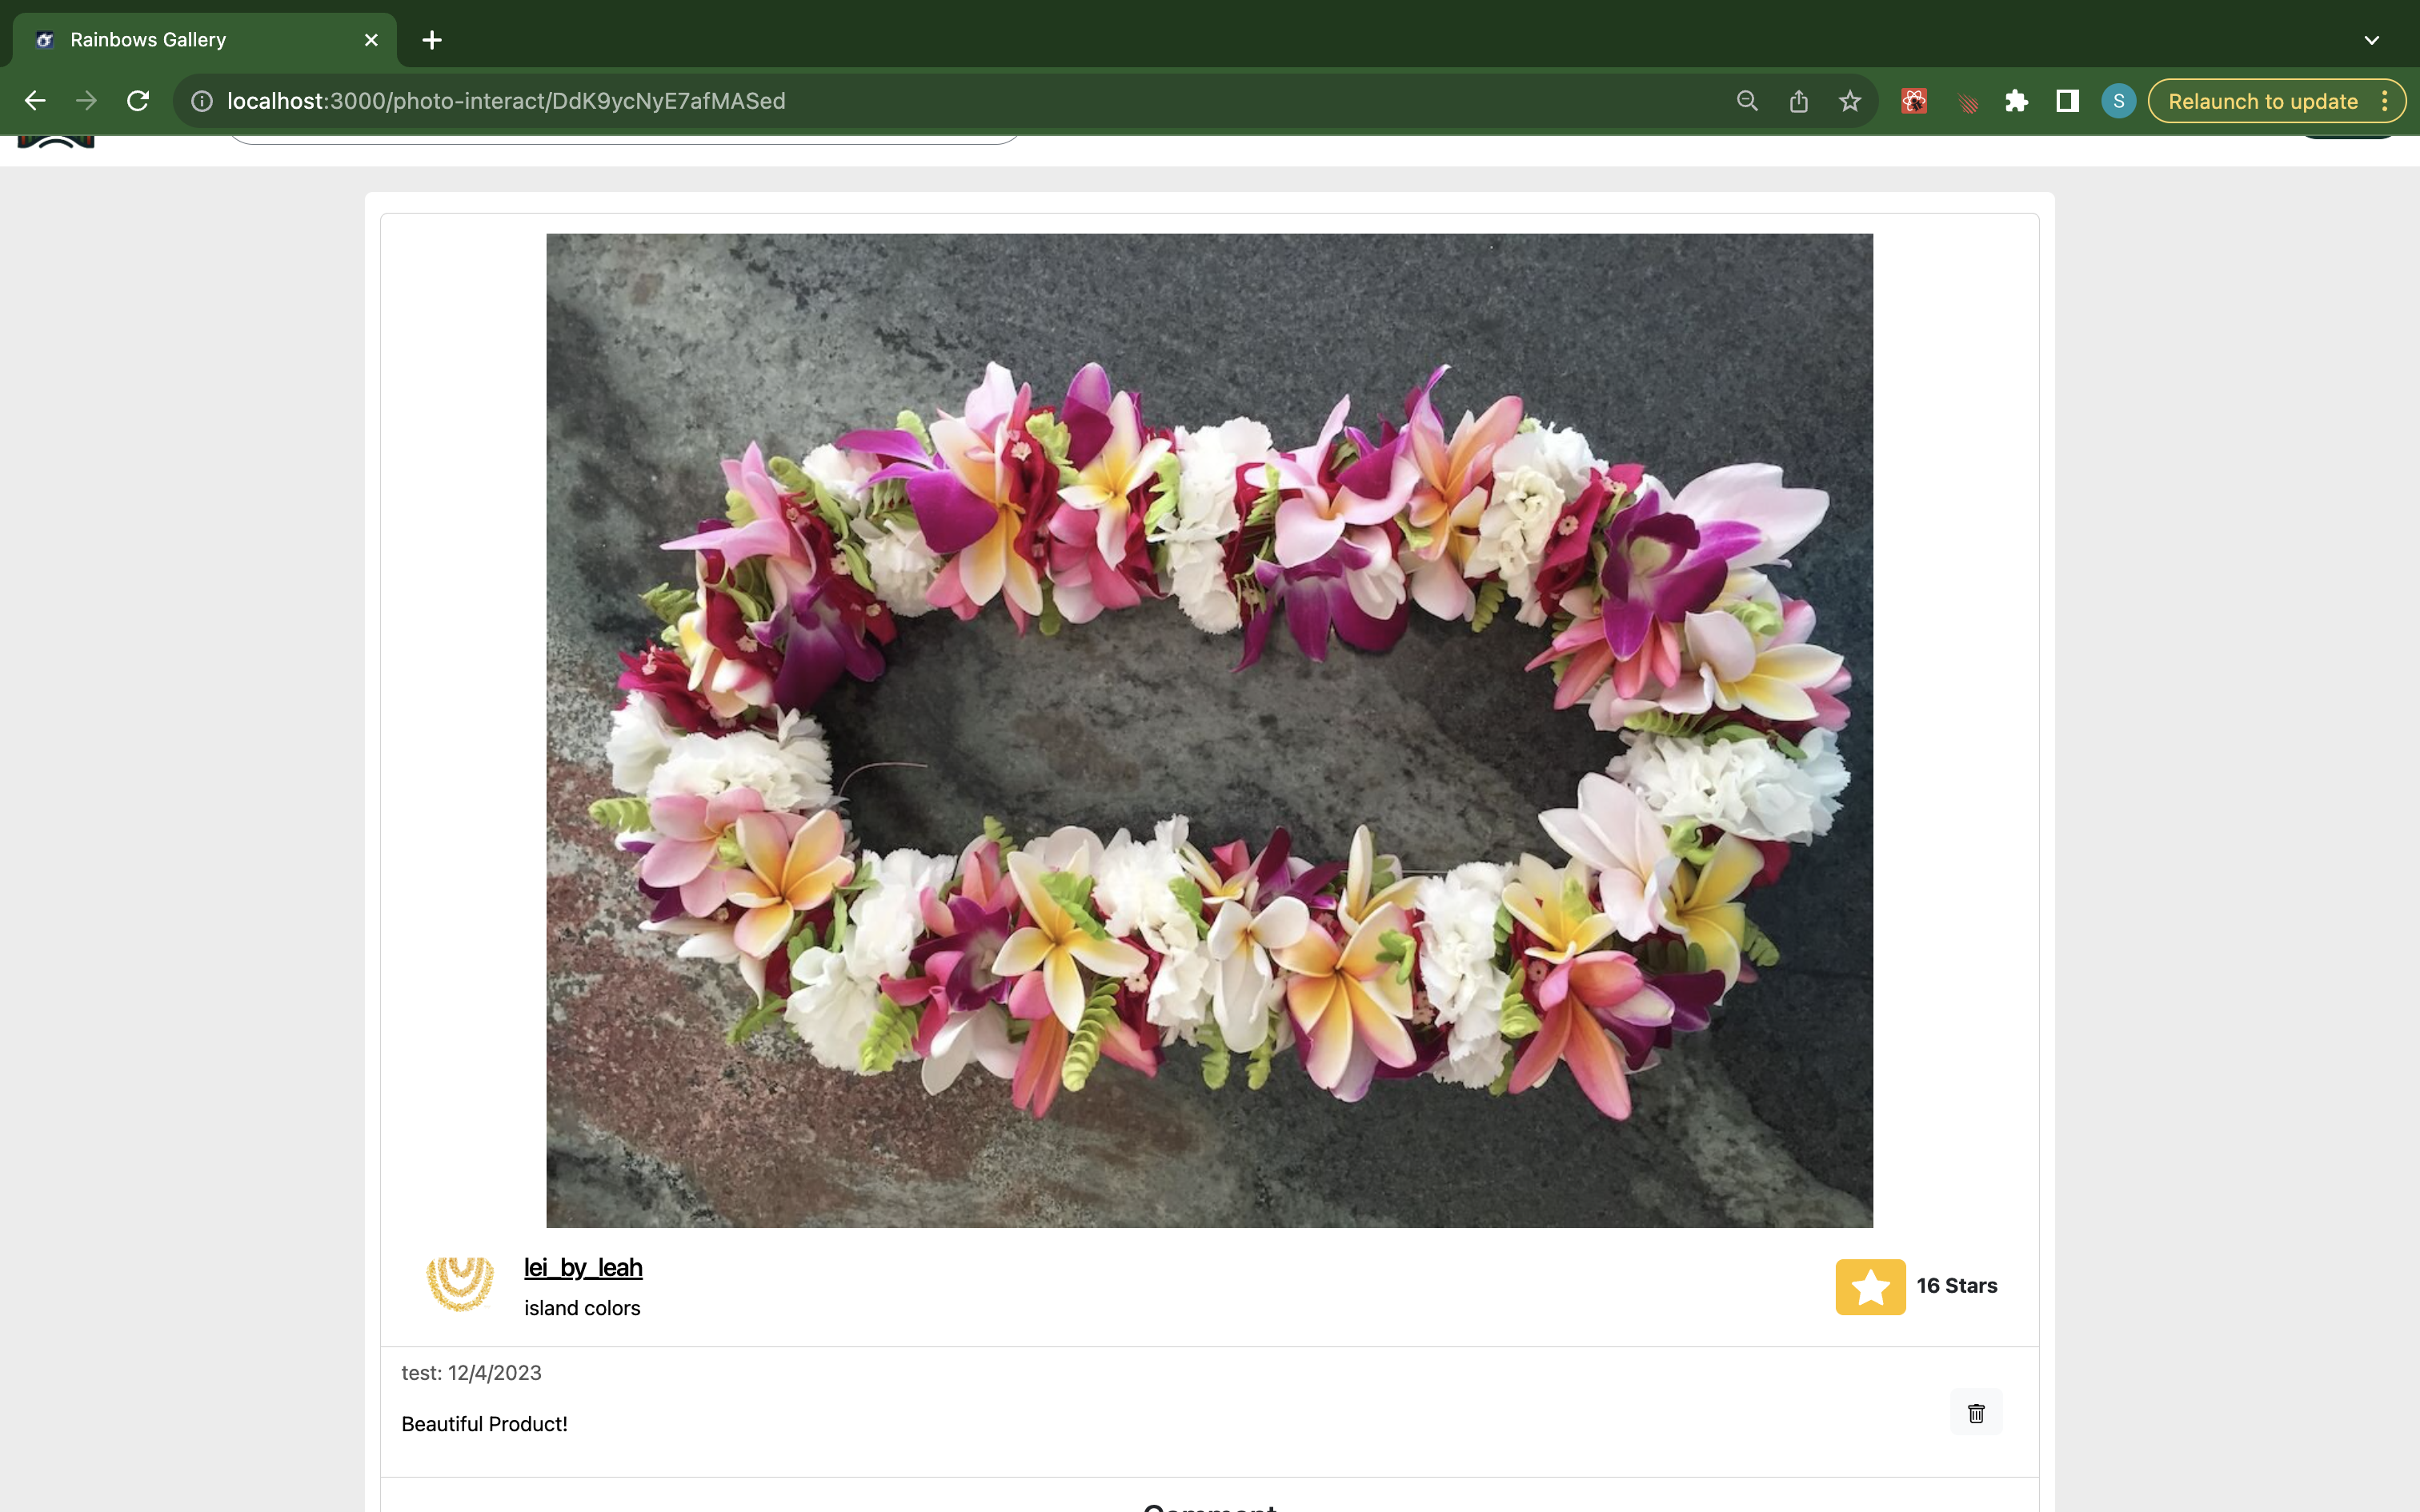
The app keeps track of how many accounts have “starred” a certain post. To “star” a post, simply click the star button! Once it turns yellow, you know you have successfully starred the post.
Developer Guide
This section provides information of interest to Meteor developers wishing to use this code to run the app locally or build upon our work.
Installing and Running the Rainbow Gallery App
First, install Meteor.
Second, visit the Rainbow Gallery Application Page, and click the “Use this template” button to create your own repository initialized with a copy of this application. Alternatively, you can download the sources as a zip file or make a fork of the repo. However you do it, download a copy of the repo to your local computer.
Third, cd into the rainbow-gallery/app directory and install libraries with:
$ meteor npm install
Fourth, run the system with:
$ meteor npm run start
If all goes well, the application will appear at http://localhost:3000.
Modifying our work
Once you have cd’d into the directory where you cloned our app locally, (…/gallery-app/app), you can open the project with your IDE of choice. We recommend IntelliJ. If you would like to see your changes as you are making them, be sure that you are running the app while you code. Note that some database modifications may require you to stop running the app, run the command
meteor reset
and then run
meteor npm run start
again in order for the changes to show up properly.
Quality Assurance
ESLint
Rainbow Gallery includes a .eslintrc file to define the coding style adhered to in this application. You can invoke ESLint from the command line as follows:
meteor npm run lint
Here is sample output indicating that no ESLint errors were detected:
$ meteor npm run lint

> rainbows-gallery@ testcafe-ci /Users/sienner/github/rainbows-gallery/rainbow-gallery/app
> eslint --quiet --ext .jsx --ext .js ./imports ./tests

$
ESLint should run without generating any errors.
It’s significantly easier to do development with ESLint integrated directly into your IDE (such as IntelliJ).
End to End Testing
Rainbow Gallery uses TestCafe to provide automated end-to-end testing.
In the rainbows-gallery tests/ directory contains the TestCafe test definitions. The remaining files in the directory contain “page object models” for the various pages in the system (i.e. Home, Landing, etc.) as well as one component (navbar). This organization makes the test code shorter, easier to understand, and easier to debug.
To run the end-to-end tests in development mode, you must first start up a Rainbow Gallery instance by invoking meteor npm run start in one console window.
Then, in another console window, start up the end-to-end tests with:
meteor npm run testcafe
You will see browser windows appear and disappear as the tests run. If the tests finish successfully, you should see the following in your second console window:
$ meteor npm run testcafe

> meteor-application-template-react@ testcafe /Users/sienner/github/rainbows-gallery/rainbow-gallery/app
> testcafe chrome tests/*.testcafe.js

 Running tests in:
 - Chrome 119.0.0.0 / Ventura 13

 meteor-application-template-react localhost test with default db
 ✓ Test that landing page shows up
 ✓ Test that landing page Renders an image for signed in and not
 ✓ Test that landing page and the about page
 ✓ Test that landing page and search profile without signing in
 ✓ Test that signin and signout work
 ✓ Test that signin landing and photoInteract and signout work
 ✓ Test that signin landing and search and profile and signout work
 ✓ Test editProfile
 ✓ Follow & Unfollow test
 ✓ PhotoInteract Comment Page test and star and then delete post
 ✓ upload Image
 ✓ signup

 12 passed (1m 36s)

 $
You can also run the testcafe tests in “continuous integration mode”. This mode is appropriate when you want to run the tests using a continuous integration service like Jenkins, Semaphore, CircleCI, etc. In this case, it is problematic to already have the server running in a separate console, and you cannot have the browser window appear and disappear.
To run the testcafe tests in continuous integration mode, first ensure that Rainbow Gallery is not running in any console.
Then, invoke meteor npm run testcafe-ci. You will not see any windows appear. When the tests finish, the console should look like this:
$ meteor npm run testcafe-ci

> rainbows-gallery@ testcafe-ci /Users/sienner/github/rainbows-gallery/rainbow-gallery/app
> testcafe chrome:headless tests/*.testcafe.js -q --app "meteor npm run start"

 Running tests in:
 - Chrome 119.0.0.0 / Ventura 13

 meteor-application-template-react localhost test with default db
 ✓ Test that landing page shows up
 ✓ Test that landing page Renders an image for signed in and not
 ✓ Test that landing page and the about page
 ✓ Test that landing page and search profile without signing in
 ✓ Test that signin and signout work
 ✓ Test that signin landing and photoInteract and signout work
 ✓ Test that signin landing and search and profile and signout work
 ✓ Test editProfile
 ✓ Follow & Unfollow test
 ✓ PhotoInteract Comment Page test and star and then delete post
 ✓ upload Image
 ✓ signup

 12 passed (1m 36s)
$
All the tests pass, but the first test is marked as “unstable”. At the time of writing, TestCafe fails the first time it tries to run a test in this mode, but subsequent attempts run normally. To prevent the test run from failing due to this problem with TestCafe, we enable testcafe quarantine mode.
The only impact of quarantine mode should be that the first test is marked as “unstable”.
Continuous Integration
![]()
Rainbow Gallery uses GitHub Actions to automatically run ESLint and TestCafe each time a commit is made to the default branch. You can see the results of all recent “workflows” at https://github.com/rainbows-gallery/gallery-app/actions.
Development History
The development process for Rainbow Gallery conformed to Issue Driven Project Management practices. In a nutshell:
- Development consists of a sequence of Milestones.
- Each Milestone is specified as a set of tasks.
- Each task is described using a GitHub Issue, and is assigned to a single developer to complete.
- Tasks should typically consist of work that can be completed in 2-4 days.
- The work for each task is accomplished with a git branch named “issue-XX”, where XX is replaced by the issue number.
- When a task is complete, its corresponding issue is closed and its corresponding git branch is merged into master.
- The state (todo, in progress, complete) of each task for a milestone is managed using a GitHub Project Board.
User Reviews
All users tested had positive reviews of the app and its design. One user found the resolution of the landing image to be too poor, however this feedback was not implemented, as the poor resolution assists in displaying the text overlay. All users stated that creating an account and navigating the app was intuitive and easy. Most users really liked the about page and found it informative and helpful, however one user wanted to see more colors or pictures. Due to the presence of the site page (that you see now!) and the distractions that would likely be caused by including many different colors, this feedback was also ignored. All users were able to successfully add a post, however a few complained about how long it took for the photo to go through. We find this feedback valid, however as an unfunded project, did not have the budget to improve response time from the service vendor.
Overall, users really enjoyed this app. There were some design inputs that have already been implemented in the discover, feed, and landing pages. In general, users found this app to be well designed, intuitive, and easy to use. The main issue from user feedback was the response time from the photo service vendor. Despite the lack of funding to fix this issue, the long wait time was addressed by disabling the ‘submit’ and enter keys after the first occurence when adding a post. Although the wait is still longer than ideal, now it is obvious that the program is “working” after submission.
If you would like to fill out our feedback form, click here.
Deployment
Project Management Links
Contract Link
Team Profiles
Links to our Materials
View our organization on GitHub
View our app repository on GitHub